
Starting a beekeeping business is a rewarding venture that combines a passion for nature and agriculture with sharp business savvy. The global honey market is a multi-billion dollar industry, with consistent demand for products like raw honey and beeswax from local markets, restaurants, and cosmetic producers.
This guide will take you through the practical steps of validating your business concept, obtaining necessary licenses, selecting the right location, and acquiring your first hives and equipment to help you launch a successful beekeeping business in the U.S.
Step 1: Plan your business and validate your idea
Research your local market
Start by visiting local farmers' markets and specialty food stores. Note the prices, sizes, and types of honey sold. Talk to store owners and chefs about what they look for in a honey supplier. This direct feedback is more valuable than generic online research.
You can also check the USDA's National Honey Report for wholesale price benchmarks. This data helps you understand regional price differences and set competitive rates for your products. Look at online sellers on platforms like Etsy to see how others market their honey.
Estimate your startup costs
A realistic budget is foundational. Many new beekeepers misjudge the initial investment. You might want to plan for costs between $1,200 and $2,500 for a small operation with two to four hives. A common mistake is to start with only one hive; if it fails, your season is over.
Here is a typical cost breakdown for a two-hive setup:
- Hives & Components: $300 - $500
- Bee Colonies (2): $250 - $400
- Protective Gear: $150 - $300
- Basic Tools (smoker, hive tool): $50 - $100
- Extraction Equipment: $200 - $500+
- State Registration/Fees: $10 - $50
Here are 3 immediate steps to take:
- Visit three local stores or markets to analyze competitor honey prices and packaging.
- Create a detailed budget spreadsheet for your initial equipment and two bee colonies.
- Find your state's Department of Agriculture website to review beekeeping registration rules.
Step 2: Establish your legal structure and get licensed
You should consider forming a Limited Liability Company (LLC). This structure separates your personal assets from business debts. It offers liability protection you do not get as a sole proprietor. An LLC also provides pass-through taxation, so business profits pass directly to you without corporate taxes.
Next, contact your state's Department of Agriculture to register your apiary. Most states require this, and fees are typically low, around $10 to $50 annually. This registration helps state officials monitor bee health and control disease outbreaks. There are no specific federal beekeeping licenses for small producers.
Check local and food production rules
Before you place your hives, call your city or county clerk's office about local ordinances. Some residential areas have restrictions on the number of hives or require minimum distances from property lines. A frequent misstep is to assume beekeeping is allowed everywhere, so confirm this first.
If you plan to sell honey, look into your state's Cottage Food Laws. These regulations often allow you to process and sell honey from your home kitchen without a commercial license, provided you meet labeling requirements and stay below a certain annual sales cap, like $25,000 in some states.
Here are 4 immediate steps to take:
- File for an LLC with your state's Secretary of State office.
- Find and complete the apiary registration form on your state's Department of Agriculture website.
- Call your local zoning office to ask about beekeeping ordinances in your area.
- Read your state’s Cottage Food Law guidelines for selling honey.
Step 3: Secure insurance and manage risks
Protecting your new business is a priority. You will need insurance that covers the unique risks of beekeeping. For most small operations, a General Liability policy is the place to start. This protects you if someone is stung or has an allergic reaction to your products.
Find the right insurance coverage
A General Liability policy with $1 million in coverage typically costs between $400 and $700 annually. Make sure it includes product liability. Many new owners assume their homeowner's policy offers protection, but it rarely covers business activities. You need a commercial policy.
You should also consider Property Insurance. This covers your hives, extraction equipment, and inventory from theft, vandalism, or fire. As your business grows, you may need Workers' Compensation if you hire help or Commercial Auto insurance if you use a dedicated business vehicle.
You might want to get quotes from providers that understand agriculture, such as Farm Bureau Financial Services, The Hartford, or Veracity Insurance Solutions. A general agent may not grasp the specific risks you face.
Here are 3 immediate steps to take:
- Request quotes for a general liability policy from at least two providers.
- Ask each provider if their policy explicitly includes product liability for honey sales.
- Inquire about adding property coverage for hive theft or damage.
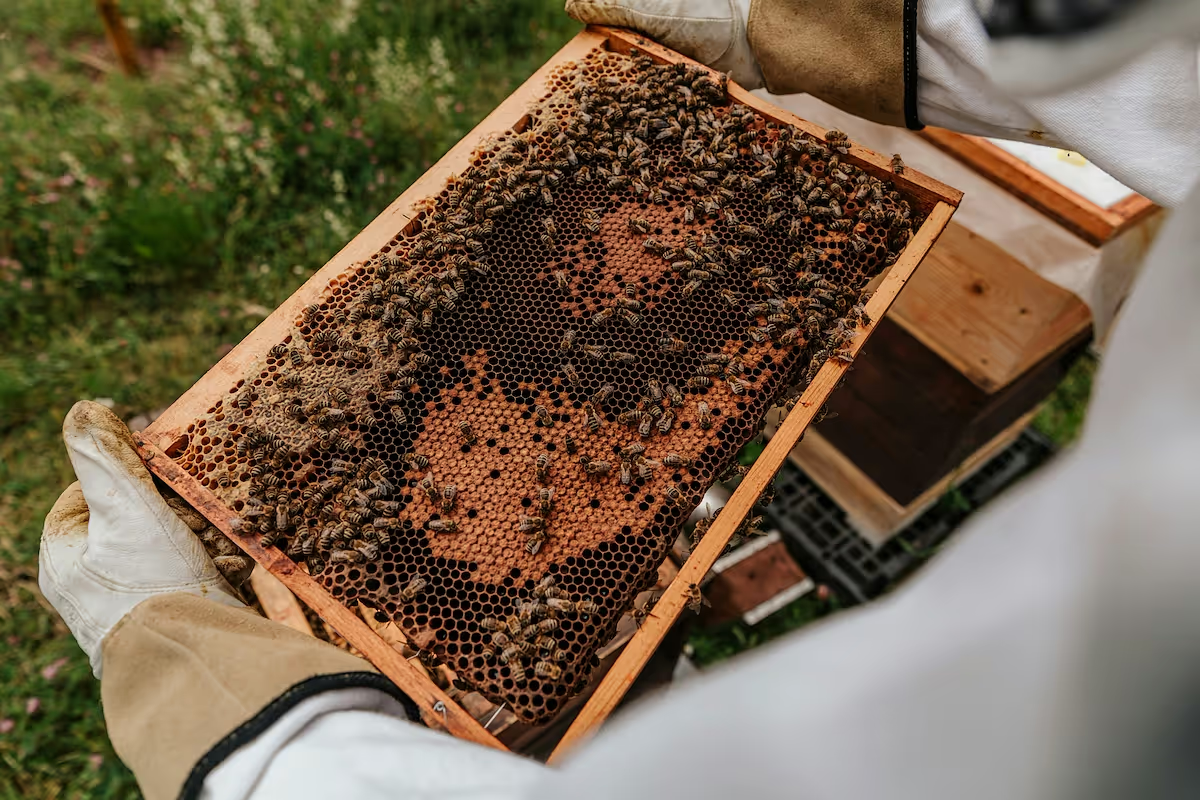
Step 4: Select your location and buy equipment
An ideal apiary location gets morning sun and afternoon shade, has a windbreak like a hedge or fence, and is near a water source. You do not need much space; a 10x10 foot area works for a few hives. The key is to be at least 150 feet from public areas.
If you do not own land, approach local farmers. Many will let you place hives on their property in exchange for pollination services or a share of the honey. This is often a simple handshake agreement, but you might want to draft a simple one-page document outlining the terms.
Gear up for your first season
Langstroth hives are the standard for beginners. You can buy complete starter kits from suppliers like Mann Lake, Dadant, or Betterbee. While used gear seems like a good deal, it can carry diseases that will wipe out your colony. It is often a safer bet to start with new hive bodies.
Plan to order your bee packages or nucs by January for spring delivery, as suppliers sell out fast. A package of bees with a queen will cost around $125 to $200. Your bees are the most important part of the operation, so source them from a reputable local or regional breeder.
Here are 4 immediate steps to take:
- Scout two or three potential apiary sites that meet sun and water requirements.
- Contact a local farmer about placing hives on their land.
- Compare the cost of a two-hive starter kit from Mann Lake and Dadant.
- Place an order for two bee packages for spring delivery.
Step 5: Set up your payment processing
For direct sales at farmers' markets, you need to accept cash and card payments. Most customers expect this flexibility. For larger wholesale orders to restaurants or stores, you might offer Net 30 payment terms, where payment is due 30 days after the invoice date.
When you choose a payment solution, look for low transaction fees and portability. Many new sellers get hit with high fees from providers that also require clunky card readers. You want something simple that works directly from your phone, especially for outdoor market sales.
For beekeeping businesses that need to accept payments on-site or on-the-go, JIM offers a streamlined solution. With JIM, you can accept debit, credit, and digital wallets directly through your smartphone—just tap and done. At just 1.99% per transaction with no hidden costs or extra hardware needed, it is particularly useful for quick sales at a farmers' market.
This rate is competitive, as many other payment providers charge between 2.5% and 3.5% per transaction. The immediate access to funds is also a major benefit for managing your cash flow during busy market seasons.
- Get Started: Download the JIM app for iOS.
- Make a Sale: Type the sales amount, hit sell, and ask your customer to tap their card or device on your phone.
- Access Funds: Your money is available right on your JIM card as soon as the sale is done - no waiting for bank transfers.
Here are 3 immediate steps to take:
- Decide which payment methods you will accept at markets.
- Compare transaction fees from different mobile payment solutions.
- Download the JIM app to see how it works for on-the-go sales.
Step 6: Fund your business and manage finances
Most beekeepers start with personal savings. If you need outside capital, agricultural lenders are your best bet. Traditional banks may not understand your business model, but programs designed for small farms will.
Explore agricultural loans
You might want to look into a USDA Farm Service Agency (FSA) microloan. These loans go up to $50,000 and have simpler application processes. Interest rates are typically low, often between 2% and 5%, and are designed for new farmers who may lack extensive credit history.
Another option is grants from the Sustainable Agriculture Research and Education (SARE) program. These are competitive and usually fund specific projects, like testing a new hive management technique, rather than general startup costs. Many new beekeepers miss these opportunities because they only look for business loans.
Plan your working capital
With funding secured, you need to manage your cash flow. Plan to have at least $1,500 to $3,000 in working capital for your first six months. This covers recurring costs like fuel, market fees, and inventory for jars and labels before your honey sales become consistent.
Here are 3 immediate steps to take:
- Visit the USDA's FSA website to review microloan eligibility requirements.
- Search the SARE grant database for projects related to beekeeping or pollination.
- Create a six-month budget for your operating expenses, including jars, labels, and market fees.
Step 7: Hire your team and manage operations
Most beekeepers start solo. Once you manage more than 15-20 hives, you might need seasonal help for the busy harvest season. This frees you to focus on sales and business growth instead of just production.
Hire your first helper
You will likely look for a “Seasonal Apiary Assistant.” This person helps with hive inspections, honey extraction, and bottling. Expect to pay an hourly wage between $18 and $25, based on their experience. Formal certifications are not required, but practical skills are.
Many new owners hire someone with no bee experience to save money. The learning curve is steep during a busy season, so you might want to find someone with at least one season of experience.
Manage your apiary records
You do not need complex software at first. A simple spreadsheet or a dedicated app like HiveTracks or Apiary Book works well. Use it to track hive health, treatments, and honey yields. This data helps you make better management decisions year after year.
Here are 4 immediate steps to take:
- Draft a job description for a Seasonal Apiary Assistant.
- Research your state's Department of Labor website for seasonal hiring rules.
- Ask your local beekeeping association if they have a job board for helpers.
- Download a free app like Apiary Book to test its features for hive tracking.
Step 8: Market your products and find customers
Build your brand story
Your story is your best marketing asset. Are your bees near a wildflower meadow or a buckwheat field? Tell customers that. People pay a premium for honey with a unique local origin. Design a simple, professional label using a platform like Canva that highlights your location and honey type.
A mistake some new sellers make is using generic labels. Your packaging should communicate quality. Also, set up a simple Facebook or Instagram page to share photos of your hives and the landscape. This builds a connection with customers before they even taste your product.
Choose your sales channels
Farmers' markets are your primary sales channel at first. You get direct customer feedback and keep 100% of the profit. You might sell a one-pound jar for $15 at a market, compared to a $7 wholesale price. This direct interaction is invaluable for a new business.
Once you have consistent production, you can approach local specialty food stores or restaurants. Offer them samples and a wholesale price list. For online sales, a simple Shopify or Etsy store works well, but be mindful of shipping costs and packaging requirements for glass jars.
Here are 4 immediate steps to take:
- Design a draft label on Canva that includes your location and honey type.
- Create a Facebook page for your business and post three initial photos.
- Visit a local farmers' market to observe how other vendors display their products.
- Develop a simple price list for direct sales and potential wholesale customers.
Step 9: Price your products for profit
Your price must cover costs and generate a healthy profit. A simple way to start is with a cost-plus model. First, calculate your cost per jar, which includes the jar, label, honey, and an estimate for your labor. Then, add your desired markup.
Set your retail and wholesale rates
For a specialty food like raw honey, a 200-300% markup is a common target. If your total cost to produce a one-pound jar is $4, a 250% markup results in a retail price of $14. This margin helps cover expenses like market fees and equipment replacement.
You should also research your local market. You will likely find that one-pound jars of local honey sell for $12 to $20. Unique varietals, like sourwood or tupelo honey, can command even higher prices. Your pricing should align with these local benchmarks.
A mistake many new sellers make is underpricing their product. They often forget to factor in their own time or the cost of a lost hive. Pricing too low makes it difficult to grow your business and signals lower quality to customers.
Once you approach stores, you will need a wholesale price. This is usually 40-50% lower than your retail price. For a $16 jar, your wholesale price might be $8 to $9.60. Your retail price must be high enough from the start to make wholesaling viable.
Here are 4 immediate steps to take:
- Calculate your cost per jar, including the container, label, and your labor.
- Survey honey prices at two local farmers' markets and one specialty food store.
- Set a retail price for a one-pound jar using a 200-300% markup.
- Create a price sheet that lists both your retail and wholesale prices.
Step 10: Maintain quality and scale your operation
As your business grows, consistent quality is what keeps customers coming back. Your honey's moisture content should always be below 18.6% to prevent fermentation. You can check this with a simple tool called a honey refractometer.
Know when to grow
Once you manage more than 20 hives, you might want to hire seasonal help. This frees you to focus on sales and marketing instead of just production. It is a natural step when your apiary becomes too much for one person to handle.
Your equipment needs will also change. When you consistently harvest over 500 pounds of honey, upgrading to a motorized extractor from a hand-crank model is a smart move. It dramatically cuts down your processing time.
A mistake some beekeepers make is expanding their hive count too fast. This can stretch your time and resources thin, which may lead to a drop in honey quality or even colony losses. It is better to grow at a manageable pace.
With more hives, it becomes harder to track everything in a notebook. An app like HiveTracks helps you monitor hive health and yields across your operation. This data helps you make better decisions about which colonies to expand.
Here are 4 immediate steps to take:
- Purchase a honey refractometer to test moisture levels.
- Set a personal goal for hive count, like 20 hives, as a trigger to hire help.
- Research the cost of a motorized honey extractor for future planning.
- Use an app like HiveTracks to identify your most productive colonies for expansion.
Your beekeeping business is a partnership with your bees. The quality of your honey and the health of your hives are directly linked. Focus on great apiary management first. With a solid plan, you are ready to build a sweet and successful venture.
When you make those first sales, getting paid should be simple. JIM turns your smartphone into a card reader, so you can accept payments for a flat 1.99% fee without extra hardware. Download JIM and you are all set.
.avif)


