
Starting a wedding invitation business is a rewarding venture that combines creativity and an eye for design with business acumen. The wedding stationery market is a multi-billion dollar industry, with consistent demand for invitations across traditional ceremonies, modern elopements, and destination weddings.
This guide will take you through the practical steps of validating your business concept, building supplier relationships, acquiring equipment, and obtaining necessary permits to help you launch a successful wedding invitation business in the U.S.
Step 1: Plan your business and validate your idea
Market and competitor research
Start by defining your niche. Will you focus on luxury letterpress, modern minimalist designs, or eco-friendly paper? Analyze Pinterest Trends and Etsy search data for popular styles. Follow wedding publications like Brides and The Knot to understand current demand.
Next, identify 10-15 competitors on platforms like Instagram and Etsy. Create a simple spreadsheet to track their product range, pricing structure, and what makes them unique. This helps you find a gap in the market and avoid the common error of underpricing your work.
Estimate your startup costs
Your initial investment can range from $1,500 to $3,000. A significant portion of this budget is for equipment. You might consider a professional-grade printer, like a Canon PIXMA Pro-200 which costs around $600, to ensure high-quality results from the start.
Other costs include design software, such as the Adobe Creative Cloud subscription at about $60 per month. Also, budget $300-$500 for an initial inventory of cardstock and envelopes. Website setup on a platform like Shopify will add another $40 per month.
Here are 3 immediate steps to take:
- Define a specific design niche (e.g., watercolor, letterpress, minimalist).
- Create a spreadsheet to analyze at least 10 competitors' pricing and styles.
- Draft a startup budget that lists expected costs for software, a printer, and initial supplies.
Step 2: Set up your legal structure and get licensed
Choose your business structure
You might want to consider forming a Limited Liability Company (LLC). This structure protects your personal assets if the business faces debt. Filing costs range from $50 to $500 depending on your state. Many new owners skip this, but it provides a vital layer of protection.
The alternative is a sole proprietorship, which is simpler but offers no separation between your personal and business finances. This can put your personal assets at risk if legal issues arise.
Obtain federal, state, and local permits
First, get an Employer Identification Number (EIN) from the IRS website. It’s free and acts as a Social Security number for your business, which you will need for taxes and opening a business bank account.
Next, apply for a seller's permit through your state's Department of Revenue. This lets you buy supplies wholesale tax-free and legally collect sales tax from clients. Expect a processing time of about two weeks.
Finally, your city or county likely requires a general business license, which can cost $50 to $100 annually. Check your local city clerk's office for the specific forms and fees.
Here are 4 immediate steps to take:
- Decide if an LLC or sole proprietorship is right for you.
- Apply for a free Employer Identification Number (EIN) on the IRS website.
- Find your state's seller's permit application and its associated fee.
- Contact your local city clerk about a business operating license.
Step 3: Protect your business with the right insurance
With your legal structure in place, the next step is to manage risk. Business insurance protects you from unexpected events, like a client claiming a typo on an invitation forced them to reprint everything. This is where professional liability insurance comes in.
Key insurance policies for your studio
Professional liability, also called Errors and Omissions (E&O), covers mistakes in your work. A policy with $500,000 in coverage might cost $400 to $750 annually. General liability is for physical risks, like a client tripping in your home studio. A $1 million policy is standard.
You should also look into business property insurance. Your homeowner's policy likely will not cover your expensive printer or paper stock in case of fire or theft. Many new owners overlook this and face major losses. This coverage adds about $200 to $500 per year.
As you grow and hire help, you will need workers' compensation. If you use your car for deliveries, you will need commercial auto insurance. Providers like Hiscox, The Hartford, and Thimble specialize in policies for creative small businesses and offer quick online quotes.
Here are 4 immediate steps to take:
- Get online quotes for professional liability (E&O) insurance from Hiscox or The Hartford.
- Review your homeowner's policy to see if it excludes business equipment.
- Compare general liability policies with at least $1 million in coverage.
- Note the requirements for workers' comp and commercial auto for future growth.
Step 4: Set up your studio and buy equipment
Your workspace and equipment
Most invitation businesses start from home. You will want a dedicated area of at least 100-150 square feet for your printer, supplies, and assembly. Check your local zoning ordinances for home-based businesses, though this is rarely an issue for non-retail creative work.
Your printer is a cornerstone of the business. Look for a model that can handle heavy cardstock, typically 110-130 lb cover weight. A professional photo printer like the Canon PIXMA Pro-200, at around $600, is a solid choice for vibrant, high-resolution prints.
You will also need a high-quality paper trimmer. A rotary trimmer from brands like Dahle or Rotatrim costs $150-$300 and ensures clean, professional cuts. A simple scoring board, about $20, is also needed for crisp folds on cards and enclosures.
Sourcing your paper and supplies
With your equipment ready, you can find paper suppliers. Companies like Cards & Pockets are great for beginners because they have no minimum order quantities. This lets you buy only what you need for each project. LCI Paper is another popular option with a wider selection.
Many new designers make the mistake of buying paper in bulk before seeing it. Always order sample kits first. This lets you feel the paper textures and see the true colors, which can vary from what you see on screen. This step prevents costly errors.
Here are 4 immediate steps to take:
- Clear a 100-150 square foot space for your studio.
- Research printers that can handle at least 110 lb cardstock.
- Order sample kits from two different paper suppliers like Cards & Pockets or LCI Paper.
- Purchase a rotary paper trimmer and a scoring board.
Step 5: Set up your payment processing
Establish clear payment terms from the start. Most stationers require a 50% non-refundable deposit to begin design work. The final balance is due before your client's order goes to print. This structure protects your time and material costs.
You will need a reliable way to accept payments. Look for a solution with low transaction fees and no long-term contracts. A common mistake is to choose a system with high fees that eat into profit margins over time.
Accepting payments on the go
For designers who meet clients in person or sell at markets, JIM offers a streamlined solution. With JIM, you can accept debit, credit, and digital wallets directly through your smartphone. Just tap and you are done.
At just 1.99% per transaction with no hidden costs or extra hardware, it is a cost-effective option. Other providers often charge rates closer to 3%. It is particularly useful when you take deposits during consultations or sell ready-made sets at a wedding fair.
- Get Started: Download the JIM app for iOS.
- Make a Sale: Type the sales amount, hit sell, and ask your customer to tap their card or device on your phone.
- Access Funds: Your money is available on your JIM card as soon as the sale is done. There is no wait for bank transfers.
Here are 3 immediate steps to take:
- Draft your payment terms to include a 50% deposit and final payment before print.
- Compare payment solutions, with a focus on transaction fees and ease of use.
- Download the JIM app to explore its features for in-person payments.
Step 6: Fund your business and manage finances
Secure your startup funding
Most invitation businesses start with personal savings. If you need external capital, consider an SBA Microloan. These government-backed loans offer up to $50,000, with the average being around $13,000. Interest rates are typically between 8% and 13%, making them an accessible option for equipment purchases.
You can also look for grants. Programs like The Amber Grant for Women award funds to female entrepreneurs. Also, check with your local arts council, as they sometimes offer grants for creative businesses. These are competitive but do not require repayment.
Manage your day-to-day finances
Plan for at least six months of working capital. This covers ongoing expenses before you turn a profit. A budget of $2,000 to $4,000 is a realistic target for software subscriptions, marketing, and paper supplies for your first few orders.
Use your EIN to open a dedicated business checking account. A frequent misstep is to mix business and personal funds, which complicates tax filing and can remove the legal protection your LLC provides. Simple accounting software like Wave (which is free) or QuickBooks Self-Employed helps track every dollar.
Here are 4 immediate steps to take:
- Calculate your estimated working capital needs for the first six months.
- Research SBA Microloan lenders in your area via the SBA website.
- Open a separate business checking account.
- Sign up for a free Wave account to track your income and expenses.
Step 7: Build your team and streamline operations
When to hire your first team member
Consider hiring when administrative tasks consume over 30% of your week. A common mistake is hiring too early, which drains cash reserves. A good benchmark is to aim for $100,000 in annual revenue before bringing on a full-time employee to maintain profitability.
Your first hire will likely be a part-time Production Assistant to handle printing, cutting, and assembly. Expect to pay $18-$25 per hour. Formal certifications are not required, but experience with design software like Adobe Creative Suite is valuable.
Manage your projects and workflow
With custom orders, mistakes are costly. A project management system is your safety net. It helps you track client details, design proofs, and production deadlines for multiple projects at once, which prevents errors like printing the wrong date.
Wedding industry professionals often use client management software like HoneyBook. It handles contracts, invoices, and client communication in one place. For a simpler, free option to manage tasks, a visual board on Trello works well.
Here are 4 immediate steps to take:
- Write a job description for a part-time Production Assistant.
- Calculate the revenue needed to support a part-time hire for 10 hours a week.
- Sign up for a free Trello account to map out your current workflow.
- Request a trial for a client management system like HoneyBook.
Step 8: Market your business and acquire clients
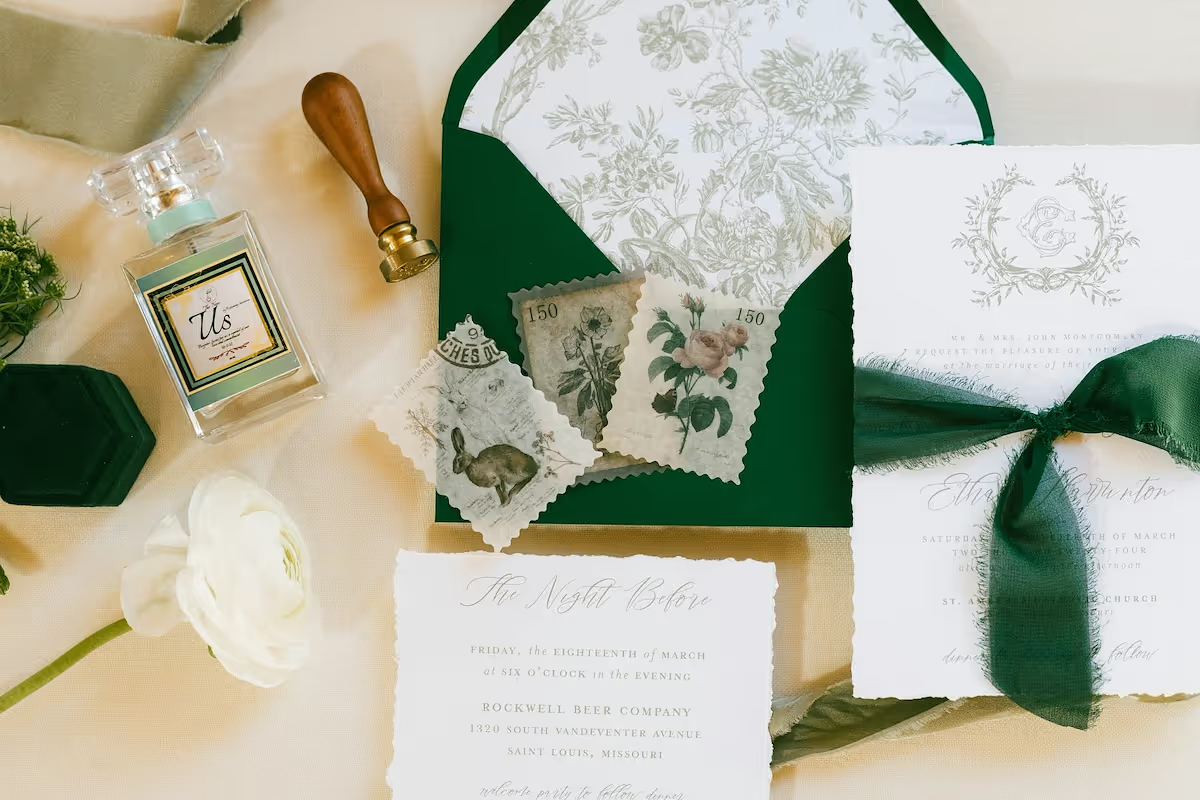
Build your visual portfolio
Your portfolio is your strongest marketing asset. Focus on Instagram and Pinterest, where couples actively search for wedding inspiration. Aim to post high-quality photos of 3-5 complete invitation suites to demonstrate your style and capabilities.
Many new designers only show digital mockups. This is a missed opportunity. Invest about $100-$200 to print your best designs for a photoshoot. Physical photos capture the paper texture and print quality in a way that digital files cannot.
Network with other wedding vendors
Collaborations are key to getting your first clients. Reach out to local wedding planners and photographers on Instagram to propose a styled shoot. You provide the stationery, and in return, you get professional photos for your portfolio and exposure to their audience.
Also, join local wedding vendor groups on Facebook. These communities are great for referrals. A single planner recommendation can lead to consistent work. Expect to offer a 10-15% commission on any referred clients, which is a standard practice in the industry.
Here are 4 immediate steps to take:
- Set up a business profile on Instagram and Pinterest.
- Photograph at least three of your best invitation suites for a starter portfolio.
- Draft an email to a local wedding photographer proposing a styled shoot collaboration.
- Join one local wedding vendor group on Facebook and introduce your business.
Step 9: Price your products and services
Establish your pricing model
Start with a cost-plus pricing model. Calculate your cost per invitation suite, including paper, envelopes, and printing. A common approach is to multiply this material cost by 3 or 4. For example, if materials cost $3 per suite, you might charge $9 to $12.
Many new designers forget to account for their design time. You can either charge a flat design fee of $200-$500 on top of the per-suite price or build an hourly rate into your unit cost. This ensures you are paid for your creative work.
Offer packages and à la carte options
Consider offering tiered packages. A basic package could include the invitation and RSVP card. A premium package might add a details card, belly band, and envelope liner. This simplifies choices for clients and allows for easy upselling.
Also, create an à la carte menu for add-ons like wax seals or custom maps. This gives clients flexibility and can increase the total order value. For example, you could price wax seals at $1.50 each and envelope addressing at $3 per envelope.
Aim for a profit margin of 60-75% on custom designs. This covers your overhead, labor, and business growth. Review the pricing of 5-10 competitors on Etsy to ensure your rates are aligned with the market for your specific niche.
Here are 4 immediate steps to take:
- Calculate the total material cost for one complete invitation suite.
- Decide if you will charge a separate design fee or build it into your unit price.
- Outline two to three pricing packages for your services.
- Research the prices of five competitors on Etsy or Instagram.
Step 10: Implement quality control and scale your operations
Establish your quality standards
Adopt a zero-error policy for text. A frequent misstep is to rely solely on client approval for proofreading. You should implement a three-point check for every order: your own review, a software check like Grammarly, and a final client sign-off on a formal proof document.
Your print and assembly quality define your brand. Aim for zero banding or color shifts on prints. For assembly, all cuts must be perfectly straight and folds crisp. A simple quality metric is your reprint rate; it should be under 2% of all orders.
Know when to scale
Once your quality is consistently high, you can plan for growth. When you spend more than 10-15 hours a week on assembly and admin, it is time to consider a part-time production assistant. This frees you up for design and client acquisition.
You should also look at your outsourcing costs. If you spend over $300 a month on services like die-cutting, it might be time to invest in your own equipment. A machine like a Silhouette Cameo can be a good first step for in-house custom shapes.
Here are 4 immediate steps to take:
- Create a final proofing checklist to use for every order.
- Calculate your current reprint rate to set a quality benchmark.
- Track your weekly hours spent on non-design tasks like assembly.
- Analyze your monthly outsourcing costs to identify investment opportunities.
You have a clear path to launch your wedding invitation business. Remember, your unique style is what will set you apart from the trends. Focus on that and deliver impeccable quality with every order. The first step is often the hardest, but you are ready.
And when you make that first sale, payment should be simple. JIM lets you accept card payments directly on your smartphone, with no extra hardware needed, for a flat 1.99% fee. Download JIM and you are set for your first client.
.avif)


