
Starting a kayak rental business is an exciting venture that combines a passion for the outdoors with smart business sense. The barrier to entry can be lower than for other ventures, and demand is often high in tourist spots and waterfront communities, but that accessibility doesn't guarantee an easy paddle to success.
This guide will take you through the practical steps of validating your business concept, selecting the right location, acquiring equipment, and obtaining necessary permits to help you launch a successful kayak rental business in the U.S.
Step 1: Plan your business and validate your idea
Start with on-the-ground research. Visit potential waterfront locations on a busy Saturday. Count how many people are there and watch what they do. Also, check with your local tourism board for visitor statistics to gauge seasonal demand.
Next, analyze your direct competition. Use Google Maps to find other kayak rentals in the area. Look at their websites and social media to understand their pricing, equipment quality, and what customers say in reviews. This shows you where the gaps in the market are.
Estimate your startup costs
A common misstep is to budget only for the boats. You should also account for transport, storage, and insurance. A trailer, for example, can be an unexpected expense of $1,500 or more. A clear budget prevents surprises down the road.
Your initial investment will likely fall between $10,000 and $25,000. A typical breakdown includes the following.
- Kayaks and Gear: A fleet of 10-15 kayaks, plus paddles and personal flotation devices (PFDs), will run from $7,000 to $20,000.
- Insurance: General liability coverage is non-negotiable. Plan for an annual premium of $1,000 to $3,000.
- Permits and Website: Business licenses, permits, a website, and a booking system can add another $1,000 to $3,000.
Here are four immediate steps to take.
- Visit two potential launch spots this weekend to observe competitor activity and foot traffic.
- Create a simple spreadsheet that lists local competitors, their rental rates, and fleet size.
- Draft a preliminary budget with estimated costs for 10 kayaks, PFDs, and paddles.
- Contact your local Chamber of Commerce to ask about business permit requirements.
Step 2: Establish your legal structure and get licensed
Choose your business structure
Most new rental owners form a Limited Liability Company (LLC). This structure separates your personal assets from business debts, which protects your home and savings if the business is sued. It is a straightforward and effective way to limit personal risk.
An LLC also provides pass-through taxation, meaning profits are taxed on your personal return. This simplifies tax filing compared to a corporation. You can file for an LLC online through your state's Secretary of State website for about $100 to $500.
Secure the right permits and licenses
Your business will need federal, state, and local approval. Federally, the U.S. Coast Guard sets safety standards. You must provide a USCG-approved personal flotation device (PFD) for every paddler. There are no exceptions to this rule.
At the state level, you need a general business license. Also, check with your state's Department of Natural Resources or Fish and Wildlife commission. These agencies often regulate commercial activity on public waterways and may have their own permit requirements.
Many new owners get stuck on local permits. Your city or county will require a business license. If you operate from a public park or beach, you will likely need a specific concessionaire's permit from the managing parks department. These can take months to secure.
Here are four immediate steps to take.
- File for an LLC with your state's Secretary of State.
- Contact your city clerk's office to ask about local business license forms.
- Visit the U.S. Coast Guard website to confirm PFD requirements for commercial vessels.
- Identify and call the agency managing your launch point about their permit process.
Step 3: Secure your insurance and manage risk
Understand your coverage needs
Your LLC protects your personal assets, but business insurance covers daily operations. General Liability is the foundation, with coverage of $1 million to $2 million per occurrence. A mistake some owners make is assuming a standard business policy is enough; you need coverage that explicitly mentions watercraft rentals.
In addition, consider Commercial Property insurance for your kayaks and gear, especially against theft. If you use a vehicle to transport boats, you will also need a Commercial Auto policy. Your personal auto insurance will not cover business use.
Find the right provider
General insurance agents may not understand your specific risks. You should work with a broker who specializes in outdoor recreation. You might want to look at providers like Veracity Insurance Solutions, CBIZ, or Philadelphia Insurance Companies. Annual premiums for a comprehensive package typically range from $2,000 to $5,000.
A strong waiver is your first line of defense. This document, signed by every customer, outlines the risks of kayaking and releases your business from liability. Have a lawyer review your waiver to ensure it is enforceable in your state. This is not a place to cut corners.
Here are four immediate steps to take.
- Request quotes from two insurance brokers who specialize in outdoor recreation.
- Ask for a sample policy to confirm it explicitly covers watercraft rentals.
- Contact a local lawyer to draft or review your liability waiver.
- Decide on your coverage amount, starting with a $1 million General Liability policy.
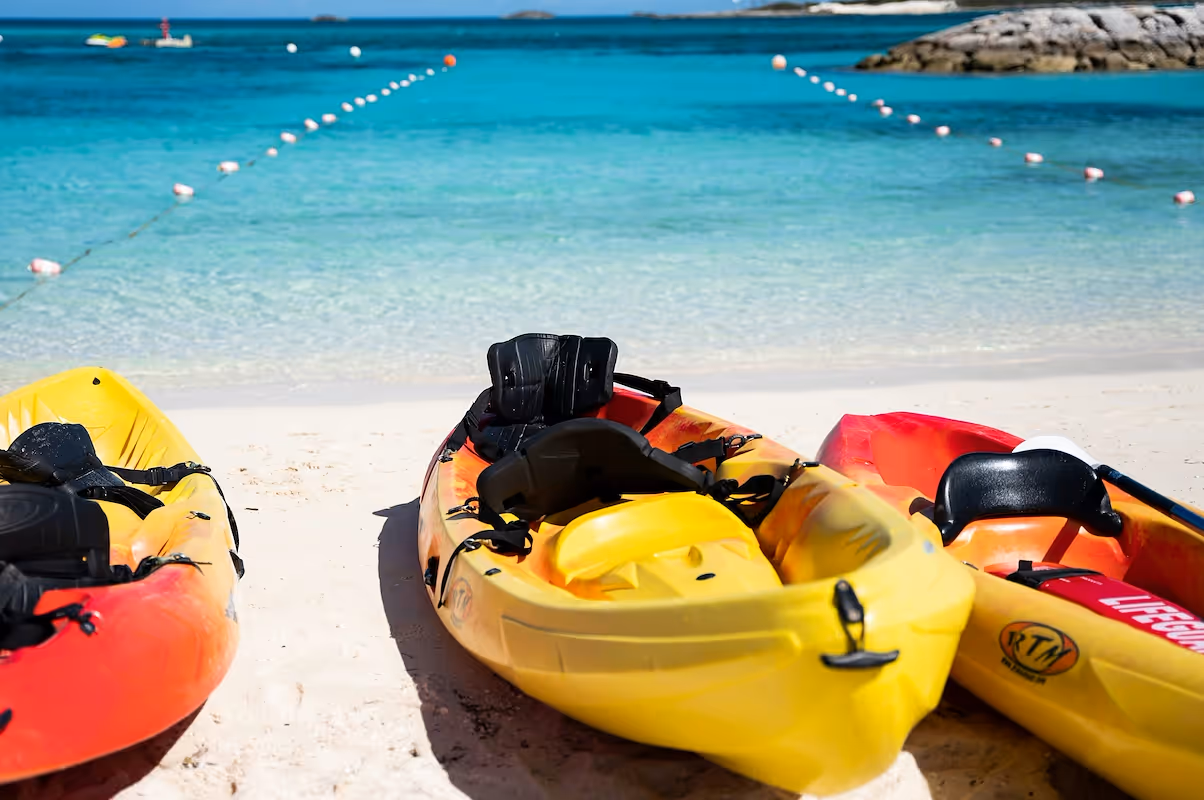
Step 4: Select your location and buy equipment
Find your launch point
Your location needs direct water access and high visibility. Look for commercial zoning that permits recreational businesses. You can confirm this with your local city planning department. A small, 200-square-foot kiosk is enough for check-ins, but you will need 400-500 square feet of secure storage for a fleet of 15 kayaks.
When you find a spot, negotiate a one or two-year lease with an option to renew. This gives you flexibility if the location does not perform as expected. Some owners focus so much on water access that they forget about parking and restrooms, which are deal-breakers for customers.
Purchase your fleet and gear
Start with durable, sit-on-top recreational kayaks. They are stable and easy for beginners to use. Plan to spend $500 to $900 per boat. Avoid the temptation to buy cheaper, big-box store models, as they often lack the durability for commercial use and can crack within a season.
You will also need paddles and PFDs for each boat.
- Paddles: $50 - $150 each. Aluminum shafts are a good, sturdy choice.
- PFDs (Life Vests): $40 - $80 each. Get a range of adult and child sizes.
Manufacturers like Old Town or Perception have high minimum orders, so you might want to buy your initial fleet from a distributor or a large retailer like REI to get started.
Here are four immediate steps to take.
- Contact your local planning department to confirm zoning for your top two locations.
- Price out a starter fleet of 10 recreational kayaks, paddles, and PFDs.
- Ask a commercial real estate agent about typical lease terms for small waterfront spaces.
- Create a spreadsheet to compare the durability and warranties of two kayak models.
Step 5: Set up your booking and payment systems
Your customers expect to book online. A dedicated booking system like FareHarbor or Peek Pro automates this. Look for a platform with real-time availability calendars, integrated digital waivers, and a mobile-friendly interface. This reduces no-shows and streamlines your check-in process.
Many new owners get locked into systems with high monthly fees. Some platforms charge a percentage per booking, which can be more cost-effective when you are starting out. Always check if the system can handle add-ons like guided tours or multi-day rentals.
Set up your payment processing
For payments, most rentals require full payment upfront at the time of booking. This secures the reservation and simplifies your cash flow. For larger group bookings or multi-day trips, you might consider taking a 50% deposit to hold the equipment.
Now that we've covered bookings, let's talk about payments. For walk-up customers or payments at the launch site, JIM offers a streamlined solution. With JIM, you can accept debit, credit, and digital wallets directly through your smartphone. Just tap and you are done.
At just 1.99% per transaction with no hidden costs or extra hardware, it is a strong offer. Other providers often charge 2.5% to 3.5% plus monthly fees. JIM is particularly useful for handling last-minute rentals right at the waterfront without any bulky equipment.
- Get Started: Download the JIM app for iOS.
- Make a Sale: Type the sales amount, hit sell, and ask your customer to tap their card or device on your phone.
- Access Funds: Your money is available right on your JIM card as soon as the sale is done. There is no wait for bank transfers.
Here are four immediate steps to take.
- Request demos from two booking software providers like FareHarbor or Peek Pro.
- Outline your payment policy, deciding between full payment upfront or deposits.
- Download the JIM app to see how it works for in-person sales.
- Compare the transaction fees of JIM with one other payment processor.
Step 6: Fund your business and manage finances
Your business plan is the key to funding. For loans, consider an SBA Microloan, which can provide $5,000 to $50,000. Lenders will want to see a detailed plan and a good personal credit score, with interest rates typically between 8% and 13%.
Another path is equipment financing. This loan uses your kayaks as collateral, which can make it easier to qualify for. Some owners make the mistake of only borrowing enough for the boats. You must also include working capital in your loan request to cover initial operating costs.
You should have at least six months of working capital set aside. This fund, typically $5,000 to $10,000, covers rent, insurance, and marketing before your business generates steady income. This is your safety net during the slow season or before you build a customer base.
You might also look for grants, though they are competitive. If your business is in a rural area, check your eligibility for a USDA Rural Business Development Grant. These programs can provide a significant boost without adding to your debt.
Here are four immediate steps to take.
- Contact a local SBA-approved lender to discuss microloan qualifications.
- Calculate your total operating expenses for six months to determine your working capital needs.
- Research two equipment financing companies that work with outdoor recreation businesses.
- Visit the USDA website to check if your location qualifies for a rural development grant.
Step 7: Hire your team and set up operations
Build your waterfront crew
Your first hire will likely be a Rental Assistant or Dockhand. This person handles customer check-ins, safety briefings, and equipment. Expect to pay $15 to $18 per hour. A good assistant frees you up to manage the business instead of just launching boats.
All staff must have First Aid and CPR certifications. This is non-negotiable. You might also look for candidates with a lifeguard certification, as it adds a layer of credibility and safety. This training is a key part of managing your risk.
Streamline your daily workflow
A mistake many new owners make is understaffing on busy days. A good rule of thumb is to have one staff member for every 8-10 kayaks on the water. This ensures no one waits too long and safety checks are never rushed.
With your team in place, you can manage schedules with software like Homebase or When I Work. These platforms help you build schedules, track hours, and communicate with your team from your phone. Many offer free plans for small businesses.
Here are four immediate steps to take.
- Draft a job description for a Rental Assistant, including pay and required certifications.
- Get your own First Aid and CPR certification if you do not have one.
- Calculate your ideal staff-to-kayak ratio for a busy Saturday afternoon.
- Sign up for a free account on a scheduling platform like Homebase to explore its features.
Step 8: Market your business and attract customers
Focus on local partnerships first. Contact hotels, campgrounds, and visitor centers to offer a 10-15% commission for each referred customer. This is a low-cost way to build a referral network before you spend much on advertising.
Next, claim and complete your Google Business Profile. This is the single most important step for local search. Add high-quality photos, your hours, and a direct link to your booking page. Many customers will find you here.
Create a visual social media presence
Use Instagram and Facebook to show people having fun. A mistake some owners make is posting static photos of kayaks. Instead, share images of customers smiling on the water. This sells the experience, not just the equipment.
You can run a targeted Facebook ad campaign for as little as $10 a day. Aim your ads at tourists currently visiting your location. A good customer acquisition cost (CAC) to aim for is between $15 and $25 per new booking.
Here are four immediate steps to take.
- Contact two local hotels to propose a referral partnership.
- Set up your Google Business Profile with at least five high-quality photos.
- Plan your first week of social media posts focused on the customer experience.
- Research Facebook's ad targeting options for tourists in your specific area.
Step 9: Price your rentals and manage your money
Set your pricing strategy
Most rentals use a tiered model. A single kayak might go for $25 per hour, $60 for a half-day (4 hours), and $90 for a full day. Tandem kayaks usually cost 30-40% more. This structure encourages longer rentals and increases your average transaction value.
Look at what nearby competitors charge. If they get $30 an hour, pricing at $25 with newer equipment can give you an edge. You should not just copy prices; understand what value they offer and find a way to provide more for a similar or lower price point.
Some owners forget to price for peak demand. You might consider a 15-20% surcharge for holiday weekends. This strategy captures extra revenue when your availability is tight and demand is at its highest. It is a standard practice in the tourism industry.
Your goal should be a gross profit margin of 60-70% per rental. After you account for the kayak's cost, maintenance, and insurance, this margin ensures you have enough left for other business expenses and eventual profit.
Here are four immediate steps to take.
- Analyze the pricing of three local competitors.
- Create a tiered price sheet for single and tandem kayaks.
- Calculate your target hourly rate based on a 60% profit margin.
- Decide on a holiday weekend surcharge percentage.
Step 10: Maintain quality and scale your operations
Your reputation depends on the condition of your gear. A daily inspection of each kayak for cracks and each PFD for wear is your baseline. This prevents accidents and shows customers you prioritize safety. Your goal should be zero equipment-related incidents per season.
You can also track customer satisfaction through online reviews. Aim for a 90% or higher 5-star rating. For added credibility, you might want to have staff complete an American Canoe Association (ACA) skills or safety course. This adds a professional touch that customers notice.
Know when to grow
Growth should be data-driven. Some owners make the mistake of expanding based on a few good weekends. When you consistently sell out over 80% of your kayak fleet every weekend for a month, it is time to add more boats to your fleet.
The same logic applies to hiring. If you spend more than 10 hours per week on administrative tasks that pull you away from customers, it is time to hire another rental assistant. This frees you up to focus on managing the business, not just running it day-to-day.
Here are four immediate steps to take.
- Create a daily pre-launch inspection checklist for all kayaks and PFDs.
- Calculate your average weekend booking percentage from the last month.
- Look into American Canoe Association (ACA) course options for your staff.
- Review the reporting features in your booking software to identify your busiest days.
Your kayak rental business is about selling an experience, not just boats. Your customers' safety and enjoyment are your most valuable assets. With this guide and a clear plan, you are ready to turn your passion for the water into a successful venture.
To keep your launch day smooth, consider how you will take payments. JIM lets you accept cards on your phone for a flat 1.99% fee, no extra hardware required. It is a simple way to manage sales at the waterfront. Download JIM.
.avif)


