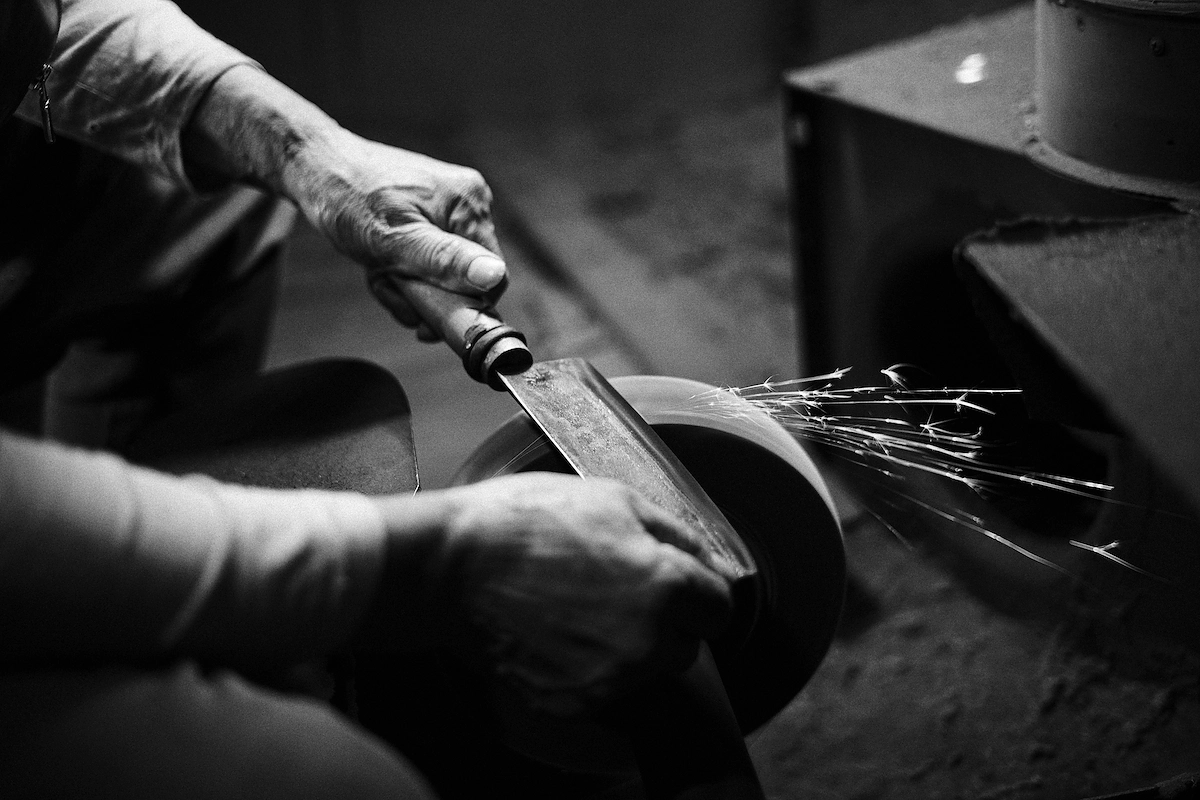
Starting a knife sharpening business is a rewarding venture that combines a knack for precision with smart business sense. With the cutlery market worth billions, there's a steady demand for sharp knives from restaurants, butchers, culinary schools, and even home cooks.
This guide will take you through the practical steps of validating your business idea, acquiring the right equipment, obtaining necessary licenses, and marketing your services to help you launch a successful knife sharpening business in the U.S.
Step 1: Research your market and plan your budget
First, identify your potential customers. Visit local restaurants, butcher shops, and even hair salons to understand their needs. Many forget that stylists need sharp scissors. Also, check out farmers' markets to connect with vendors who use knives for produce.
With a customer profile in mind, look at your competition. Use Google Maps and Yelp to find other sharpening services in your area. Note their prices, turnaround times, and if they offer mobile services. A frequent misstep is trying to compete only on price. Instead, find a way to offer better quality or convenience.
Calculate your startup costs
Your initial investment will vary, but you can plan for costs in these general ranges. A quality setup is an upfront expense, but it protects your reputation and prevents you from damaging client knives.
- Professional Belt Grinder: $800 - $2,500
- Whetstones & Honing Rods: $200 - $500
- Business Registration (LLC): $100 - $500
- Initial Marketing (business cards, flyers): $150 - $300
This puts a realistic startup budget between $1,250 and $3,800. You can start smaller with manual methods, but a professional grinder allows you to handle more volume and different types of blades.
Here are 3 immediate steps to take:
- Identify 10 potential commercial clients (restaurants, butchers) in your zip code.
- List the prices and services of at least two local competitors.
- Create a simple spreadsheet to draft your startup budget.
Step 2: Set up your legal structure and get licensed
You will want to form a Limited Liability Company (LLC). This structure protects your personal assets, like your home and car, from business debts or lawsuits. It is a straightforward process through your state’s Secretary of State website and costs between $50 and $500.
An LLC also offers pass-through taxation, meaning business profits pass to your personal tax return. This simplifies tax filing. As your business grows, you can elect to have your LLC taxed as an S Corp, which can reduce your self-employment tax burden.
Get the right permits and licenses
First, get a free Employer Identification Number (EIN) from the IRS website. You need this for banking and taxes. Next, visit your state’s Department of Revenue site to see if you need a seller’s permit, which is sometimes required even for service businesses.
Your most important license will be a general business license from your city or county clerk’s office. This typically costs $50 to $100 annually. A frequent oversight is ignoring local zoning laws for a home-based business, so confirm you can operate from your address.
Here are 3 immediate steps to take:
- File for an LLC with your state’s Secretary of State.
- Apply for a free Employer Identification Number (EIN) directly from the IRS.
- Contact your local city clerk to ask about a general business license application.
Step 3: Insure your business and manage risk
Protecting your new venture from accidents is non-negotiable. You will need insurance to cover potential damages or injuries. A frequent mistake is assuming a homeowner's policy provides coverage for a home-based business, but it almost never does.
Key insurance policies to consider
You should look into a Business Owner's Policy (BOP), which bundles general liability and property insurance. General liability protects you if a client gets hurt, while property insurance covers your equipment like grinders and whetstones.
- General Liability: Aim for at least $1 million in coverage. Annual premiums typically run from $400 to $900 for a small operation.
- Professional Liability: This covers you if you accidentally damage an expensive client knife. It is a vital addition to your policy.
- Inland Marine: If you plan a mobile service, this policy protects your equipment while in transit.
Providers like Hiscox, Next Insurance, and The Hartford specialize in small business policies and can give you a quote online in minutes. Be upfront about the nature of your work to get the right coverage.
Here are 3 immediate steps to take:
- Request online quotes for a Business Owner's Policy from Hiscox and Next Insurance.
- Ask an agent how professional liability would cover damage to a client’s high-value cutlery.
- If you operate from home, call your homeowner's insurance agent to confirm your business is not covered.
Step 4: Set up your workspace and buy equipment
Your workspace does not need to be large. A 100-150 square foot area in a garage, basement, or shed works perfectly. Check with your city about zoning for a "home occupation permit" to ensure you comply with local rules before you set up shop.
If you decide to lease a commercial spot, look for small workshop spaces. You might want to negotiate a shorter 1- or 2-year lease to start. This gives you flexibility as your business finds its footing without a long-term financial commitment.
Select your sharpening system
Your equipment directly impacts your quality and speed. Many new business owners buy cheap grinders with inconsistent speeds, which can easily damage a client's knife. A variable-speed model gives you the control you need for different types of steel and blade conditions.
- Belt Grinder: A 1x30 inch variable-speed grinder is a versatile starting point, costing between $400 and $900. You can find these at suppliers like Jantz Supply or USA Knife Maker, which have no minimum order quantities.
- Sharpening Belts: You will need a variety of grits. Start with a set from 80 to 1000 grit, plus a leather stropping belt. A starter pack costs around $50.
- Whetstones: For fine-tuning and specialty knives, a 1000/6000 combination water stone is a solid choice. Expect to pay $60 to $150 for a quality stone from brands like Shapton.
Also, get safety glasses, a dust mask, and good lighting. These are not optional. Protecting your eyes and lungs from metal dust is a top priority from day one.
Here are 3 immediate steps to take:
- Confirm your proposed home workspace complies with local "home occupation" zoning rules.
- Research 1x30 variable-speed belt grinders on USA Knife Maker or Jantz Supply.
- Add a 1000/6000 combination whetstone and a set of sharpening belts to your budget spreadsheet.
Step 5: Set up your payment and invoicing system
Most knife sharpening jobs are paid upon completion. For residential clients, this is straightforward. For commercial clients like restaurants, you might offer net-15 or net-30 terms on an invoice, but require immediate payment for the first few jobs to build trust.
A frequent misstep is starting with cash only, which can limit your customer base. You should accept credit and debit cards from day one. It signals professionalism and makes payment easy for everyone, especially for higher-priced commercial jobs.
For businesses that need to accept payments on-site or on-the-go, JIM offers a streamlined solution. With JIM, you can accept debit, credit, and digital wallets directly through your smartphone. Just tap and you are done.
At just 1.99% per transaction with no hidden costs or extra hardware needed, it is very competitive. Other providers often charge 2.5% to 3.5% plus monthly fees. It is particularly useful for mobile sharpeners at farmers' markets or when you collect payment from a chef at their restaurant.
- Get Started: Download the JIM app for iOS.
- Make a Sale: Type the sales amount, hit sell, and ask your customer to tap their card or device on your phone.
- Access Funds: Your money is available right on your JIM card as soon as the sale is done - no waiting for bank transfers.
Here are 3 immediate steps to take:
- Decide on your payment terms for commercial clients, such as payment on completion or Net 30.
- Download the JIM app to see how it works for mobile payments.
- Set your policy for handling payments for both walk-in and commercial jobs.
Step 6: Fund your business and manage your finances
You can fund your startup without a large bank loan. An SBA Microloan is a good fit, offering $500 to $50,000. Interest rates typically range from 8% to 13%. Lenders will want to see a simple business plan and a decent personal credit score, usually above 640.
Another option is a platform like Kiva, which offers 0% interest crowdfunded loans up to $15,000. Many new owners get denied for loans because they fail to show how they will make money. Your plan should clearly list your services, prices, and target customers.
Plan your working capital
You will need funds to cover expenses for the first six months before you turn a steady profit. A realistic budget for this period is between $1,500 and $3,000. This covers insurance premiums, replacement sharpening belts, marketing materials, and fuel for a mobile service.
While grants specifically for knife sharpening are rare, you should check with your local Small Business Development Center (SBDC). They can point you to state or local grants for new small businesses, especially if you are a veteran or minority entrepreneur.
Here are 3 immediate steps to take:
- Find an SBA Microloan lender in your state through the SBA's website.
- Draft a one-page business plan that outlines your startup costs and target market.
- Calculate your 6-month working capital needs in your budget spreadsheet.
Step 7: Build your team and streamline operations
Initially, you will be the sole operator. You handle everything from sharpening to customer service. This is the best way to perfect your process and understand every part of the business before you bring anyone else on board.
When you consistently handle over 40-50 knives a week or your revenue tops $4,000 a month, it might be time to hire. Your first hire should be a part-time Sharpening Technician. This frees you to focus on finding more commercial clients.
Key roles and responsibilities
A Sharpening Technician would handle routine sharpening jobs. Look for someone with good manual dexterity and attention to detail. No formal certifications exist, so you will train them on your specific equipment and quality standards. Expect to pay between $18 and $25 per hour.
Many owners make the mistake of hiring someone without a practical test. During the interview, have them sharpen a few of your own knives on your equipment. This shows you their skill level and ability to follow instructions far better than a resume ever could.
To manage appointments and clients, you can start with Google Calendar. As you grow, software like Jobber or Housecall Pro helps you schedule jobs, send invoices, and manage customer information for about $50-$150 a month. This keeps your operations organized.
Here are 3 immediate steps to take:
- Set a monthly revenue goal, like $4,000, that will signal it is time to hire.
- Create a simple skills test to use in interviews for your first Sharpening Technician.
- Explore the free features of Google Calendar to manage your first client appointments.
Step 8: Market your services and get customers
Your first customers will likely come from direct outreach. Focus on commercial clients like restaurants and butcher shops for steady, recurring work. Walk in, introduce yourself, and offer to sharpen one house knife for free. This shows your skill and builds immediate trust.
Many new owners wait for customers to find them. You have to be proactive. A single restaurant can provide $50-$100 in monthly revenue, so converting just a few can build a solid base. Aim to visit five potential clients each day when you first launch.
Establish your digital footprint
Set up a free Google Business Profile. This is how local customers will find you on Google Maps. Add your hours, service area, and photos of your work. Ask every satisfied customer to leave a review. Positive reviews are your most powerful marketing asset.
You do not need a fancy website at the start. A simple Facebook page or your Google profile with before-and-after photos works well. Visual proof of a dull, chipped knife transformed into a razor-sharp tool is incredibly effective at attracting new business.
Tap into the residential market
To reach home cooks, set up a small booth at a local farmers' market. You can sharpen knives while customers shop. You can also partner with local kitchen supply stores or hardware stores. Offer them a 10-15% commission for each referral they send your way.
Here are 3 immediate steps to take:
- Create a Google Business Profile and upload photos of your workspace and equipment.
- Visit five local restaurants during off-peak hours and offer the chef a free trial sharpening.
- Design and order 250 business cards with your name, number, and basic pricing.
Step 9: Set your prices and create a service menu
Your pricing strategy directly impacts your profitability. Most sharpeners use a per-inch model, typically $1 to $2 per inch of blade, or a flat rate per knife type. A flat rate is simpler for customers, such as $8 for a standard chef’s knife and $12 for a serrated one.
A frequent mistake is to compete solely on price. This devalues your skill and can make the business unsustainable. Instead, price based on the quality you deliver. Your gross profit margin on each knife should exceed 90%, as your main cost is time, not materials.
Build your service menu
Create a clear menu of your services. You can offer tiered options to increase your average sale. For example, a standard sharpening service plus an add-on for chip repair or tip reshaping for an extra $5 to $15, depending on the damage.
- Standard Knives (up to 10"): $8 - $12 flat rate
- Serrated Knives: $10 - $15 (these require more specialized work)
- Scissors & Shears: $12 - $20
- Commercial Discount: 15-20% off for bulk orders (10+ knives)
To finalize your numbers, research competitors on Google Maps. Call two or three and ask for a quote on an 8-inch chef's knife with a small chip. This gives you direct insight into the going rates for both standard and repair work in your area.
Here are 3 immediate steps to take:
- Draft a price list using a per-inch or flat-rate model for your core services.
- Decide on pricing for at least one add-on service, like chip repair.
- Call two local competitors to get a quote for sharpening a standard knife.
Step 10: Maintain quality and scale your operations
Define your quality standards
Your reputation is built on consistency. While there are no formal certifications, you can create your own standard. A sharpened knife should cleanly slice through a sheet of paper without snagging. This is a simple, effective test you can perform on every blade.
Many new sharpeners get sloppy as volume increases. They rush jobs and deliver inconsistent results. To avoid this, inspect each knife for a uniform edge and make sure the burr is completely removed. A happy customer is your best marketing asset.
Know when to grow
Growth should be deliberate. A good signal to hire your first part-time technician is when you consistently sharpen 40-50 knives per week or your monthly revenue exceeds $4,000. This frees you up to find more commercial accounts instead of just working at the grinder.
When your home workspace feels cramped, consider leasing a small commercial spot. In addition, when you need to manage a growing client list, software like Jobber or Housecall Pro can automate scheduling and invoicing. These platforms cost around $50-$150 per month.
Here are 3 immediate steps to take:
- Write down your quality standard, including the paper slice test for every knife.
- Set a monthly revenue goal, like $4,000, as your trigger to start the hiring process.
- Review the basic plans for Jobber and Housecall Pro to see which fits your future needs.
You have the steps to launch your knife sharpening business. Remember that consistency is everything; a perfectly sharpened knife is your best business card. Your reputation for quality work will bring you more clients than any ad. Now, go get started.
And when it is time to get paid, keep it simple. JIM turns your smartphone into a card reader, so you can accept payments for a flat 1.99% fee without extra hardware. This makes getting paid on the spot easy. Download JIM to be ready for your first customer.

