
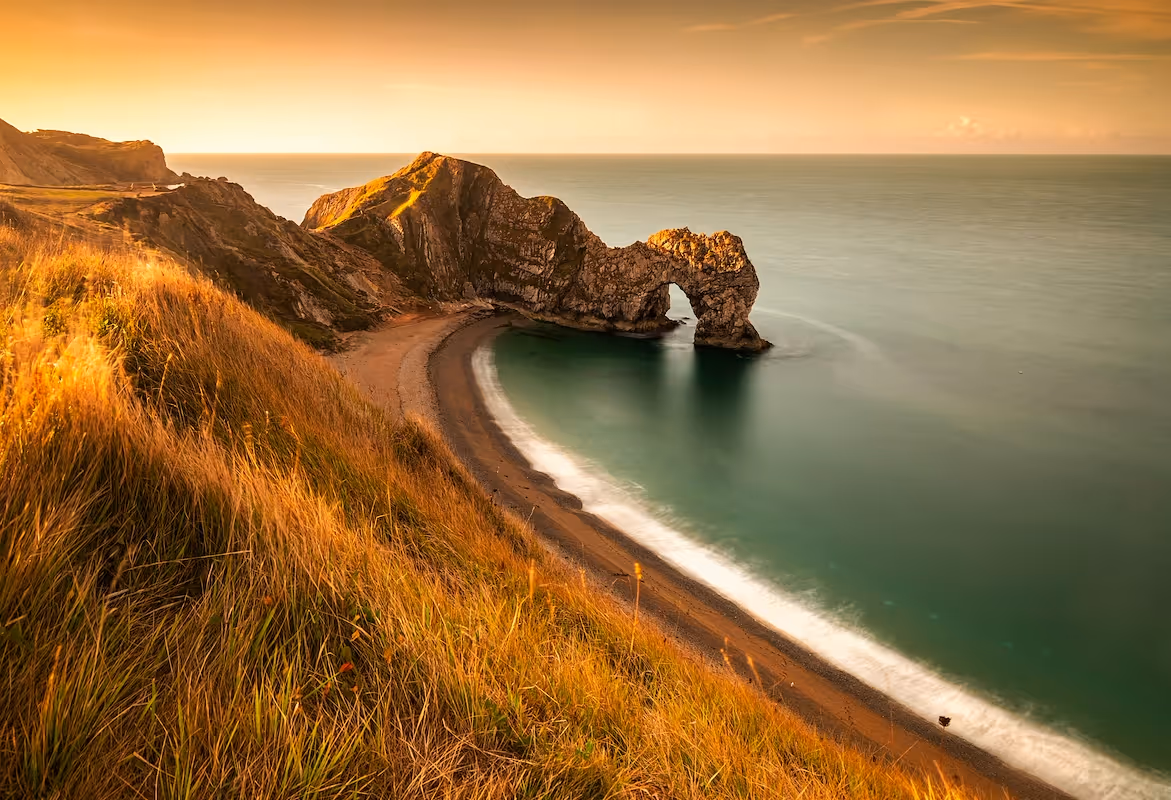
Starting a landscape photography business is a rewarding venture that combines artistic vision and technical camera skills with business savvy. The photography market is a multi-billion dollar industry, with steady demand for captivating images from interior designers, corporate clients, and publications.
This guide will take you through the practical steps of validating your business concept, acquiring the right equipment, securing funding, and obtaining necessary permits to help you launch a successful landscape photography business in the U.S.
Step 1: Create a business plan and validate your idea
Research your market and competition
Start by analyzing what sells. Spend time on stock photo sites like Getty Images or Adobe Stock to identify popular landscape styles and subjects. Notice the color palettes and compositions that appear most often in best-selling categories.
Next, look at local competitors. Search for landscape photographers in your target region on Instagram and 500px. Note their pricing for prints, their niche, and how they market themselves. Many photographers try to cover everything, so finding a specific focus can give you an edge.
Estimate your startup costs
Your initial investment will mostly cover equipment. A professional full-frame camera body can range from $1,500 to $3,000. You might spend another $1,000 to $4,000 on a couple of high-quality wide-angle and telephoto lenses.
Other costs include a sturdy tripod ($200-$800), editing software like an Adobe Photography Plan (around $10/month), and website hosting (about $200/year). A frequent misstep is to buy top-tier gear immediately. You can start with a capable mid-range setup and upgrade later.
Here are 3 immediate steps to take:
- Identify five trending landscape themes on stock photography websites.
- List three competitors in your area and analyze their online portfolios and print prices.
- Create a startup budget that outlines low-end and high-end estimates for your initial gear.
Step 2: Establish your legal structure and obtain permits
Choose your business structure
You might want to consider a Limited Liability Company (LLC). It separates your personal assets from business debts, a safeguard a sole proprietorship does not offer. An LLC also provides pass-through taxation, so business profits are taxed on your personal return, which simplifies paperwork.
Register your business and get licensed
Once you have a business name, you may need to file a "Doing Business As" (DBA) with your state or county. If you form an LLC, you will also need to apply for a free Employer Identification Number (EIN) from the IRS online.
Most cities or counties also require a general business license to operate legally. These typically cost between $50 and $100 annually. Check your local city hall's website for the specific forms and fees.
Secure photography permits
Many photographers get into trouble by assuming public land is free to shoot on for commercial purposes. The National Park Service (NPS) requires commercial use permits, which can cost over $250 per park and take 2-4 weeks to process. State and local parks have their own rules and fees.
Here are 4 immediate steps to take:
- Decide between an LLC and a sole proprietorship for your business structure.
- Apply for a free EIN on the IRS website if you choose an LLC.
- Check your city's website for business license application forms and costs.
- Research the commercial photography permit process for one national or state park you want to shoot in.
Step 3: Secure insurance and manage risk
Protect your gear and your business
You will want to get general liability insurance. A standard $1 million policy protects you if someone gets hurt or property is damaged during your shoots. Expect annual premiums to be between $400 and $700.
Next, insure your equipment. Many photographers mistakenly believe their homeowners' policy covers their gear, but it usually does not for business use. An equipment policy, often called inland marine insurance, covers theft and damage, even in remote locations.
Also consider professional liability insurance. This covers you against claims of negligence if, for example, you lose a client's files. It provides peace of mind as you handle important projects.
Find the right provider
Look for insurers who understand photographers. Providers like Full Frame Insurance, Hill & Usher, and the Professional Photographers of America (PPA) offer tailored packages. They understand the unique risks, from gear theft at a remote trailhead to drone-related accidents.
Here are 4 immediate steps to take:
- Get a quote for a $1 million general liability policy.
- Inventory your camera gear and calculate its total replacement value for an equipment policy.
- Confirm with your agent that your homeowners' policy does not cover business equipment.
- Request a policy review from a photography-specific provider like Full Frame Insurance.
Step 4: Set up your workspace and buy gear
Design your home office
You likely do not need a commercial studio. A dedicated 100-150 square foot space in your home is usually enough for a desk, computer, and print storage. Check your local city’s website for home-based business zoning regulations to ensure you are compliant.
Invest in your post-production setup
Your computer and monitor are as important as your camera. Budget for a powerful computer with at least 16GB of RAM. A color-calibrated monitor, like a Dell UltraSharp or BenQ model ($500-$1,200), ensures your prints look how you expect them to.
Many new photographers try to save money by using a standard monitor. This often results in prints with inaccurate colors, leading to wasted materials and unhappy clients. A proper display prevents this headache.
Decide on printing
You can either buy a professional photo printer or outsource to a lab. An in-house printer like a Canon imagePROGRAF gives you full control but costs over $1,000 plus ink and paper. Labs like White House Custom Colour or Bay Photo Lab handle printing for you.
Here are 4 immediate steps to take:
- Check your local zoning rules for home-based businesses.
- Research color-calibrated monitors from brands like BenQ or Dell.
- Compare the cost of an in-house printer against outsourcing to a lab like Bay Photo.
- Create a budget for your complete computer and editing workspace.
Step 5: Set up your payment processing
For print sales, you should require 100% payment upfront. For commissioned projects, a 50% non-refundable deposit is standard before you start, with the balance due upon delivery. Many new photographers fail to formalize this in a contract, which can lead to awkward conversations and late payments.
With your terms decided, you need a way to get paid. For landscape photographers that need to accept payments on-site or on-the-go, JIM offers a streamlined solution. With JIM, you can accept debit, credit and digital wallets directly through your smartphone - just tap and done.
At just 1.99% per transaction with no hidden costs or extra hardware needed, it's particularly useful for selling prints at art fairs. The average commission rates that other payment solution providers offer are often higher, so the savings add up, especially when you sell high-value framed prints.
- Get Started: Download JIM app for iOS
- Make a Sale: Type the sales amount, hit sell, and ask your customer to tap their card or device on your phone
- Access Funds: Your money is available right on your JIM card as soon as the sale is done - no waiting for bank transfers
Here are 3 immediate steps to take:
- Draft a payment policy that specifies a 50% deposit for commissioned work.
- Download the JIM app to explore its interface for on-site sales.
- Calculate the potential savings on a $500 print sale using JIM's 1.99% rate versus a 2.9% rate.
Step 6: Fund your business and manage finances
Secure startup capital
You might want to consider an SBA Microloan. These loans range from $500 to $50,000 and often have interest rates between 8% and 13%. They are a good fit for new entrepreneurs who may not qualify for traditional bank loans.
Another path is to look for grants. Organizations like PPA Charities offer financial awards, and your local arts council likely has programs too. While competitive, grants provide capital you do not have to repay.
Plan your operating budget
With funding in mind, you need a plan for your first six months. A working capital budget of $5,000 to $10,000 is a realistic target. This covers travel, marketing, permit fees, and initial print inventory before sales become steady.
Many photographers underestimate travel costs. A single trip to a national park can easily exceed $1,000 with fuel, lodging, and food. You should budget on a per-trip basis to avoid surprises and keep your finances healthy.
Here are 4 immediate steps to take:
- Review the SBA Microloan program requirements on their website.
- Search for arts grants offered by your state or local arts council.
- Draft a six-month operating budget with a $5,000 minimum.
- Estimate the total cost for one week-long photography trip to a target location.
Step 7: Build your team and streamline operations
Start with freelance help
You will likely operate solo at first. Your first "hires" should be freelancers. A virtual assistant (VA) can handle emails and social media for $15-$30 per hour. A freelance photo editor can manage post-processing overflow for $25-$75 per hour.
A good rule of thumb is to outsource when administrative tasks consume over five hours of your week. This frees you up for shooting and client work. Many photographers wait too long, leading to burnout and missed opportunities.
Use software to manage your workflow
To stay organized, you might want to use a client management system like HoneyBook or Studio Ninja. These platforms handle contracts, invoices, and client communication in one place for about $20-$50 a month. They present a more professional image than scattered emails and spreadsheets.
Get your drone license
If you plan to use a drone for commercial work, you must obtain a Part 107 license from the FAA. This involves passing a knowledge test. Operating without this certification can result in significant fines, so it is a non-negotiable step for aerial landscape photography.
Here are 4 immediate steps to take:
- Research freelance rates for virtual assistants on a platform like Upwork.
- Sign up for a free trial of a client management system like HoneyBook.
- List five administrative tasks you could delegate to a VA.
- Review the FAA's official study guide for the Part 107 drone license.
Step 8: Market your business and find clients
Build your online presence
Your portfolio website is your digital gallery. Platforms like Squarespace and PhotoShelter offer templates designed for photographers. Focus on a clean design with 15-25 of your strongest images. A cluttered site can overwhelm potential buyers.
Next, use Instagram and Pinterest to showcase your work. A good content mix is 80% polished photos and 20% behind-the-scenes stories. This helps people connect with you. Also, optimize your website with keywords like "[Your City] landscape prints" to attract local search traffic.
Find commercial and print buyers
You can reach out directly to interior designers and corporate art buyers. Use LinkedIn to find these professionals in your area. A personalized email that shows you understand their style can get their attention, but expect a low reply rate of 1-2%.
Also, consider local art fairs and galleries. Galleries typically take a 40-50% commission, but they handle sales and marketing for you. Art fair booth fees can start around $300, giving you direct access to hundreds of potential customers over a weekend.
Here are 4 immediate steps to take:
- Create a list of 10 local interior design firms to contact.
- Research the application deadlines and fees for two art fairs in your region.
- Optimize your website's homepage title with a location-specific keyword.
- Plan a week of Instagram content with an 80/20 image-to-story mix.
Step 9: Price your work and create packages
Determine your pricing model
A simple way to start is with a cost-plus model. Calculate your cost of goods sold (COGS)—the print, mat, frame, and shipping materials. Then, apply a markup of 3x to 5x. If a framed print costs you $100 to produce, you would price it between $300 and $500.
A frequent oversight is pricing based only on print cost. You must also account for your time, travel, and gear depreciation. For unique or limited edition prints, you might use value-based pricing, where the price reflects the image's artistic merit and exclusivity, not just production cost.
Create print packages
With your pricing model in mind, you can build packages. Offer a few options to appeal to different buyers. For example, you could offer a small, unframed 8x10 print for $75, a medium 16x20 framed print for $350, and a large 24x36 metal print for $900.
This tiered approach gives customers clear choices and can guide them toward higher-value purchases. It also simplifies your sales process, especially at art fairs or on your website. Make sure your packages showcase a range of materials, from standard paper to canvas or metal.
Here are 4 immediate steps to take:
- Calculate the total cost of goods sold for one 16x20 framed print.
- Research the prices for similar-sized prints from three competitors.
- Develop three print packages with different sizes and materials.
- Set a value-based price for a limited edition run of one of your best images.
Step 10: Maintain quality and scale your operations
Establish your quality standards
Your reputation depends on consistency. For prints, you should aim for a resolution of 300 DPI. Regularly calibrate your monitor with a device like a SpyderX. Many photographers neglect this and end up with prints that have inaccurate colors, which leads to costly reprints.
For client work, track your performance. A good goal is to keep revision requests under 10% for commissioned projects. You should also aim to deliver final images on or before your promised deadline 100% of the time to build trust and encourage referrals.
Know when to scale
With your quality locked in, you can plan for growth. Once administrative work takes more than five hours a week, it is time to hire a freelance virtual assistant. A financial trigger, like a consistent monthly profit over $5,000, could be your signal to hire a part-time editor.
You can also expand your services. If you receive frequent questions about your methods, consider offering a weekend workshop. If you find yourself selling many prints from a particular national park, you could organize a guided photo tour there for another revenue stream.
As you grow, spreadsheets will not be enough. A client management system like HoneyBook keeps projects organized. If you manage a large print inventory, software like inFlow Inventory can help you track stock levels and prevent you from selling out of popular images.
Here are 4 immediate steps to take:
- Calibrate your monitor and set a monthly reminder to repeat the process.
- Define three quality metrics for your business, such as print return rate.
- Set a monthly revenue goal that would trigger hiring a freelance editor.
- Review inventory software if you plan to stock over 50 prints.
Your journey into landscape photography is about more than business steps. Your unique eye for light and composition is what will set you apart. Trust that vision and stay persistent through the quiet months. You have the roadmap, now go build something beautiful.
When you make that first sale, payment should be the easy part. With a solution like JIM, your smartphone becomes a card reader. You can accept payments anywhere for a flat 1.99% fee, without extra hardware. Download JIM and you are ready.
.avif)


