
Starting a laser engraving business is an exciting venture that combines creativity and technical skill with business savvy. The industry is worth billions, with steady demand for personalized gifts, custom signage, and industrial part marking.
This guide will take you through the practical steps of validating your business idea, acquiring the right equipment, securing funding, and obtaining necessary permits to help you launch a successful laser engraving business in the U.S.
Step 1: Validate your business idea and research the market
First, define your niche. You could focus on consumer products like custom tumblers and cutting boards, or pursue B2B work such as part marking for local manufacturers. Explore platforms like Etsy to see what sells well in the consumer space.
Once you have a niche in mind, analyze your competition. Use Google Maps to find local engraving services and review their offerings. On Etsy, study the top sellers in your category to understand their pricing, product photos, and popular items. Google Trends can also show you demand for specific products.
Estimate your startup costs
Your budget will heavily influence your initial capabilities. The laser engraver itself is the main investment. A quality hobbyist diode laser can start around $2,000, while a more powerful CO2 laser often ranges from $5,000 to $10,000.
Many new owners miscalculate by choosing a machine that cannot handle their target materials. A diode laser, for instance, will not engrave clear acrylic or uncoated metals effectively. Factoring in the right machine from the start prevents a costly upgrade later.
Beyond the machine, budget for software like LightBurn (around $60), an initial inventory of materials ($300-$500), and business registration fees ($100-$500). This brings a typical startup investment to between $2,500 and $11,000.
Here are 3 immediate steps to take:
- Identify five potential competitors on Etsy and Google Maps and note their primary products.
- Use Google Trends to compare search interest for two different product ideas in your state.
- Draft a preliminary budget with estimated costs for a machine, software, and materials.
Step 2: Establish your legal entity and secure permits
Choose your business structure
You should consider forming a Limited Liability Company (LLC). It protects your personal assets, like your home and car, from business debts. This structure is a popular choice over a sole proprietorship, which offers no liability protection. Filing for an LLC typically costs between $50 and $200.
An LLC also offers tax flexibility. By default, its profits pass through to your personal tax return. As your business grows, you can elect to have the LLC taxed as an S Corporation, which might reduce your self-employment tax burden. Consult a tax professional for this decision.
File for licenses and permits
First, get a free Employer Identification Number (EIN) from the IRS website. You need this to open a business bank account and file taxes. The online application takes only a few minutes to complete. Once you have your EIN, open a separate bank account to keep your finances clean.
Next, register your business with your state’s Secretary of State. If you operate under a name different from your LLC’s legal name, you will also need to file a “Doing Business As” (DBA) name. Check your city or county clerk’s office for a general business license.
Many new owners forget local permits. If you operate from home, you may need a Home Occupation Permit. These local permits usually cost less than $100 and prevent future fines. Processing times vary from same-day approval to a few weeks, so start this process early.
Here are 4 immediate steps to take:
- Decide between an LLC and a sole proprietorship for your business.
- Apply for a free Employer Identification Number (EIN) on the IRS website.
- Visit your Secretary of State’s website to find LLC filing fees and forms.
- Contact your local city or county clerk to ask about business license requirements.
Step 3: Secure insurance and manage risks
With your legal entity established, the next step is to protect your business from accidents. Insurance covers unexpected events that could otherwise be financially devastating. It is a key part of a solid business foundation.
Key insurance policies for your shop
General Liability insurance is your first line of defense. It covers claims of injury or property damage. A typical policy with $1 million in coverage runs between $400 and $900 annually. Also, consider Business Property insurance to protect your laser engraver from theft, fire, or damage.
Many new owners forget to insure their machine for its full replacement value. Make sure your policy covers the cost of a new laser, not just its depreciated worth. If you use a vehicle for deliveries, you will need Commercial Auto insurance.
For providers, you might want to look at companies like Hiscox, Next Insurance, or The Hartford. They specialize in small business policies and understand the needs of craft-based operations. A general agent may not be familiar with the specific risks of laser engraving, such as fire or fume-related hazards.
Here are 3 immediate steps to take:
- Request a quote for a $1 million General Liability insurance policy.
- Ask potential insurers if their Business Property policy covers the full replacement cost of your laser.
- Compare rates from at least two providers that specialize in small business insurance.
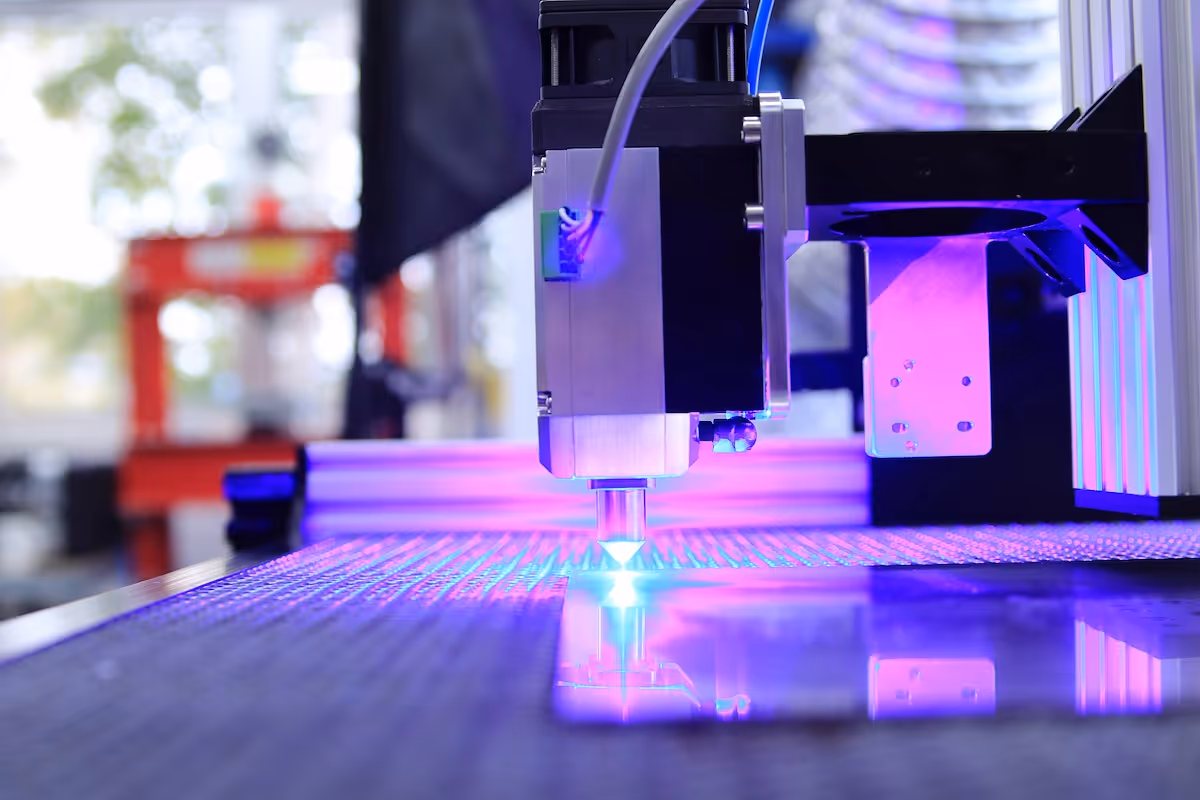
Step 4: Set up your workspace and buy equipment
For a home-based setup, a 100-200 square foot area is a good start. Check your local zoning regulations for home-based businesses. Some areas require specific permits for light manufacturing activities, so confirm this with your city planning department before you buy anything.
If you lease a commercial space, look for properties zoned for light industrial use. During negotiations, get written permission to install an exhaust vent. Landlords are more likely to agree if you present a clear plan for installation and removal upon leaving.
Choose your core equipment
Beyond the laser ($2,000-$10,000), a dedicated fume extractor is a must-have for safety. Expect to spend $400 to $1,200. Some new owners try to use a simple fan, but a proper filtration system protects your health and keeps residue off your machine’s optics.
For materials, look at suppliers like JDS Industries or Johnson Plastics Plus. They cater to engravers and often have no minimum order quantity. This lets you buy small batches of tumblers or wood sheets to test before you commit to a large inventory purchase.
Here are 4 immediate steps to take:
- Check your city’s zoning laws for home-based manufacturing rules.
- Get price quotes for a fume extractor compatible with your target laser.
- Create a free account with a supplier like Johnson Plastics Plus to see material costs.
- If leasing, draft a clause about ventilation installation for your lease proposal.
Step 5: Set up your payment processing
For custom work, a 50% non-refundable deposit is common practice. This covers your material costs and secures the order. The remainder is due upon completion, before you ship or hand over the item. This policy protects you from last-minute cancellations.
Many new owners overlook transaction fees, which can eat into profits. While average commission rates from other providers often hover between 2.5% and 3.5%, you should look for a solution with clear, low-cost pricing, especially for in-person sales.
For an engraver who needs to accept payments on-site or on-the-go, JIM offers a streamlined solution. With JIM, you can accept debit, credit, and digital wallets directly through your smartphone. Just tap and the sale is done.
At just 1.99% per transaction with no hidden costs or extra hardware needed, it is particularly useful for taking payments at craft fairs or securing deposits at a client's location. Getting started is straightforward.
- Get Started: Download the JIM app for iOS.
- Make a Sale: Type the sales amount, hit sell, and ask your customer to tap their card or device on your phone.
- Access Funds: Your money is available right on your JIM card as soon as the sale is done - no waiting for bank transfers.
Here are 3 immediate steps to take:
- Decide on a standard deposit percentage for your custom orders.
- Compare the 1.99% rate from JIM with other payment options you find.
- Draft a simple contract clause stating your payment terms for client work.
Step 6: Secure funding and manage your finances
You might want to look into an SBA Microloan. These government-backed loans offer up to $50,000, which is ideal for buying a laser and initial supplies. Interest rates typically fall between 8% and 13%. Local Small Business Development Centers (SBDCs) offer free help with applications.
Another route is equipment financing. With this option, the loan is secured by the laser engraver itself. This can be easier to obtain than a traditional business loan because the machine acts as its own collateral, reducing the lender's risk.
Estimate your working capital
You should have at least six months of working capital set aside. This fund covers your operating costs before you turn a consistent profit. For a home-based setup, this usually means having $3,000 to $5,000 ready for materials, software, and insurance.
Many new owners underestimate material costs for test runs and mistakes. It is a good idea to add a 20% buffer to your initial material budget. This gives you room to dial in your machine settings without the stress of wasting expensive inventory.
Here are 3 immediate steps to take:
- Contact your local SBDC to find SBA Microloan lenders in your area.
- Request an equipment financing quote for your preferred laser engraver model.
- Create a spreadsheet to calculate your 6-month working capital, including a 20% material buffer.
Step 7: Build your operational workflow
As a solo operator, you will wear many hats. You are the designer who prepares files, the operator who runs the laser, and the shipper who packs orders. Document your process for each role from day one so you can easily train someone later.
Hiring your first team member
You might want to wait to hire until you have more orders than you can handle. Your first hire is often a part-time Production Assistant at $15-$20 per hour. Their duties would include preparing materials, post-production cleaning, and packing shipments.
Formal certifications are rare in this field. Training usually involves mastering your specific laser and design software like LightBurn or Adobe Illustrator. Many laser manufacturers offer free tutorials, which are a great resource for getting a new hire up to speed quickly.
To manage your orders, a simple project board on Trello or Asana can work well. You can create cards for each order and move them through stages like “Design,” “Engraving,” and “Shipped.” This keeps you organized without a big software expense.
Here are 4 immediate steps to take:
- Document the step-by-step process for a typical order, from design to shipping.
- Calculate the revenue needed to support a part-time assistant at $18/hour for 10 hours a week.
- Watch a manufacturer's tutorial video for your laser model to identify key training points.
- Set up a free Trello board with columns for your production stages.
Step 8: Market your business and find customers
Start with visual platforms like Instagram and Pinterest. Post high-quality photos and videos of your work. Use specific hashtags like #laserengraving and #customgifts to attract buyers. A common mistake is to only show finished products. Instead, post time-lapse videos of the laser in action to boost engagement.
Reach local businesses and sell online
You can also pursue B2B clients. Contact local real estate agents for closing gifts or breweries for custom tap handles. A simple cold email with a link to your portfolio can open doors. Offering a free engraved sample with their logo is a low-cost way to show your quality.
For online sales through a platform like Etsy, focus on your search optimization. Use all 13 available tags for each listing with relevant keywords. A good conversion rate to aim for is 1-3%. If you get 100 views and one sale, you are on the right track.
Here are 4 immediate steps to take:
- Set up an Instagram business profile and post five high-quality images or videos.
- Draft a cold email template to send to five local businesses.
- Research 13 relevant tags for a product you plan to sell on Etsy.
- Calculate the cost of producing one sample item to use for B2B outreach.
Step 9: Price your services and products
A simple way to price is a direct markup on your materials. A 3x to 5x markup is a common starting point. For a $5 tumbler blank, this means a final price between $15 and $25. This model works well for standardized products.
For more complex jobs, you might want to charge by machine run-time. A rate of $1 to $2 per minute for a CO2 laser is typical. Many new owners forget to add a separate setup fee of $10-$25 to cover design adjustments, which can protect your profit.
Analyze the market
To see if your prices are competitive, study 5-10 Etsy shops in your niche. Note their pricing for items similar to yours. Also, check Google for local engravers to understand B2B rates, which are often higher than consumer prices.
For example, a local brewery might pay a flat $200 for a custom wooden sign. A bulk order of 100 keychains, however, would likely be priced per unit after an initial design fee. Your pricing should reflect the value of custom, skilled work.
Here are 4 immediate steps to take:
- Price one of your products using a 4x material cost markup.
- Calculate a per-minute machine rate based on a $1.50/minute benchmark.
- Find three competitors on Etsy and record their prices for a similar product.
- Draft a sample quote for a local business project, including a setup fee.
Step 10: Maintain quality and scale your operations
To ensure consistency, create a “gold standard” sample for each of your main products. This is your physical benchmark for color, depth, and alignment. Before you ship any order, compare it directly to this master sample. This practice keeps your quality high from the first sale to the thousandth.
Many new owners ship items with small flaws, which hurts their reputation over time. You can avoid this if you track a defect rate and aim for under 2%. A simple checklist for each order—to check for clear engraving, correct spelling, and no scratches—is a great way to start.
Plan your growth
Once you spend over 15 hours a week on non-engraving tasks like packing and admin, you might want to consider hiring. A part-time assistant can handle these duties, which frees you to focus on design work and find new clients.
For equipment, a good rule of thumb is to invest in a second laser when your primary machine runs at over 80% capacity for a full month. Use your Trello board to track machine hours and identify when you approach this threshold.
Here are 4 immediate steps to take:
- Create a "gold standard" sample for your top-selling product.
- Draft a 3-point quality check for every order.
- Calculate your current machine's weekly run-time to track capacity.
- List the tasks you would delegate to a part-time assistant.
Starting your laser engraving business is a journey of precision, both in your craft and your planning. Remember that consistent quality, from your first sample to your hundredth order, builds a lasting reputation. You have the steps, now go make your mark.
As you start to sell, getting paid should be simple. JIM turns your phone into a card reader, so you can accept payments anywhere with a flat 1.99% fee and no extra hardware. Download JIM to get started.
.avif)


