
Launching a product photography business is an exciting venture that merges artistic talent in photography with sharp business acumen. The market is worth billions of dollars, with steady demand for high-quality images from e-commerce stores, marketing agencies, and digital catalogs.
This guide will take you through the practical steps of acquiring the right equipment, validating your business idea, obtaining licenses, and building a client base to help you launch a successful product photography business in the U.S.
Step 1: Plan your business and validate your idea
First, gauge the market. Spend time on sites like Etsy and Shopify. Note the photography styles for top-selling products in different categories, from handmade jewelry to tech gadgets. This shows you what brands currently pay for and where demand is high.
Next, identify your direct competition. Use Instagram hashtags like #productphotographer and search on creative portfolio sites like Behance. Look at their pricing, style, and the types of clients they feature. This helps you find a gap in the market you can fill.
Estimate your startup costs
Your main investment will be equipment. A solid starter kit with a camera body, a versatile lens, and a basic two-light setup can be assembled for about $2,000 to $4,000. A frequent misstep is buying too much specialized gear before you have clients.
Beyond gear, budget for other expenses. This includes software like the Adobe Photography Plan (around $10/month) and business registration fees ($50-$500, depending on your state). A realistic initial budget often lands between $3,000 and $5,000.
Here are 3 immediate steps to take:
- Research 10 local and online competitors, noting their prices and specialties.
- Create a startup budget spreadsheet, prioritizing a versatile camera and lighting kit.
- Identify three potential product niches by analyzing top-sellers on e-commerce platforms.
Step 2: Set up your legal structure and get licensed
Choose your business structure
You might want to consider forming a Limited Liability Company (LLC). It separates your personal assets from business debts, a protection a sole proprietorship does not offer. LLCs also provide pass-through taxation, which helps you avoid corporate tax rates.
A frequent oversight is mixing personal and business finances. Once you register your business, open a dedicated business bank account immediately. This simplifies bookkeeping and reinforces the legal separation of your LLC, which is its main purpose.
Secure federal, state, and local permits
At the federal level, apply for an Employer Identification Number (EIN) from the IRS. It is free and the application is online. You will need this for taxes and to open your business bank account. It acts like a Social Security number for your business.
Next, check state and local rules. You will likely need a general business license from your city or county, costing $50 to $150 annually. If you work from home, a home occupation permit might also be necessary. Processing times can take a few weeks.
Here are 3 immediate steps to take:
- Decide between a sole proprietorship and an LLC for liability protection.
- Apply for a free Employer Identification Number (EIN) on the IRS website.
- Check your city or county clerk's website for business license and permit forms.
Step 3: Insure your business and manage risk
Choose your insurance coverage
General Liability Insurance protects you if someone gets hurt or their property is damaged during a shoot. A $1 million policy is standard, with annual premiums typically between $400 and $700. This is your foundational coverage.
Next, you need Business Property Insurance for your gear. Many new photographers assume their homeowner's policy covers their camera and lights for business use, but it almost never does. This policy protects against theft or damage, whether at home or on location.
Also, consider Professional Liability Insurance. This covers you if a client claims your work caused them a financial loss, like if you accidentally delete their images. If you hire assistants, you will need Workers' Compensation. Use a vehicle for work? Add Commercial Auto insurance.
You might want to look at providers like Hiscox, Full Frame Insurance, or The Hartford. They offer policies tailored to photographers and understand the specific risks involved, which a general agent might miss. This can make the claims process much smoother.
Here are 4 immediate steps to take:
- Get a quote for a $1 million General Liability policy.
- Inventory your equipment to determine the value for a Business Property Insurance quote.
- Review your business plan to see if you need Workers' Comp or Commercial Auto.
- Contact an insurer that specializes in creative professions, like Hiscox or Full Frame Insurance.
Step 4: Set up your studio and get your gear
You can start your business from home. A dedicated space of 100-150 square feet, like a spare room or a clear garage corner, is often enough. A frequent oversight is forgetting about vertical space; you need ceilings high enough for light stands, usually at least 8 feet.
Build your starter equipment kit
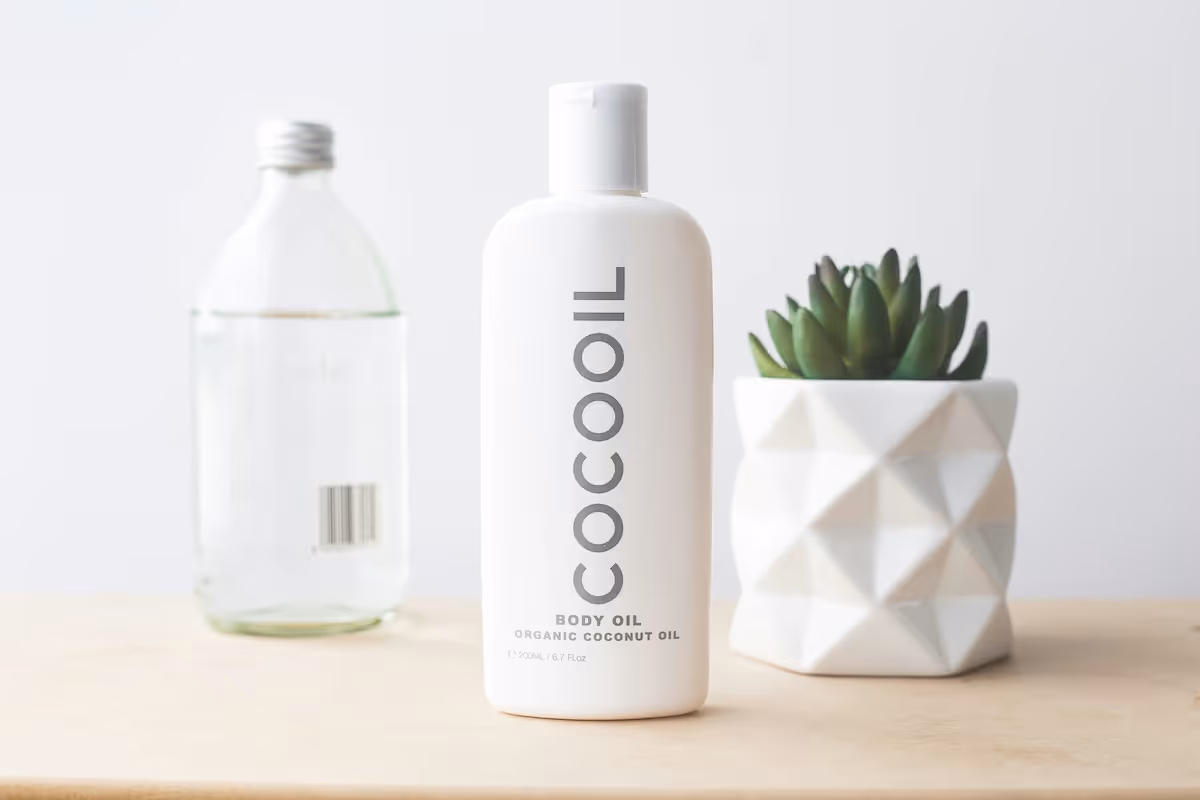
Many photographers overspend on gear before they have income. You can build a professional kit for under $5,000. Start with a full-frame mirrorless camera body, which runs about $1,500 to $2,500. This gives you the image quality clients expect.
Pair your camera with a 100mm macro lens, which costs between $500 and $900. This lens is a workhorse for capturing the fine details in products like jewelry or cosmetics. For lighting, a two-light strobe kit from a brand like Godox will cost around $600 to $1,000.
Finally, invest in support. A sturdy tripod and a C-stand are non-negotiable for sharp, consistent images. Budget about $300 to $500 for both. You can find this equipment at specialized retailers like B&H Photo Video or Adorama, which offer more expertise than big-box stores.
Here are 4 immediate steps to take:
- Measure a 10x10 foot space in your home and confirm the ceiling is at least 8 feet high.
- Price out a full-frame mirrorless camera and a 100mm macro lens.
- Compare two-light strobe kits from Godox on B&H Photo Video.
- Add a quality tripod and a C-stand to your equipment budget.
Step 5: Set up your payment and invoicing system
Establish clear payment terms from the start. A common industry standard is a 50% non-refundable deposit to book the shoot. The remaining 50% is due upon delivery of the final, edited images. Always outline these terms in a simple contract to avoid any confusion.
Choose your payment solution
When you need to accept payments, especially on-site or on-the-go, JIM offers a streamlined solution. With JIM, you can accept debit, credit, and digital wallets directly through your smartphone. Just tap and the transaction is done. There is no need for extra hardware.
At just 1.99% per transaction with no hidden costs, it is a very competitive rate. Other providers often charge between 2.5% and 3.5%. This is particularly useful when a client wants to add a last-minute product to the shoot or purchase prints on location.
- Get Started: Download the JIM app for iOS.
- Make a Sale: Type the sales amount, hit sell, and ask your customer to tap their card or device on your phone.
- Access Funds: Your money is available on your JIM card as soon as the sale is done. There is no wait for bank transfers.
Here are 3 immediate steps to take:
- Draft a standard contract template with 50% deposit and 50% final payment terms.
- Download the JIM app to explore its features for on-the-go payments.
- Calculate the potential savings of a 1.99% transaction fee versus the 2.5%-3.5% industry average.
Step 6: Secure funding and manage your finances
Find the right funding
SBA Microloans are a solid option for new businesses. These loans range from $500 to $50,000, with interest rates typically between 8% and 13%. Lenders look for a good business plan and decent personal credit but are often more flexible than traditional banks.
You could also look into equipment financing. Since the gear itself serves as collateral, these loans are often easier to secure. This frees up your cash for other operational costs. Expect interest rates from 6% to 20% depending on your credit score.
Grants are another avenue, though they are highly competitive. Check out the Amber Grant for Women or search for grants from your local arts council. The application process can be lengthy, so start early and do not rely on this as your sole funding source.
Plan your working capital
Beyond your gear, you need cash to operate for the first six months. This working capital covers insurance, software, marketing, and a modest personal draw. A misstep many make is forgetting to budget for this runway, focusing only on the initial equipment purchase.
A safe estimate for six months of working capital is between $5,000 and $10,000. This buffer ensures you can focus on finding clients without financial stress. It keeps the lights on while you build momentum and start to generate consistent income.
Here are 3 immediate steps to take:
- Research SBA Microloan lenders in your state.
- Get a quote for equipment financing based on your gear list.
- Calculate your 6-month operating budget for insurance, software, and marketing.
Step 7: Staff your business and set up operations
Hiring your first assistants
You will likely operate solo at first. Once you consistently book clients, consider hiring freelancers. A Photo Assistant is a great first step. They handle tasks like setting up lights and organizing products, which frees you to focus on shooting.
Expect to pay a freelance assistant between $25 and $40 per hour. For more complex shoots, a Digital Tech manages file transfers and tethered capture. Their rates are higher, typically $50 to $75 per hour. A frequent oversight is not using a simple contract for freelancers.
Streamline your workflow
As for revenue, a good benchmark is to aim for $80,000-$100,000 in annual revenue before you consider a full-time employee. This ensures your business is stable enough to support a salary. Until then, freelancers are your best bet.
To manage projects, you might want to use a client management platform like HoneyBook or Dubsado. These systems handle contracts, invoices, and client communication in one place. This saves a significant amount of administrative time.
Here are 4 immediate steps to take:
- Draft a simple independent contractor agreement for freelancers.
- Research local photo assistants and digital techs on creative network sites.
- Set a revenue goal of $80,000 before you consider a full-time hire.
- Explore the features of a client management platform like HoneyBook or Dubsado.
Step 8: Market your business and get clients
Your portfolio is your most powerful marketing asset. Curate your best 10-15 images on a professional website and a Behance profile. A frequent misstep is showing too much variety. Instead, focus your portfolio on the specific niche you identified in Step 1 to attract your ideal clients.
Use Instagram strategically. Post high-quality images and use targeted hashtags like #productphotographer and #cosmeticphotography. You can also create spec work for a brand you admire and tag them. This demonstrates your skill and initiative directly to a potential client.
Find clients with direct outreach
Do not just wait for clients to find you. Use LinkedIn to identify marketing managers or founders at e-commerce brands that fit your niche. A personalized email is far more effective than a generic message. A well-crafted outreach campaign can yield a 5-10% positive response rate.
One effective strategy is the "free sample" approach. Shoot one of their products on your own, or create a high-quality spec image for them. Send it in a cold email with a simple note. This immediately proves your value and sets you apart from competitors.
Here are 4 immediate steps to take:
- Build a portfolio on Behance with your top 10-15 images.
- Create a list of 20 dream clients to target with direct outreach.
- Draft a personalized cold email template for your outreach campaign.
- Shoot one piece of spec work for a brand and post it on Instagram, tagging them.
Step 9: Price your services and define your packages
Choose your pricing model
You can price your work in a few ways. Charging per image is common, with rates from $25 to $150 per photo depending on complexity. This works well for clients who know exactly how many shots they need. It keeps the transaction simple and clear.
Alternatively, you might offer a day rate, which can range from $800 to $2,000. This is better for larger shoots with multiple products or complex setups. It gives the client more flexibility without you having to count every single shot on the day.
Calculate your profit
A frequent oversight is only billing for the time spent shooting. You must account for pre-production calls and post-production editing. A good rule of thumb is to assume for every hour you shoot, you will spend two hours editing. Aim for a 60-70% profit margin.
To set your rates, analyze competitors on Behance or by requesting their rate cards. This gives you a baseline. Then, create packages. For example, an "E-commerce Starter" package with 20 photos for $1,000 can be an attractive offer for new brands.
Here are 4 immediate steps to take:
- Decide if per-image, day-rate, or package pricing fits your first offer.
- Analyze 5 competitors to find the average market rate in your niche.
- Calculate your cost per photo, including your estimated editing time.
- Create three sample packages with different deliverables and price points.
Step 10: Control quality and scale your business
Establish a quality control checklist for every project. Your standards should include 100% image sharpness, consistent white balance across all photos, and adherence to a specific file naming convention. This ensures every client receives a uniform, professional product.
A frequent oversight is delivering inconsistent edits. To avoid this, create a simple style guide for each client. You can also track your revision rate. If more than 10% of your images require major changes, it is a signal to refine your pre-production communication or editing workflow.
Know when to grow
Once you reach a consistent $5,000 in monthly revenue, consider outsourcing your retouching. This frees you to shoot more. When you hit the $8,000-$10,000 monthly mark, it might be time to lease a small commercial studio space instead of working from home.
For managing client galleries and feedback, you might want to use a platform like Pic-Time or ShootProof. These systems look more professional than a simple file-sharing link and streamline the approval process, which saves you significant administrative time as you get busier.
Here are 4 immediate steps to take:
- Create a quality control checklist for your editing process.
- Track your client revision rate for one month to identify process gaps.
- Set a revenue goal of $5,000/month to trigger outsourcing your retouching.
- Explore a professional gallery delivery platform like Pic-Time or ShootProof.
You now have a clear path to launch your product photography business. Remember, your job is not just to take pictures, but to help brands sell. Keep that commercial mindset with every click of the shutter. You are ready to start building your client list.
And when you make that first sale, getting paid should be simple. A solution like JIM turns your phone into a card reader, letting you accept payments anywhere for a flat 1.99% fee. It keeps your cash flow steady from day one. Download JIM.
.avif)


