
Starting a spray foam insulation business is a rewarding venture that combines hands-on technical skill with sharp business savvy. The industry is valued in the billions, with steady demand for high-performance insulation in new residential construction, commercial buildings, and agricultural structures.
This guide will take you through the practical steps of securing funding, acquiring the right equipment, obtaining necessary licenses, and building supplier relationships to help you launch a successful spray foam insulation business in the U.S.
Step 1: plan your business and validate the market
Start by gauging local demand. You can check your county clerk’s website for new building permits. Also, talk to general contractors and home builders. Ask them what they look for in an insulation subcontractor to understand their needs.
Next, analyze your direct competition. Use Google Maps and the Better Business Bureau (BBB) to find local spray foam companies. Note their services, service areas, and customer reviews to find potential gaps in the market you can fill.
Estimate your startup costs
Speaking of costs, your budget will require careful planning. The spray foam rig, which includes a truck or trailer and the application equipment, is the biggest line item. A frequent misstep is buying a cheap rig that breaks down often, leading to downtime.
A reliable new rig can range from $45,000 to $90,000. You should also budget for initial materials ($5,000-$10,000), plus insurance and business licensing ($3,000-$6,000). Initial marketing efforts might add another $1,000 to $3,000.
This brings your estimated startup capital to between $54,000 and $109,000. Securing this level of funding is a significant step, so a detailed business plan is your best asset for approaching lenders.
Here are 3 immediate steps to take:
- Research five local competitors using Google Maps and the BBB database.
- Contact three general contractors to discuss their need for insulation subcontractors.
- Draft a startup budget with line items for a rig, materials, and insurance.
Step 2: establish your legal structure and get licensed
Choose your business structure
You should consider forming a Limited Liability Company (LLC). It protects your personal assets from business debts and offers pass-through taxation, meaning profits are taxed on your personal return. This simplifies paperwork compared to a corporation.
Filing for an LLC typically costs between $50 and $500 through your state’s Secretary of State website. The process usually takes a few days to a couple of weeks, depending on the state.
Secure the right licenses and certifications
On the federal level, the Environmental Protection Agency (EPA) requires Lead-Safe Certification for work on buildings constructed before 1978. A frequent misstep is skipping this certification, which can lead to fines up to $37,500 per day.
State requirements vary, so check with your state’s contractor licensing board for specific insulation contractor licenses. You will also need a general business license from your city or county clerk to operate legally in your area.
Finally, your team must complete safety training that follows OSHA (Occupational Safety and Health Administration) guidelines for handling chemicals like isocyanates. This protects your workers and your business from liability.
Here are 4 immediate steps to take:
- File for an LLC with your state's Secretary of State.
- Research your state’s contractor licensing board for insulation-specific rules.
- Schedule an EPA Lead-Safe Certification course.
- Contact your city or county clerk to apply for a local business license.
Step 3: secure your insurance and manage risk
Protect your business with the right coverage
General liability insurance is your first line of defense, covering property damage and third-party injuries. A frequent misstep is getting a basic policy that excludes pollution liability. You need this specific coverage for chemical spills or overspray damage, which standard policies often will not cover.
Aim for a general liability policy with at least a $1 million per occurrence limit. When you add pollution liability, commercial auto, and other coverages, annual premiums can range from $4,000 to $9,000. This investment protects your business from accidents that could otherwise be financially devastating.
You will also need commercial auto insurance for your rig, with a typical $1 million combined single limit. If you hire a team, workers’ compensation is mandatory in most states. It covers employee injuries from handling chemicals or operating equipment, which is a real risk in this trade.
Work with an insurance broker who understands the construction trades. General agents may not grasp the specific risks of handling isocyanates. Consider providers like The Hartford or Hiscox, or find a local broker specializing in contractor insurance to get the right policies without dangerous gaps.
Here are 4 immediate steps to take:
- Request quotes for a $1 million general liability policy.
- Confirm that any quote includes a pollution liability rider.
- Contact three insurance brokers who specialize in contractor trades.
- Check your state’s requirements for workers’ compensation insurance.
Step 4: find a location and buy your equipment
Find your home base
You will need a commercial space of 500 to 1,000 square feet. Look for properties zoned for light industrial use, as this classification usually permits chemical storage. This gives you enough room for your rig and materials.
When you negotiate a lease, ask about ventilation. A frequent oversight is not confirming you can install an exhaust system. You must have proper airflow for storing and handling spray foam chemicals safely, so clarify this before you sign.
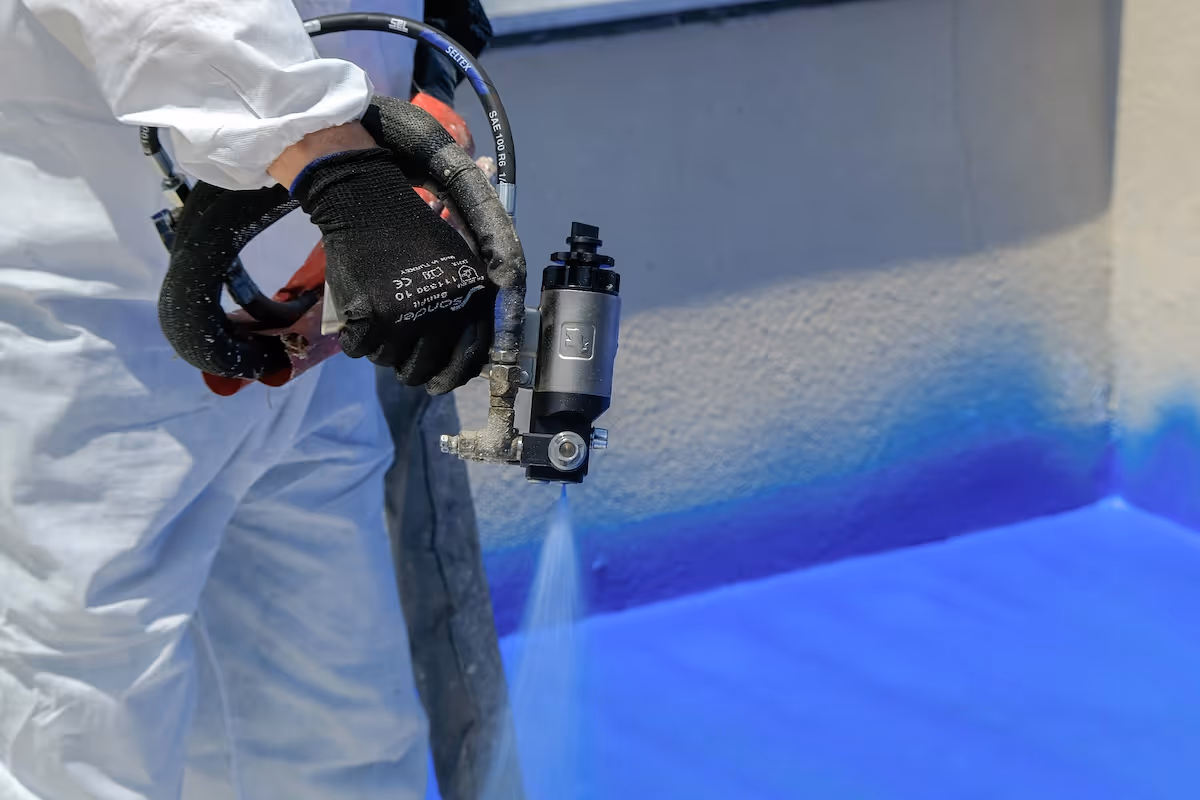
Buy your rig and initial materials
Your spray foam rig is your mobile office. Key components include a proportioner, like a Graco E-20, a generator, an air compressor, and at least 150 feet of heated hose. This complete setup will be a significant part of your startup budget.
For materials, contact suppliers like IDI Distributors or Service Partners. They sell foam in "sets," which consist of two 55-gallon drums. Your initial order will likely be one to two sets to get started.
Here are 4 immediate steps to take:
- Identify three local properties zoned for light industrial use.
- Ask potential landlords about their policy on ventilation system installation.
- Request quotes for a complete spray foam rig from two equipment suppliers.
- Contact a chemical supplier to confirm pricing for a foam set.
Step 5: set up your payment processing
In this trade, standard practice is to collect a 50% deposit to book a job and cover materials. The remaining balance is due upon completion. You should accept checks, but offering card payments is a must for customer convenience.
A frequent headache for new owners is collecting that final payment. You can waste a lot of time chasing invoices after you leave the job site. The best approach is to secure payment right after the final walkthrough with the client.
For spray foam businesses that need to accept payments on-site, JIM offers a streamlined solution. With JIM, you can accept debit, credit, and digital wallets directly through your smartphone. Your customer just taps their card on your phone.
At just 1.99% per transaction with no hidden costs, it is very competitive. Other providers often charge between 2.5% and 3.5%. This is particularly useful for collecting final payment immediately after a job is complete, without extra hardware.
Getting started is straightforward:
- Get Started: Download the JIM app for iOS.
- Make a Sale: Type the sales amount, hit sell, and ask your customer to tap their card or device on your phone.
- Access Funds: Your money is available right on your JIM card as soon as the sale is done, with no waiting for bank transfers.
Here are 3 immediate steps to take:
- Define your payment terms (e.g., 50% deposit) in your service agreement.
- Download the JIM app to see how it works on your phone.
- Add your accepted payment methods to your customer quotes and contracts.
Step 6: secure your funding and manage your finances
Explore your funding options
With your business plan ready, you can approach lenders. The Small Business Administration (SBA) 7(a) loan is a popular choice. Lenders often approve amounts from $50,000 to $100,000 for businesses like this, with interest rates typically a few points above prime.
You will need a credit score over 680 and a solid plan. Another path is equipment financing, where the rig itself acts as collateral. This can make approval simpler. Companies that specialize in construction equipment financing are a good place to start your search.
Plan for your operating costs
Many new owners focus on the rig price and forget about working capital. You will need cash for the first six months before jobs become consistent. Budget around $20,000 to $35,000 to cover materials, fuel, insurance, and other initial operating expenses.
From day one, open a dedicated business checking account. Mixing personal and business funds can cause major accounting headaches and even put your personal assets at risk if you have an LLC. This separation is a foundational step for sound financial management.
Here are 4 immediate steps to take:
- Contact two SBA-preferred lenders to discuss a 7(a) loan.
- Request quotes from an equipment financing company.
- Open a dedicated business checking account for your LLC.
- Calculate your estimated working capital for the first six months.
Step 7: hire your team and set up operations
Build your crew
Your first hire should be a certified spray foam applicator. This person runs the rig and is responsible for quality control. Look for candidates with Spray Polyurethane Foam Alliance (SPFA) certification. Expect to pay an experienced applicator between $25 and $35 per hour.
You will also need a helper to manage the hose, prep job sites, and assist with cleanup. This role typically pays $18 to $22 per hour. A frequent misstep is hiring an uncertified applicator to save money, which often leads to wasted material and callbacks.
Streamline your workflow
Once your crew is in place, you need to manage your daily schedule. Field service software like Jobber or Housecall Pro helps you organize appointments, dispatch your team, and communicate with clients. This avoids the chaos of manual scheduling with texts and phone calls.
For financial planning, aim to keep your labor costs between 25% and 35% of job revenue. A skilled two-person crew can typically complete jobs that generate $2,000 to $4,000 in revenue per day, which makes this ratio achievable and profitable.
Here are 4 immediate steps to take:
- Draft job descriptions for a certified applicator and a helper.
- Research the SPFA certification program for hiring criteria.
- Sign up for a free trial of a scheduling software like Jobber.
- Set a target labor cost percentage for your financial projections.
Step 8: market your business and find customers
Your first move should be to claim your free Google Business Profile. This puts you on Google Maps. Fill it out completely with photos of your rig and work. Ask your first few customers for reviews to build credibility with new prospects.
A simple one-page website that showcases your portfolio, service area, and contact information is sufficient. You can build one for a few hundred dollars. Many new owners wait for word-of-mouth, but you need to be proactive to fill your schedule.
Build relationships with contractors
Focus on networking with general contractors and home builders. These partnerships can become your primary source of consistent work. Join your local Home Builders Association (HBA). Annual dues are typically $400-$600 but provide direct access to potential clients.
A small Google Ads budget of $300 to $500 per month can target homeowners who search for insulation services. Expect a customer acquisition cost of $150 to $300 per job from these ads. A good goal is to convert 20% of qualified leads into booked jobs.
Here are 4 immediate steps to take:
- Set up and complete your Google Business Profile with job photos.
- Create a one-page flyer outlining your services and contact information.
- Research your local Home Builders Association (HBA) for membership details.
- Contact three local general contractors to introduce your services.
Step 9: set your pricing and create quotes
Most spray foam jobs are priced by the board foot. A board foot is one square foot of area at one inch of thickness. This method accurately accounts for varying insulation depths. You might aim for a price between $1.25 and $2.50 per board foot.
Your material cost for a foam set is around $1,500, which yields about 4,500 board feet. This puts your material cost near $0.33 per board foot. After you factor in labor and overhead, a 40-50% gross profit margin is a healthy target for your business.
A frequent mistake is to price only by the board foot. You should also have a minimum job fee, perhaps $1,500 to $2,000. This covers your setup and travel time for smaller projects and ensures they remain profitable for your crew.
Create professional quotes
Once you have your pricing, your quote should clearly break down the scope of work, total board feet, price per board foot, and the final cost. You can use a simple template from Google Docs or a dedicated quoting software to look professional and organized.
Here are 4 immediate steps to take:
- Calculate your price per board foot based on a 40% profit margin.
- Set a minimum job fee of at least $1,500.
- Call three local competitors to get a quote for a sample job.
- Create a quote template that details the job scope and pricing.
Step 10: maintain quality and scale your operations
Establish your quality standards
Your reputation depends on consistent quality. The Spray Polyurethane foam Alliance (SPFA) certification is the industry benchmark. Ensure your lead applicators hold this credential to signal expertise and build trust with clients.
After each job, perform a quality check. Measure foam depth to ensure it meets the contract specs. Also, check for proper adhesion and a uniform surface. Many new owners skip a formal post-job walkthrough, which can lead to preventable callbacks.
Know when to grow
When your schedule is consistently booked three to four weeks in advance, it is a strong signal to consider expansion. This is the point where you might start turning down profitable work. Adding a second rig and crew can double your revenue capacity.
Before you make that investment, ensure your field service software, like Jobber or Housecall Pro, can handle multi-crew dispatch. You want to avoid creating logistical bottlenecks for your teams as you grow your operations.
Here are 4 immediate steps to take:
- Create a post-job quality checklist for your crew to use.
- Research the SPFA certification requirements for your applicators.
- Set a revenue or booking target that will trigger your expansion plan.
- Review your software's features for managing multiple crews.
Conclusion
You have the steps to launch your spray foam business. Remember, your reputation for quality work and reliability will be your best asset. General contractors value partners they can trust. Now you have the blueprint, go build your company with confidence.
A smooth payment process also helps that reputation. JIM lets you accept cards on your phone right after the job is done, with no extra hardware and a simple 1.99% fee. It keeps your cash flow steady. Download JIM and be ready for your first client.
.avif)


