
Starting an insulation business is a rewarding venture that blends hands-on technical skill with smart business savvy. The industry is worth billions, driven by steady demand for energy efficiency in new homes, commercial properties, and older building retrofits.
This guide will take you through the practical steps of securing funding, obtaining necessary licenses, acquiring equipment, and building supplier relationships to help you launch a successful insulation business in the U.S.
Step 1: Plan your business and validate the market
Before you spend a dollar, gauge your local market. Talk to general contractors and property managers. They can tell you about demand and what they look for in an insulation partner. This is firsthand intelligence you cannot buy.
Also, check your city or county's public records for building permits. A high number of new builds or major remodels indicates a healthy market for insulation services. This data is often available online through municipal portals.
Next, size up the competition. Use online platforms like Angi or HomeAdvisor to see who operates in your area. Many new owners only look at websites, which is a missed opportunity. A better approach is to call a few competitors for a mock quote.
Note their response time, professionalism, and how they explain the process. This reveals their customer service quality, a key area where you can differentiate your business.
Understand your startup costs
Speaking of costs, let's map out your initial investment. A reliable used insulation truck and rig can run between $30,000 and $60,000. New equipment can easily push past $90,000. A clear budget helps you create a solid financial plan.
Beyond the main equipment, budget for other expenses. General liability insurance might be $2,000 to $5,000 per year. Business registration and licensing could add another $500 to $1,500. Set aside $1,000 to $3,000 for initial marketing efforts.
Here are 3 immediate steps to take:
- Contact three local builders to discuss their needs for insulation subcontractors.
- Request a sample quote from a competitor for a standard attic project to benchmark local pricing.
- Create a detailed spreadsheet of all potential startup expenses, from the truck to safety gear.
Step 2: Set up your legal structure and get licensed
You might want to form a Limited Liability Company (LLC). It protects your personal assets if the business faces a lawsuit. Filing costs between $50 and $500, depending on your state. An S Corp is another option that can save on self-employment taxes once you are profitable.
After you register your business, get a free Employer Identification Number (EIN) from the IRS website. You need this number to open a business bank account and hire employees. The online application takes about 15 minutes.
Secure your licenses and permits
Most states require a contractor's license. Check with your state's contractor licensing board for specifics. For example, some states have a specialty insulation license. A mistake some new owners make is to operate without the correct license, which can lead to heavy fines.
For each job, you will likely need a building permit from the local city or county. These can cost from $50 to over $500 and take a few days to several weeks to process. Always have the approved permit before you start work to avoid penalties.
Also, be aware of regulatory bodies. OSHA sets workplace safety standards, and the EPA has rules for handling certain materials you might encounter in older homes.
Here are 4 immediate steps to take:
- File for an LLC with your state's Secretary of State office.
- Apply for a free Employer Identification Number (EIN) on the IRS website.
- Find your state's contractor board online to review insulation license rules.
- Call your local building department to confirm permit fees and average wait times.
Step 3: Secure your insurance and manage risk
With your legal structure in place, your next move is to protect your business. General liability insurance is your foundation. You should look for a policy with at least a $1 million per-occurrence limit and a $2 million aggregate. Annual premiums often run from $2,000 to $5,000.
You will also need commercial auto insurance for your work truck. A policy for a single vehicle can cost between $1,500 and $4,000 per year. If you plan to hire help, workers' compensation is mandatory in most states. Premiums are a percentage of payroll, usually 3% to 7% for this trade.
Find the right insurance provider
Some new owners make the mistake of using a general insurance agent. You are better off with a provider who understands the trades. Look into companies like The Hartford, Hiscox, or Next Insurance. They are familiar with the risks specific to contractors.
Your work has unique risks, like property damage from overspray or health claims related to materials. A specialized agent will ensure your policy covers these scenarios. Be sure to discuss these specific points when you request a quote.
Here are 4 immediate steps to take:
- Request a general liability quote with a $2 million aggregate limit.
- Get a commercial auto insurance quote for your planned work vehicle.
- Check your state's workers' compensation board website for employer requirements.
- Contact an agent from The Hartford or Hiscox to discuss a policy for insulation contractors.
Step 4: Find a location and buy your equipment
Secure your home base
You need a place to store materials and park your truck. A 1,000 to 2,000 square foot warehouse or shop is a good start. Check with your local planning department for correct zoning, which is often light industrial or commercial.
Some owners sign long leases too early. You might want to negotiate a one or two-year term with an option to renew. This gives you flexibility as you grow. Also, confirm you can store insulation materials, as some landlords have restrictions.
Choose your rig and gear
Your insulation rig is your biggest investment. A reliable used spray foam rig, perhaps from a brand like Graco, can cost $30,000 to $60,000. A new one can exceed $90,000. For blown-in jobs, a machine might run $5,000 to $15,000.
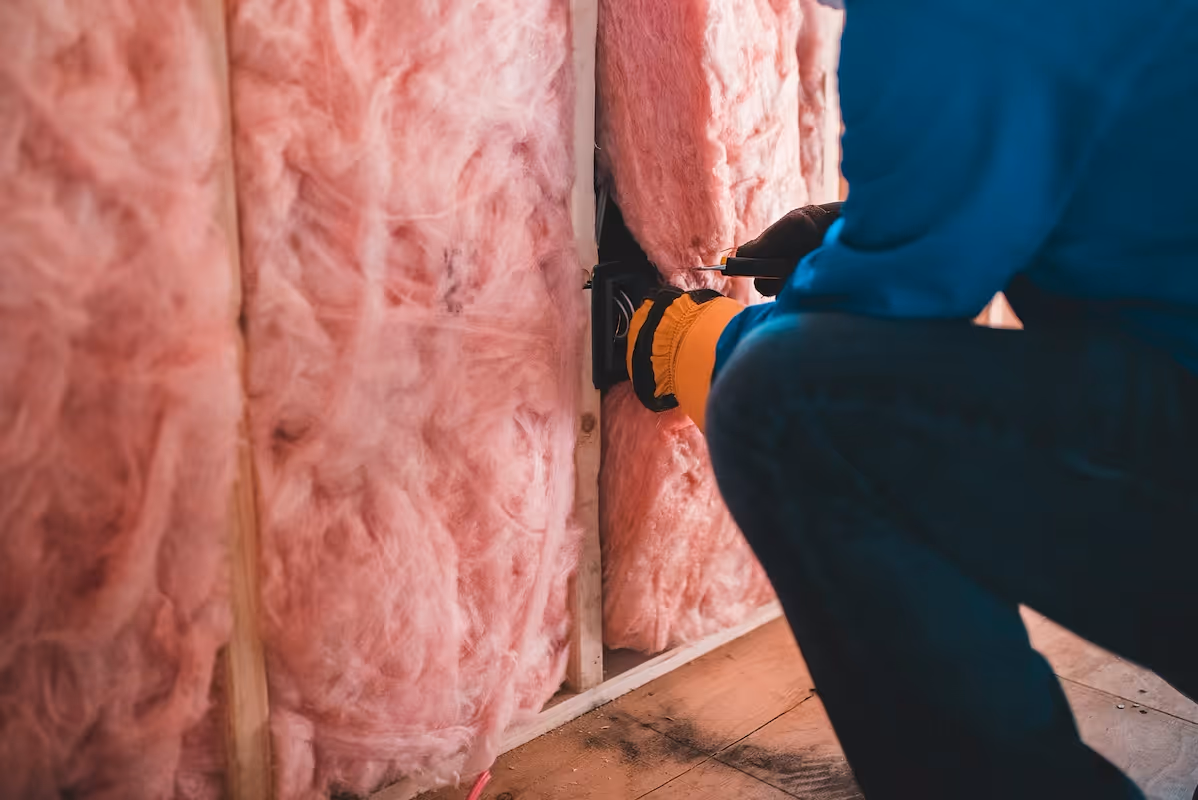
Do not forget safety gear. Budget about $1,000 for NIOSH-approved respirators, disposable coveralls, and gloves. Your crew's safety is paramount, and using proper personal protective equipment (PPE) is a non-negotiable part of the job.
Line up your material suppliers
You will buy materials from regional distributors, not directly from manufacturers like Owens Corning or CertainTeed. Find two or three local distributors to compare prices and service. Relying on a single supplier can leave you stranded if they have stock issues.
Your first material order could be a significant part of your startup capital. A few pallets of spray foam or fiberglass batts can cost between $5,000 and $10,000. Ask about their minimum order quantities and payment terms upfront.
Here are 4 immediate steps to take:
- Identify three potential warehouse spaces with light industrial zoning.
- Get quotes for a used spray foam rig from two different equipment dealers.
- Contact a regional distributor for CertainTeed or Owens Corning for a price list.
- Create a line-item budget for your initial safety gear purchase.
Step 5: Set up your payment and billing systems
For most residential jobs, a 50% deposit is standard practice. The final 50% is due upon completion. This approach secures your material costs and commits the client. While checks are an option, you should be ready to accept credit cards for customer convenience.
Some new owners make the mistake of only taking cash or checks. This can create cash flow issues and appear unprofessional. You need a reliable way to process card payments from day one, especially for payments you collect on-site after a job is finished.
For insulation businesses that need to accept payments on-site, JIM offers a streamlined solution. With JIM, you can accept debit, credit, and digital wallets directly through your smartphone. Just tap and you are done. Other providers often charge between 2.5% and 3.5%.
At just 1.99% per transaction with no hidden costs or extra hardware, it is particularly useful for collecting the final payment right after a client inspects the work. Here is how it works:
- Get Started: Download the JIM app for iOS.
- Make a Sale: Type the sales amount, hit sell, and ask your customer to tap their card or device on your phone.
- Access Funds: Your money is available right on your JIM card as soon as the sale is done. There is no waiting for bank transfers.
Here are 3 immediate steps to take:
- Draft your standard payment terms, like a 50% deposit, for your client contracts.
- Download the JIM app to review its features for on-site payments.
- Compare the 1.99% transaction rate with other payment processors you might consider.
Step 6: Secure your funding and manage finances
Find the right loan type
With your business plan and cost sheet ready, it is time to secure capital. An SBA 7(a) loan is a popular route. Lenders often want to see a credit score over 680. For a rig and materials, you might seek between $50,000 and $150,000.
Besides SBA loans, consider equipment financing directly from rig suppliers. Since the equipment serves as collateral, these loans can be easier to qualify for. Terms usually range from three to seven years. This frees up other cash for operating expenses.
Plan your cash flow
Speaking of cash, you need a working capital buffer. Plan for at least six months of expenses, which might be $15,000 to $25,000. This covers insurance, fuel, and marketing before your first client payments come in. Many new owners underestimate this need.
As soon as you have your EIN, open a dedicated business checking account. A common misstep is mixing personal and business funds, which creates a headache at tax time. Use accounting software like QuickBooks or Wave to track every dollar from the start.
Here are 4 immediate steps to take:
- Contact an SBA-preferred lender to discuss a 7(a) loan application.
- Ask two equipment dealers about their in-house financing options.
- Create a spreadsheet detailing your first six months of operating costs.
- Open a business checking account and research accounting software.
Step 7: Hire your team and set up operations
Build your installation crew
Your first hire will likely be an Insulation Installer. A skilled installer might earn between $20 and $30 per hour. Some new owners try to save money with unskilled labor, but this often leads to poor work and costly callbacks. Invest in someone with experience from the start.
Once you have a steady workflow, you can promote your best installer to a Crew Lead to manage job sites. A lean two-person crew, with you and an installer, can aim to generate between $250,000 and $400,000 in annual revenue once established.
Invest in training and systems
For safety, ensure your team has OSHA 10 certification. You might also look into manufacturer certifications from suppliers like CertainTeed. This training ensures proper material application and is often required for product warranties, which is a great selling point for clients.
To manage your schedule, consider software like Jobber or Housecall Pro. These platforms help you organize jobs, send quotes, and manage customer information from your phone. It keeps your operation smooth and professional from day one.
Here are 4 immediate steps to take:
- Draft a job description for an Insulation Installer, including pay range.
- Find a local provider for OSHA 10 certification courses.
- Explore manufacturer certification programs for the insulation you will use.
- Sign up for a free trial of a field service software like Jobber.
Step 8: Market your business and get customers
Your first marketing action is to claim your free Google Business Profile. Fill it out completely with your service area, hours, and phone number. Add photos of your truck and equipment. Ask your initial customers for reviews to build credibility fast.
Next, focus on relationships with general contractors, roofers, and property managers. They provide a consistent stream of work. Drop by their offices with business cards and a simple price list. A mistake many new owners make is to only chase homeowner leads and ignore these partnerships.
Run targeted digital ads
For direct leads, use Google Local Services Ads. You pay per qualified lead, not per click, which can cost between $50 and $100. This is more efficient than standard Google Ads. Your business can also earn the "Google Guaranteed" badge, which builds trust with homeowners.
You should also have a simple one-page website. It serves as your digital brochure. Include photos of your work, a list of services, and clear contact information. This makes your business look professional when potential clients search for you online.
Here are 4 immediate steps to take:
- Claim and complete your free Google Business Profile.
- Identify five local general contractors to contact this week.
- Research the cost of Google Local Services Ads in your city.
- Outline a one-page website with your services and contact info.
Step 9: Set your pricing and create quotes
Set your pricing model
Most insulation jobs are priced by the square foot. For spray foam, you might charge between $1.50 and $4.50 per board foot. Fiberglass batts often run from $0.60 to $1.40 per square foot. Your price must cover materials, labor, and overhead.
Your target gross profit margin should be 30% to 50%. To get there, mark up material costs by 20% to 50%. After that, add your labor costs and a portion for overhead like insurance and fuel. This ensures each job is profitable.
A mistake some new owners make is to simply undercut everyone. This race to the bottom hurts your brand and your bank account. Instead, use competitor quotes to understand the market rate, then price your services based on the value and quality you provide.
Create professional quotes
Your quote is a sales document. It should be clear and detailed. List the exact materials you will use, the scope of work, the total price, and your payment terms. You can use software like Jobber to create and send professional-looking quotes that impress clients.
Here are 4 immediate steps to take:
- Calculate your price per square foot for both spray foam and fiberglass insulation.
- Set your material markup percentage, aiming for at least 20%.
- Call two competitors for a quote on a 1,200 sq. ft. attic to analyze their pricing.
- Create a quote template that details the scope of work and payment terms.
Step 10: Implement quality control and scale your operations
After each job, perform a quality inspection. Use a simple checklist to confirm uniform insulation depth and complete cavity fills. A mistake some owners make is to skip this step, which leads to callbacks that destroy your profit margin and reputation.
You should track your callback rate, with a goal to keep it under 2%. In addition, send a simple follow-up text or email to gauge customer satisfaction. This feedback is invaluable for spotting issues early.
Know when to grow
Once your quality is consistent, you can plan for growth. When your lead crew is booked solid for three to four weeks out, it is time to start the process for a second rig and crew. Another benchmark is when you consistently pass $30,000 in monthly revenue.
To elevate your business, you might want to pursue a Building Performance Institute (BPI) certification. It signals a high level of expertise and can help you win larger or more complex projects. As you add teams, field service software like Jobber becomes critical for managing schedules.
Here are 4 immediate steps to take:
- Create a post-job quality inspection checklist for your crew to use.
- Research the Building Performance Institute (BPI) certification requirements.
- Set a revenue or booking threshold that will trigger your next hire.
- Review your field service software’s features for managing multiple crews.
You now have a clear path to launch your insulation business. Your success will depend on the quality of your work and how you treat your customers. That focus builds a reputation that pays off for years. Go ahead and get started.
And when it is time to get paid, keep it simple. JIM turns your phone into a card reader, so you can accept payments on the spot for just 1.99% per sale. No extra hardware needed. Download JIM and you are ready.
.avif)


