
Starting a 3D printing business is an exciting venture that combines technical skill and creativity with business savvy. The industry is already worth billions, with steady demand for custom prototypes, specialized parts, and unique consumer products.
This guide will take you through the practical steps of validating your business concept, acquiring the right equipment, securing funding, and building supplier relationships to help you launch a successful 3d printing business in the U.S.
Step 1: Plan and validate your business idea
First, decide who you will serve. Many new owners try to serve everyone. Instead, focus on a niche like tabletop gaming miniatures, architectural models, or custom drone parts. This helps you stand out and target your marketing efforts effectively.
Explore forums like Reddit’s r/3Dprinting or check hashtags on Instagram to see what people request and what projects get attention. This direct insight shows you real demand.
With a niche in mind, analyze your competition. Use Google Maps to find local print shops. Also, look at online service platforms like Hubs or Craftcloud to understand pricing, materials offered, and turnaround times for established players.
Estimate your startup costs
Mapping out your initial investment helps you plan. Your budget will depend on the technology you choose. An entry-level setup can start around $1,800, while more advanced equipment can push the total closer to $8,500 or more.
- Prosumer FDM Printer: $500 - $2,000
- Resin (SLA) Printer: $1,000 - $4,000
- Initial Materials (Filament/Resin): $200 - $500
- Business Registration: $100 - $500
Here are 3 immediate steps to take:
- Identify three potential niches by browsing online 3D printing communities.
- List five competitors and their primary services and prices.
- Draft a startup budget with low and high estimates for your chosen equipment.
Step 2: Set up your legal structure and get licensed
You might want to consider forming a Limited Liability Company (LLC). This structure protects your personal assets, like your home and car, if the business faces debt or legal issues. It separates you from the business legally.
An LLC also offers pass-through taxation, meaning profits pass directly to you without separate corporate taxes. A frequent misstep is mixing personal and business funds. Open a dedicated business bank account as soon as your LLC is approved.
Secure your licenses and permits
First, get an Employer Identification Number (EIN) from the IRS. It is free and you can apply online. You will need an EIN to open a business bank account, even if you do not plan to hire employees immediately.
Next, register your business with your state, usually through the Secretary of State's office. This can cost between $50 and $500. Also, check with your city or county clerk for a general business operating license and any home-based business permits if you operate from your residence.
While no single federal agency governs 3D printing, you must follow local zoning laws and EPA guidelines for waste disposal, particularly with SLA resins. Improper disposal can lead to fines.
Here are 4 immediate steps to take:
- Decide between an LLC and a sole proprietorship for your business structure.
- Apply for a free EIN on the official IRS website.
- Research your state’s business registration process and fees.
- Contact your local city or county office about home-based business permits.
Step 3: Secure your business insurance
To protect your new venture, you will need insurance. While it is an upfront cost, a single accident or lawsuit could be financially devastating. Focus on policies that cover the specific risks of 3D printing.
Key insurance policies
A frequent mistake is to stop at general liability. This policy alone does not cover claims from product failures. For a 3D printing business, you need more specialized protection for your work and equipment.
- General & Product Liability: This combination covers third-party injuries and property damage, plus harm caused by a failed print. This is your most important coverage.
- Commercial Property: Protects your expensive printers and materials from fire, theft, or other damage. Remember, printers can be a fire risk.
- Professional Liability: If you offer design services, this policy covers you against claims of errors or negligence in your work, including intellectual property issues.
- Workers’ Compensation: You will need this if you hire employees. It covers medical costs and lost wages from work-related injuries.
A basic Business Owner's Policy (BOP) bundling general and property coverage might start around $500 annually. With product and professional liability added, expect to pay between $1,000 and $3,000 per year. Look into providers like Hiscox, The Hartford, and Next Insurance for quotes.
Here are 4 immediate steps to take:
- Request quotes for a Business Owner's Policy that includes product liability.
- Ask potential insurers how their policies handle intellectual property claims.
- Confirm your homeowner's policy does not exclude business activities from your residence.
- Compare quotes from at least three providers that understand technology businesses.
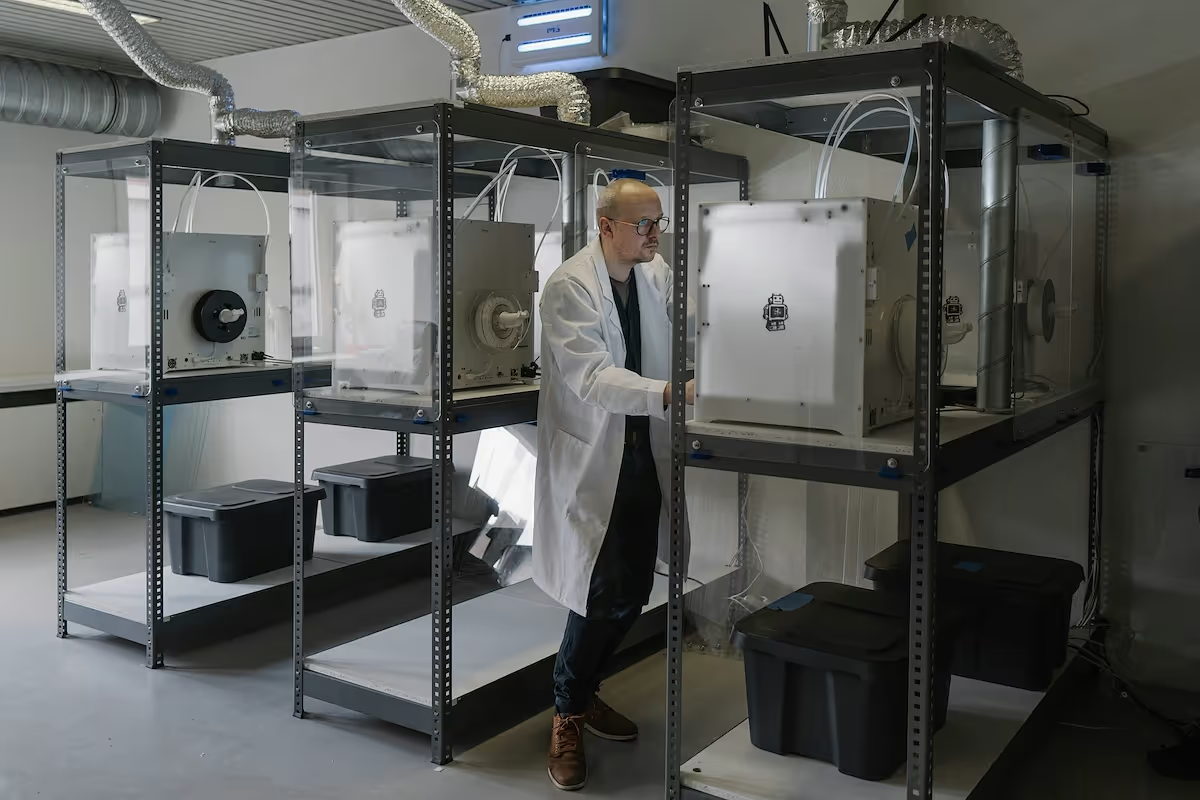
Step 4: Set up your location and buy equipment
You can start a 3D printing business from home. A spare room or garage of about 100-200 square feet is often enough. Check your local zoning laws for home-based business restrictions. Some areas have rules about noise or chemical storage, particularly for resin printing.
If you choose a commercial space, look for light industrial or commercial zoning. When you review a lease, confirm the space has adequate ventilation for fumes and sufficient electrical circuits to run multiple printers without issue. These are points you can negotiate with a landlord.
Choose your core equipment
Your equipment choice depends on your niche. Many new owners make the mistake of buying the cheapest printer available, only to spend more time on repairs than on printing. A reliable prosumer machine is a better investment. Your initial setup will likely include:
- FDM Printer: A Bambu Lab P1S costs around $700 and offers speed and reliability. A Prusa MK4 is another solid option for about $1,100.
- SLA Printer: For high-detail work, an Elegoo Saturn or Mars model runs between $300 and $600. You will also need a wash and cure station, which costs about $150.
- Materials: Find suppliers like MatterHackers or Polymaker. Most do not have minimum order quantities, so you can start with a few spools of filament or bottles of resin for under $200.
Here are 4 immediate steps to take:
- Check your city’s zoning regulations for home-based businesses.
- Research ventilation options, like an enclosure with an exhaust fan, for your space.
- Price out one FDM and one SLA printer model that fits your budget.
- Compare the cost of PLA filament and standard resin from two online suppliers.
Step 5: Set up your payment processing
For custom projects, it is standard to require a 50% deposit upfront. This protects you by covering material costs. For smaller, pre-made items, you will collect the full payment at the time of sale. Make your terms clear on your quotes and website.
You need a simple way to accept credit cards, debit cards, and digital wallets. A frequent misstep is to choose a system with high fees or one that requires extra hardware. Look for low transaction rates and fast access to your funds.
For a 3D printing business that needs to accept payments on-site or on-the-go, JIM offers a streamlined solution. With JIM, you can accept debit, credit and digital wallets directly through your smartphone. Just tap and you are done.
At just 1.99% per transaction with no hidden costs, it is particularly useful when you sell at maker faires or deliver a project to a client. This rate is quite low, as other providers often charge between 2.5% and 3.5%.
Getting started is straightforward:
- Get Started: Download the JIM app for iOS.
- Make a Sale: Type the sales amount, hit sell, and ask your customer to tap their card or device on your phone.
- Access Funds: Your money is available right on your JIM card as soon as the sale is done. There is no wait for bank transfers.
Here are 3 immediate steps to take:
- Decide on your deposit policy for custom jobs.
- Download the JIM app to explore its interface.
- Draft a sentence for your quotes that clearly states your payment terms.
Step 6: Fund your business and manage finances
Most 3D printing businesses start with personal savings or a small loan. For external funding, consider an SBA Microloan, which can provide up to $50,000. These loans often have interest rates between 8-13% and are more accessible for new businesses with little credit history.
Equipment financing is another strong option. Lenders finance the printer itself, using the machine as collateral. This frees up your cash for materials and marketing. Also, look into the Small Business Innovation Research (SBIR) program if your work involves a new technology or process.
Manage your working capital
A frequent misstep is to secure just enough for the printer but forget operating costs. You will need about $3,000 to $5,000 in working capital for your first six months. This covers materials, software, utilities, and marketing before you have steady income.
From day one, track every dollar. Use software like Wave, which is free, or QuickBooks Self-Employed to categorize expenses and monitor your cash flow. This discipline is vital for tax season and for understanding your business's financial health without guesswork.
Here are 4 immediate steps to take:
- Research one SBA-approved lender in your area for microloan options.
- Calculate your estimated working capital needs for the first six months.
- Review the SBIR program website to see if your business idea qualifies.
- Set up an account with a bookkeeping software like Wave to track initial costs.
Step 7: Hire your team and set up operations
You will likely be the sole operator at first. When you are ready to expand, your first hire is usually a 3D Print Technician. This role handles print setup, post-processing like cleaning and sanding, and basic machine maintenance.
Expect to pay an hourly rate between $18 and $25, depending on experience. A frequent misstep is to hire based on a resume alone. Instead, include a practical test in your interview, like having a candidate slice a model and set up a print.
Streamline your workflow
To start, you can manage your print queue with a simple spreadsheet. Track the client, file name, material, estimated print time, and due date. As you get busier, a project management board like Trello can help you visualize your workflow from order to delivery.
There are no formal certifications required for most 3D printing roles. Focus on a candidate's hands-on experience with your specific printer technology. As you grow, a good target is to generate $100,000 to $150,000 in revenue per employee annually.
Here are 4 immediate steps to take:
- Draft a job description for a 3D Print Technician.
- Create a simple print job tracking spreadsheet with key columns.
- Design a short, hands-on test for your interview process.
- Set a revenue-per-employee goal for your business plan.
Step 8: Market your business and get customers
Your first marketing asset is a strong portfolio. Take high-quality photos of at least 10-15 of your best prints against a clean background. These images will be the foundation for all your marketing efforts, so make them look professional.
Build your online presence
Focus on platforms where visuals matter. Create an Instagram account dedicated to your prints. Use relevant hashtags like #3Dprinting, #customparts, or tags specific to your niche. Also, offer your services on Reddit communities like r/3Dprintmything to find immediate project requests.
A simple website is also a good idea. Use a platform like Carrd or Squarespace to build a one-page site. It should feature a gallery of your work, a list of materials you offer, and a clear contact form for quotes. This gives you a professional hub to direct potential clients to.
Find customers offline
Do not overlook local opportunities. Attend maker faires or craft shows to showcase your prints and talk to potential customers directly. You can also reach out to local engineering firms, architecture studios, and university departments that may need prototypes.
Many new owners spend on marketing without a clear goal. To avoid this, track your Customer Acquisition Cost (CAC). Divide your monthly marketing spend by the number of new customers. A good starting target is to keep your CAC under $50 per customer.
Here are 4 immediate steps to take:
- Create a portfolio with high-quality photos of at least 10 of your best prints.
- Post your services and portfolio on the r/3Dprintmything subreddit.
- Identify three local engineering or architecture firms to contact with your portfolio.
- Set up a spreadsheet to track where each new customer comes from.
Step 9: Set your pricing strategy
Most print jobs use a cost-plus model. You calculate your direct costs and add a markup for overhead and profit. A typical markup on materials and machine time is between 300% and 500%. This ensures you cover hidden costs like failed prints and machine maintenance.
For highly specialized parts, you might consider value-based pricing. If your print saves a client significant time or money, your price should reflect that value. This works best when you serve a niche B2B market that needs functional, hard-to-source components.
Calculate your print costs
A frequent mistake is to only charge for materials. To be profitable, you must account for machine time, labor, and overhead. Use your slicer software to get an accurate estimate of print time and material usage for every quote.
- Material Cost: Calculate the cost per gram of your filament or resin.
- Machine Time: Assign an hourly rate to each printer, from $1 to $3, to cover electricity and depreciation.
- Labor: Factor in time for file preparation, post-processing, and packing.
For example, a 100-gram print that runs for 8 hours might have $2.50 in material costs and $16 in machine time ($2/hour). After adding labor and your markup, the final price would be much higher than the simple material cost.
Here are 4 immediate steps to take:
- Calculate the cost-per-gram for your primary filament and resin.
- Set an hourly rate for your printer that covers electricity and depreciation.
- Price a benchmark model using your cost-plus formula.
- Compare your benchmark price to a quote from an online service like Craftcloud.
Step 10: Scale with quality control
To build a reputation for reliability, create a quality control checklist. For every print, inspect for layer separation, warping, and surface blemishes. Use digital calipers to confirm dimensional accuracy, and aim for a tolerance of +/- 0.5% on critical features.
A frequent mistake is to ship prints with minor flaws to meet deadlines. This can damage your brand over time. A consistent inspection process ensures every part that leaves your shop meets a professional standard, which builds customer trust and repeat business.
Know when to grow
Use clear metrics to guide your expansion. When you consistently process over 15 orders per week or your lead times stretch beyond seven days, it is time to invest in another printer. This prevents bottlenecks and keeps customers happy.
Once you reach a steady $5,000 in monthly revenue, you can consider a part-time technician. As your printer fleet grows, move from a spreadsheet to print farm software like OctoFarm or AstroPrint to manage your queue and monitor jobs remotely.
Here are 4 immediate steps to take:
- Draft a quality inspection checklist for your prints.
- Set a target for dimensional accuracy, like +/- 0.5%.
- Define the weekly order volume that will trigger buying a new printer.
- Look at the features of a print farm manager like OctoFarm.
Starting a 3D printing business is a journey of precision. Remember that your reputation is built one perfect layer at a time. Focus on quality over speed, and each successful print will become your best marketing. You have the roadmap, now go build your future.
And when it is time to get paid, keep things simple. JIM turns your phone into a card reader for a flat 1.99% fee, with no extra hardware. Your money is available instantly. Download JIM and get ready for your first sale.
.avif)


