
Starting a personal training business is an exciting venture where you can turn your passion for fitness into a career. The market is worth billions, and there's steady demand for trainers who help with weight loss, athletic conditioning, and senior fitness.
This guide will cover the practical steps, from validating your business idea and securing the right permits to acquiring equipment, to help you launch a successful personal training business in the U.S.
Step 1: Plan your business and validate your idea
Your first move is to define your target client. Will you focus on athletes, seniors, or new mothers? A specific niche helps you tailor your services and marketing. Many new trainers try to appeal to everyone, which often results in connecting with no one.
Once you have a niche, research your local market. Use Google Maps to find nearby trainers and check directories like the IDEA Health & Fitness Association. Analyze their prices and packages, but avoid the temptation to underprice your services just to compete.
Startup costs
A realistic startup budget falls between $1,500 and $5,500. Key expenses include certification from a body like NASM or ACE ($500-$2,000), annual liability insurance ($300-$500), and business registration fees which can be up to $500 depending on your state.
Basic equipment like resistance bands, mats, and kettlebells can cost around $500. You should also set aside $200 to $1,000 for initial marketing, such as a simple website and business cards, to get your first clients through the door.
Here are 4 immediate steps to take:
- Identify a specific client niche you want to serve.
- Research three local competitors to understand their pricing and services.
- Draft a preliminary budget that lists all potential startup expenses.
- Check your state's official website for business registration fees.
Step 2: Establish your legal framework and obtain licenses
You might want to consider forming a Limited Liability Company (LLC). It separates your personal assets from business debts. Many new trainers operate as sole proprietors, but this offers no liability protection if a client gets injured, putting your personal finances at risk.
To form an LLC, you file Articles of Organization with your Secretary of State, with fees from $50 to $500. This structure also offers tax flexibility. You can be taxed as a sole proprietor or elect S Corp status later for potential savings as your income grows.
Licenses and permits
Once your business is registered, get an Employer Identification Number (EIN) from the IRS. It is free and you can apply online. You will need an EIN to open a business bank account or hire employees. This is a non-negotiable step for a legitimate operation.
Next, check with your city or county clerk for a general business operating license. Costs vary but expect to pay between $50 and $200 annually. Processing can take a few weeks, so it is smart to start this early to avoid delays in your launch.
The personal training industry is not government-regulated like medicine. However, certifying bodies like the National Academy of Sports Medicine (NASM) and the American Council on Exercise (ACE) act as the industry's de facto regulators, setting the professional and ethical standards you must follow.
Here are 4 immediate steps to take:
- Decide on a business structure, like an LLC, for liability protection.
- Apply for a free Employer Identification Number (EIN) on the IRS website.
- Contact your local city clerk to inquire about a business operating license.
- Ensure your professional certification from a body like NASM or ACE is active.
Step 3: Secure your insurance and manage risk
Insurance types and costs
Protection for your business starts with the right insurance. Professional liability insurance is your first line of defense if a client claims your advice led to an injury. General liability covers other accidents, like a client who trips over a kettlebell in your studio.
A combined policy with $1 million in coverage typically costs between $300 and $500 annually. Many new trainers mistakenly believe the gym's insurance protects them. This is rarely true for independent contractors, so you should secure your own dedicated policy.
You might want to get quotes from providers that focus on fitness, such as Insure Fitness Group, K&K Insurance, or NEXT Insurance. They understand the industry's unique risks better than general agents. If you train clients in a home gym, also consider property insurance for your equipment.
Here are 4 immediate steps to take:
- Request quotes for a combined general and professional liability policy.
- Contact at least two specialized fitness insurance providers.
- Verify whether your gym's policy offers any coverage for you.
- Assess if you need property insurance to cover your equipment.
Step 4: Choose your location and buy equipment
You can train clients in their homes, outdoors, or lease a small studio. If you lease, a 500 to 1,000-square-foot space is a good start. Check with your city’s planning department about zoning laws; you will likely need a space zoned for commercial or retail use.
When you negotiate a lease, ask for a shorter term, like one or two years, to maintain flexibility. You might also request a tenant improvement allowance. This is a credit from the landlord to help pay for mirrors or rubber flooring, which can be a significant initial expense.
Stock your training space
Focus on versatile equipment first. A common mistake is to overspend on complex machines. You can build a solid business with starter gear like kettlebells ($50-$200 each), resistance band sets ($20-$50), and stability balls ($30-$60). Look at suppliers like Rogue Fitness or Perform Better.
Here are 4 immediate steps to take:
- Check your city’s zoning laws for fitness businesses.
- Draft a list of starter equipment with a budget.
- If leasing, ask the landlord about a 1- or 2-year lease term.
- Compare prices for basic gear from suppliers like Rogue Fitness.
Step 5: Set up your payment processing
Payment options and contracts
Most trainers offer session packages, like 10 or 20 at a time, or charge a flat monthly fee. You might want to require payment upfront for packages to secure your income. For ongoing clients, setting up recurring monthly payments helps create predictable cash flow.
While some trainers start with cash or checks, modern clients expect to pay with cards or digital wallets. A dedicated payment system makes you look more professional and simplifies your bookkeeping. Look for a solution that can handle both one-time and recurring payments.
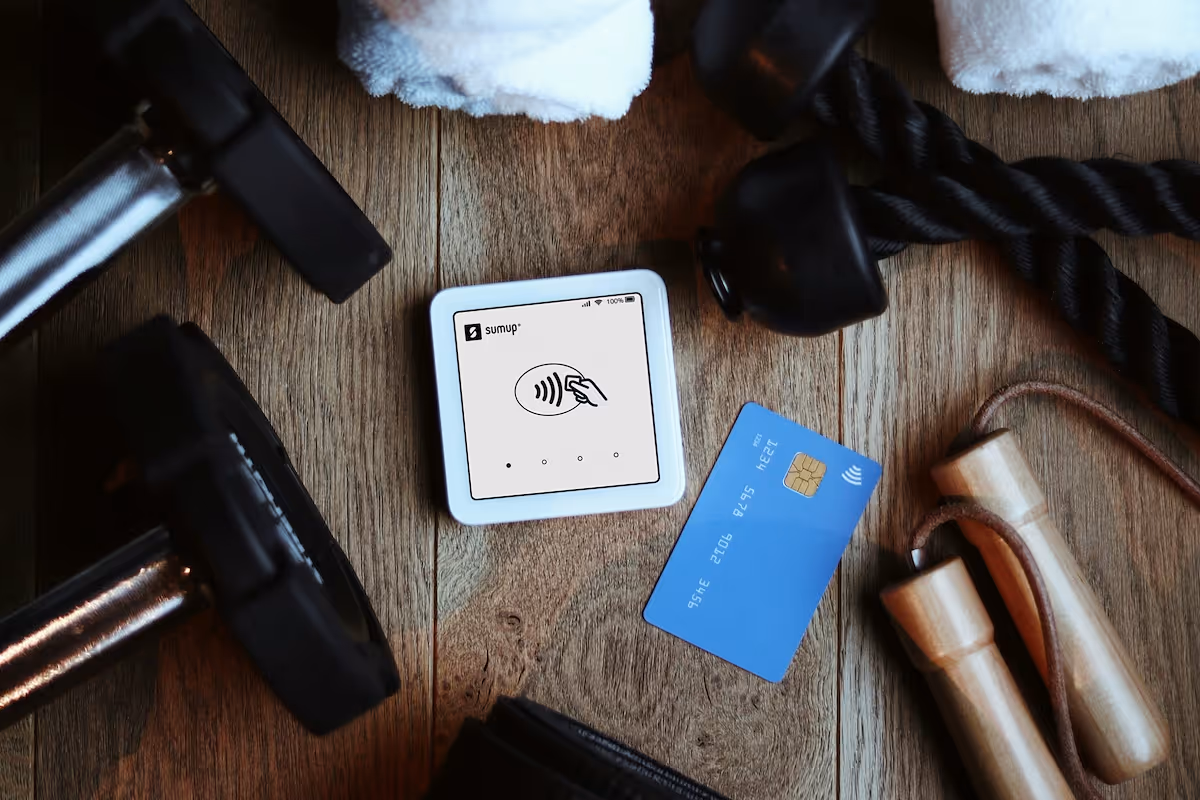
For personal trainers who accept payments on-site or on-the-go, JIM offers a streamlined solution. With JIM, you can accept debit, credit and digital wallets directly through your smartphone. Just tap and done.
At just 1.99% per transaction with no hidden costs or extra hardware needed, it's particularly useful for collecting payment after a session at a client's home. Average commission rates from other providers are often higher, and may include extra fees.
Getting started is straightforward:
- Get Started: Download the JIM app for iOS.
- Make a Sale: Type the sales amount, hit sell, and ask your customer to tap their card or device on your phone.
- Access Funds: Your money is available right on your JIM card as soon as the sale is done, with no waiting for bank transfers.
Here are 3 immediate steps to take:
- Decide whether to offer session packages or monthly retainers.
- Look for a payment solution that supports recurring billing.
- Download the JIM app to see how it works on your phone.
Step 6: Fund your business and manage finances
Funding sources
Most trainers start by using personal savings. If you need a boost for equipment or marketing, a small business loan is a good option. You do not need a huge loan to get started. Many trainers secure what they need with less than $10,000.
You might want to look into an SBA Microloan. These range from $500 to $50,000 with interest rates typically between 8% and 13%. Lenders will look for a good personal credit score and a solid business plan. Online lenders like Accion Opportunity Fund also cater to small startups.
Financial management
Once you have funding, you need to manage it. Plan for $3,000 to $6,000 in working capital to cover your first six months. This buffer pays for insurance, marketing, and other costs while you build your client base and establish consistent income.
A frequent misstep is mixing personal and business funds. This complicates taxes and makes it hard to track profitability. As soon as you have your EIN, open a dedicated business bank account. This simple action keeps your financial records clean from day one.
Here are 4 immediate steps to take:
- Calculate your working capital needs for the first six months.
- Research the requirements for an SBA Microloan on the SBA website.
- Open a dedicated business bank account using your EIN.
- Explore loan options from online lenders like Accion Opportunity Fund.
Step 7: Hire your team and set up operations
Hiring your first trainer
When you have more clients than you can handle, it is time to hire. Look for a certified personal trainer with credentials from a recognized body like NASM or ACE. A frequent misstep is to hire someone based on personality alone without verifying their certification is active.
You will want to decide on a pay structure. Many studios offer a 60/40 split on session fees, with the trainer keeping the larger share. Another option is a flat hourly rate, which typically ranges from $25 to $50 depending on experience and location.
Streamline your operations
As your client list grows, manual scheduling becomes a headache. You might want to use a dedicated software to manage appointments and client progress. Platforms like Trainerize or Acuity Scheduling handle booking, reminders, and even payments, which frees you up to focus on training.
A full-time trainer can typically manage 20 to 25 sessions per week. This metric helps you project revenue. If your session rate is $80, one trainer could generate $1,600 to $2,000 in weekly revenue for the business before their pay split.
Here are 4 immediate steps to take:
- Define a clear pay structure, such as a percentage split or hourly rate.
- Draft a job description that requires a specific, active certification.
- Demo two scheduling software options, like Trainerize and Acuity Scheduling.
- Calculate potential weekly revenue based on hiring one new trainer.
Step 8: Market your business and get clients
Local and digital marketing
Focus your initial marketing on one or two channels. Many new trainers try to be everywhere at once and fail to gain traction. You might want to start with a Google Business Profile to appear in local searches and on maps. Encourage your first few clients to leave reviews.
Social media is also powerful. Use Instagram or Facebook to post client success stories, with their permission, or share short exercise tutorials. This builds credibility and shows potential clients what you can do. A consistent posting schedule, maybe three times a week, is more effective than sporadic updates.
Partnerships and metrics
You can also build a referral network. Connect with local physical therapists, chiropractors, or supplement stores. Offer them a small commission for each client they send your way. This creates a steady stream of qualified leads without a large ad spend.
As you market, track your numbers. A good website conversion rate in the fitness industry is 2-5%. If you run ads, calculate your Customer Acquisition Cost (CAC). If you spend $200 on Facebook ads and sign up two clients, your CAC is $100 per client.
Here are 4 immediate steps to take:
- Set up your Google Business Profile and ask for a review.
- Post one client testimonial or workout tip on Instagram.
- Identify one local business to approach for a referral partnership.
- Calculate a target Customer Acquisition Cost based on your session price.
Step 9: Price your services and create packages
Set your rates
Your pricing structure directly impacts your income stability. You can charge per session, but selling packages of 10 or 20 sessions is often better. This model secures client commitment and improves your cash flow. A monthly retainer is another great option for predictable income.
To set your rates, look at what other trainers in your niche charge locally. A single session often falls between $75 and $100. You could then offer a 10-session package for $700. You might also consider an introductory offer for your first few clients to build momentum.
Many new trainers make the mistake of just undercutting competitors. Instead, calculate your rate based on your expenses and income goals. If your monthly business costs are $500 and you want to take home $4,000, you need to generate $4,500 in revenue. For 60 sessions a month, your rate must be at least $75.
Here are 4 immediate steps to take:
- Research the session rates of three local competitors in your niche.
- Create two package options, like a 10-session pack and a monthly retainer.
- Calculate your target hourly rate based on your monthly expenses and income goals.
- Draft an introductory offer to attract your first five clients.
Step 10: Scale your business and maintain quality
Maintain service quality
To keep your skills sharp, you must complete Continuing Education Units (CEUs). Certifying bodies like NASM and ACE require them to maintain your credentials. For example, NASM requires 2.0 CEUs, or 20 contact hours, every two years. Letting your certification lapse is a mistake that can damage your credibility.
You can track quality with two key numbers: client retention and goal achievement. Aim for a client retention rate above 70%. You might also want to survey clients quarterly to see if they are hitting the goals you set together. This feedback is invaluable.
Know when to grow
The clearest sign you need to expand is when you are consistently booked at 80% capacity and have a waitlist. At this point, you can either raise your rates or hire another trainer to handle the overflow. This prevents burnout and allows you to serve more people.
When you add staff, you might want to upgrade your systems. While Acuity works well for solo operators, a platform like Mindbody is built to manage multiple trainer schedules, payroll, and more complex client management for a growing studio.
Here are 4 immediate steps to take:
- Check the CEU requirements for your specific certification.
- Calculate your current client retention rate.
- Determine your current weekly booking capacity percentage.
- Explore the features of a multi-trainer platform like Mindbody.
You now have the roadmap to launch your personal training business. Remember that your success hinges on the relationships you build. A client's progress is your best marketing. You have the plan, now go and build your career.
As you start, keep payments simple. JIM turns your smartphone into a card reader, so you can accept payments anywhere for a flat 1.99% fee with no extra hardware. Download JIM to make your first sale.
.avif)


