
Starting an excavating business is a rewarding venture that combines hands-on skill with heavy machinery and sharp business savvy. The industry is a multi-billion dollar sector, fueled by consistent demand for earthmoving services in residential construction, commercial development, and public infrastructure projects.
This guide will take you through the practical steps of validating your business idea, securing funding, acquiring the right equipment, and obtaining the necessary permits to help you launch a successful excavating business in the U.S.
Step 1: Validate your business plan
Market and competitor research
First, define your service area. You can use Google Maps to identify all construction sites, new developments, and existing excavating companies within a 50-mile radius. This gives you a clear picture of demand and competition.
Also, check your local county or city planning department's website for public records on recently approved construction permits. This tells you which developers are active and what projects are in the pipeline, giving you a direct list of potential clients to contact.
Estimate your startup costs
Your initial investment will be significant, so a detailed budget is key. Many new owners focus only on the big-ticket machines and forget to budget for operating cash. You should plan to have at least three months of operating expenses in the bank.
Here is a typical breakdown of major startup costs:
- Used Mini Excavator: $30,000 - $50,000
- Heavy-Duty Truck (e.g., Ford F-350): $40,000 - $70,000
- Equipment Trailer: $8,000 - $15,000
- Insurance Down Payment: $3,000 - $6,000
- Business Licensing & Permits: $500 - $2,000
Here are 4 immediate steps to take:
- Identify five active construction projects in your area using public permit records.
- List ten local competitors and note the specific services they advertise.
- Call an insurance agent who specializes in construction to get a preliminary quote.
- Create a draft budget that includes equipment costs and three months of operating expenses.
Step 2: Set up your legal structure and get licensed
Choose your business structure
You should consider a Limited Liability Company (LLC). This structure protects your personal assets if the business is sued. For tax purposes, an LLC uses pass-through taxation, so profits are taxed on your personal return which simplifies paperwork.
An S-Corporation is another option that can offer tax advantages once your business grows, but an LLC is the most straightforward structure to start.
Get the right licenses and permits
Once your business is registered, get a federal Employer Identification Number (EIN) from the IRS website. It is free and you will need it for taxes and banking. Next, check with your state's contractor licensing board for its specific requirements.
A mistake new owners often make is to operate with only a local business license. Most states require a specialty license, like a General Engineering Contractor license, which can take 2-3 months to process. Start that application early to avoid work delays.
Speaking of permits, you will need project-specific excavation permits from your local building department. These can cost between $500 and $2,000. Also, always contact 811 before you dig to locate underground utility lines. This is a legal requirement that prevents dangerous accidents.
Here are 4 immediate steps to take:
- File for an LLC with your state's Secretary of State office.
- Apply for a free EIN on the IRS website.
- Identify the specific contractor license required by your state licensing board.
- Call your local building department to understand their excavation permit process.
Step 3: Secure your insurance and manage risk
Get the right coverage
You will need a General Liability policy with at least $1 million in coverage, though $2 million is better. Combined with Commercial Auto insurance, your annual premiums will likely be between $7,000 and $12,000. This cost can be a surprise, so budget for it.
Beyond basic liability, you need policies that cover your specific operations. Many new owners overlook these and find themselves with major coverage gaps after an incident.
- Inland Marine Insurance: This protects your excavator and other equipment while it is on a job site, in storage, or in transit.
- Workers’ Compensation: Most states require this as soon as you hire your first employee. It covers medical costs and lost wages from job-related injuries.
You should work with an insurance provider who understands construction, like The Hartford or Hiscox. A general agent might sell you a cheaper plan, but it may exclude critical risks like trench collapse or underground utility damage, leaving you exposed.
Handle job site risks
Insurance is your safety net, but daily diligence is your first line of defense. Before you break ground, always have the 811-utility locate ticket in hand. Also, perform and document daily equipment safety checks to reduce liability in case of an accident.
Here are 4 immediate steps to take:
- Contact an insurance broker who specializes in the construction industry.
- Request a quote for a $2 million general liability policy.
- Ask about adding an inland marine policy to cover your equipment.
- Confirm your state's workers' compensation insurance requirements.
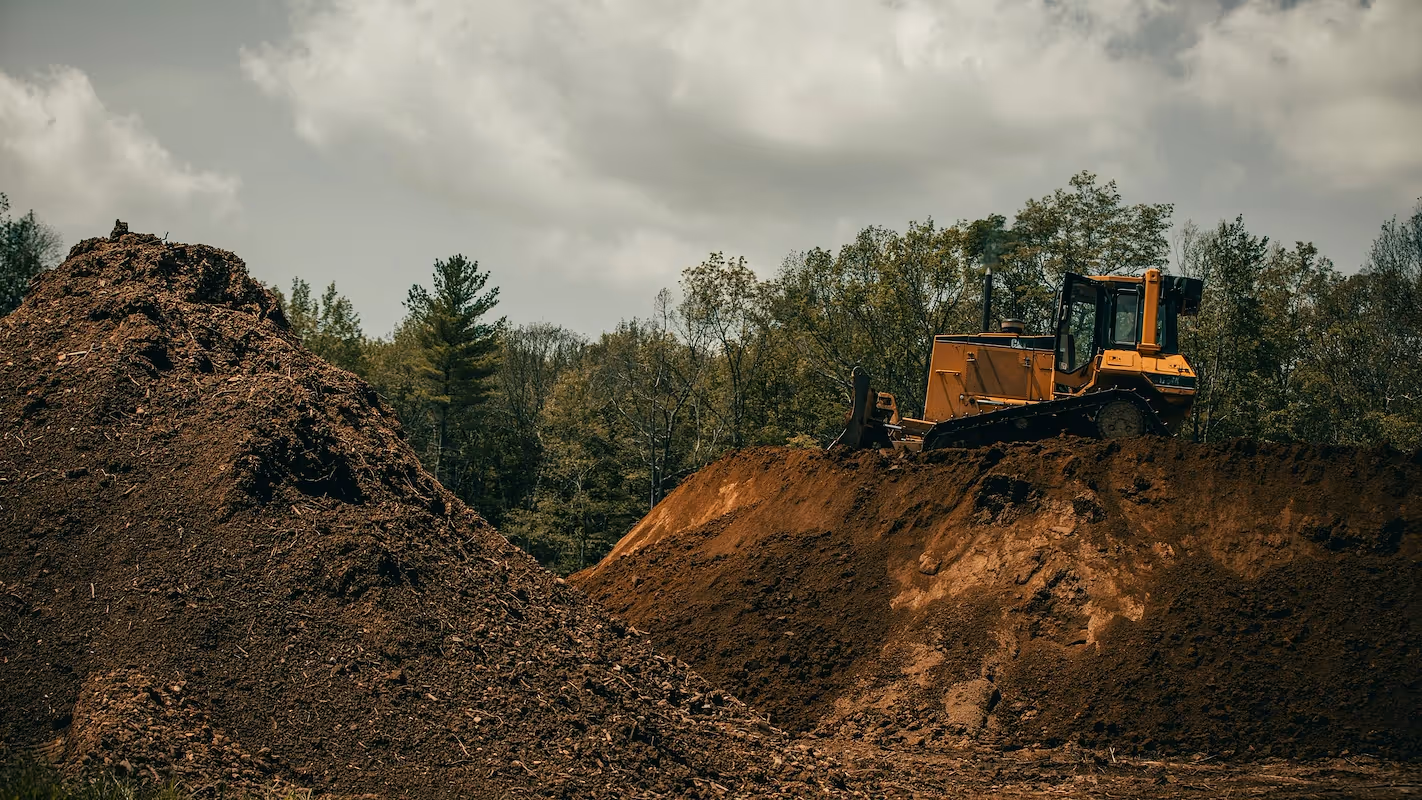
Step 4: Secure your yard and acquire equipment
Find a location for your equipment
You need a yard, not a fancy office. Look for properties zoned for light industrial or commercial storage. A quarter-acre, or about 10,000 square feet, provides enough space for your machines and materials without excess cost. This keeps your overhead low.
When you find a spot, try to negotiate a one or two-year initial lease. This gives you flexibility. Ask the landlord for a cap on annual rent increases, like 3-5 percent, to keep your future costs predictable. This is a standard request.
Purchase your first machines
Your machinery purchase is a major budget item, so smart buys are important. Many new owners make the mistake of buying new, which can drain cash reserves. You can find reliable used equipment for 40-60% less than the price of a new machine.
Focus on these core pieces to start. You can find quality used models from dealers like Ritchie Bros. or from local rental companies that sell off their fleet.
- Mini Excavator: $30,000 - $50,000
- Skid Steer: $25,000 - $40,000
- Heavy-Duty Dump Trailer: $8,000 - $15,000
Here are 4 immediate steps to take:
- Search online commercial real estate sites for quarter-acre lots zoned for industrial use.
- Contact a commercial real estate agent to ask about typical lease terms in your area.
- Browse used equipment listings on Ritchie Bros. to gauge current prices.
- Call a local equipment rental company to ask if they sell used machines from their fleet.
Step 5: Set up your payment processing
Define your payment terms
For residential jobs, require a 50% deposit to secure the booking and cover initial costs. The final balance should be due immediately upon completion. For commercial clients, Net 30 terms are standard, but you should run a credit check before extending this courtesy.
Many new owners rely only on checks and bank transfers, which can create cash flow problems. You need a way to accept immediate payment on-site, especially for smaller residential projects. This avoids chasing payments and keeps your accounts current.
Choose a payment solution
For an excavating business that needs to accept payments on-site, JIM offers a streamlined solution. With JIM, you can accept debit, credit, and digital wallets directly through your smartphone. Just tap and you are done. Other providers often charge 2.5% to 3.5% plus monthly fees.
At just 1.99% per transaction with no hidden costs or extra hardware needed, it is particularly useful for collecting deposits from homeowners on the spot. This locks in the job without a trip to the bank.
- Get Started: Download JIM app for iOS
- Make a Sale: Type the sales amount, hit sell, and ask your customer to tap their card or device on your phone
- Access Funds: Your money is available right on your JIM card as soon as the sale is done - no waiting for bank transfers
Here are 4 immediate steps to take:
- Draft a standard contract that specifies your payment terms, like a 50% deposit.
- Decide which payment methods you will accept, including cards, checks, and bank transfers.
- Compare JIM's 1.99% rate to other mobile payment solutions.
- Download the JIM app to see how it works on your phone.
Step 6: Secure your funding and manage finances
Explore your funding options
An SBA 7(a) loan is a solid choice for new excavating businesses. Lenders typically offer $50,000 to $150,000 for equipment and startup costs. You will likely need a credit score of 680 or higher and a detailed business plan to qualify for rates around Prime + 3%.
You might also look into equipment financing. With this option, the lender uses the excavator or skid steer as collateral. This can make approval easier than a traditional loan. The terms often align with the machine's expected lifespan, which helps manage cash flow.
Plan your working capital
Many new owners focus on the equipment purchase but forget about daily operating cash. You should have at least six months of working capital set aside. For most startups, this means having $15,000 to $25,000 in the bank to cover fuel, insurance, and maintenance without stress.
Once you have funding, open a dedicated business checking account immediately. Mixing personal and business finances is a common mistake that creates major headaches during tax season. A separate account keeps your bookkeeping clean and professional from day one.
Here are 4 immediate steps to take:
- Contact your local bank to ask about their SBA 7(a) loan requirements.
- Request a quote for equipment financing from a specialized lender.
- Calculate your estimated operating costs for the first six months.
- Open a separate business checking account for your LLC.
Step 7: Hire your team and set up operations
Hire your first operator
Your first hire will likely be an Equipment Operator. This person runs the machinery, performs daily safety checks, and helps manage the job site. For an experienced operator, a pay range of $25 to $40 per hour is competitive in most markets.
Look for candidates who hold an OSHA 10-hour construction safety card. If your operator will also transport equipment, they will need a Commercial Driver’s License (CDL). The specific class of CDL depends on the total weight of your truck and trailer.
A mistake some new owners make is hiring based on a resume alone. You should always conduct a paid, hands-on skills test on your own machine. This confirms their proficiency and safety awareness before you commit to a full-time hire.
Set up your daily operations
To keep projects on schedule, you can use field management software like HCSS HeavyJob to assign tasks and track hours. This gives you a clear view of job profitability. As a benchmark, one skilled operator should help your business generate $150,000 to $200,000 in annual revenue.
When you hire, classify your team as W-2 employees. Some businesses try to use 1099 independent contractors to save on payroll taxes, but this misclassification can result in serious penalties from the IRS if the worker is deemed an employee.
Here are 4 immediate steps to take:
- Draft a job description for an Equipment Operator listing key responsibilities.
- Check your state’s DMV website for CDL requirements based on your vehicle’s weight.
- Research payroll service providers that specialize in construction.
- Find a local OSHA 10-hour training course for your new hire.
Step 8: Market your business and win your first jobs
Build your online presence
Your first step is to claim your free Google Business Profile. This puts your business on Google Maps and in local search results when people look for excavation services. It is one of the most effective ways to get calls.
Next, create a simple one-page website. It only needs to show your services, contact information, and photos of your equipment. A professional site builds credibility with homeowners and contractors. You can build one yourself on Squarespace in a weekend.
Many new owners ignore social media, but a Facebook business page with project photos and videos shows you do quality work. It helps potential clients see your capabilities before they even call you.
Go where the work is
Direct outreach is powerful. Identify five to ten local general contractors and home builders. Introduce yourself and your services. A single good relationship with a builder can provide a steady stream of work for months.
You can also find commercial projects on bidding platforms like the Dodge Construction Network. Some new owners get overwhelmed here. Start by looking for smaller subcontracts that fit your equipment and capabilities.
Lead generation services like Angi or Thumbtack can get your phone to ring, but be careful. Leads can cost $50 to $150 each and are sent to multiple contractors. Your follow-up must be immediate to have a chance.
Here are 4 immediate steps to take:
- Set up and verify your free Google Business Profile.
- Create a one-page website with your services and contact details.
- Make a list of ten local general contractors to contact.
- Research the cost per lead for excavation services on Angi in your area.
Step 9: Set your pricing and win bids
Most jobs are priced by the hour or by the project. For smaller residential work, an hourly rate of $125 to $175 for a mini excavator with an operator is common. Larger commercial projects usually require a fixed-price bid based on a detailed estimate.
Calculate your costs and markup
First, figure out your hourly operating cost. This includes fuel, insurance, maintenance, and your operator's wage. A frequent mistake is to forget to include equipment wear and tear in this calculation. This can lead to pricing that does not cover long-term replacement costs.
Once you have your cost, apply a markup. A standard practice is to multiply your total costs by 1.5 to determine your bid price. This should give you a net profit margin between 20% and 30%, which is a healthy target for this industry.
To see what your market will bear, call a few local competitors and ask for a quote on a simple job, like digging a small trench. This gives you real-world pricing data instead of just guessing what others charge.
Here are 4 immediate steps to take:
- Calculate your hourly operating cost for your mini excavator.
- Call three local competitors to get a quote for a small grading job.
- Decide on a target net profit margin, such as 25%.
- Create a simple bid template for a project-based price.
Step 10: Control your quality and scale your operations
Maintain job site quality
Quality in this business is measured on the job. You will want to aim for a final grade accuracy within one inch of the project plans. Document this with photos before you leave the site. This simple step prevents future disputes over finished work.
A final walkthrough with the client is also a smart practice. Use a simple checklist to confirm all tasks are complete, from trench depth to site cleanup. This ensures the client signs off happy and reduces the chance of callbacks for minor issues.
Know when to grow
Growth should be driven by data, not ambition. Some owners make the mistake of buying more iron too soon. A good rule of thumb is to consider a second machine only when your primary excavator is booked over 80% of the time for three straight months.
Once you pass the $250,000 annual revenue mark, it might be time to hire a dedicated project manager. As you take on more jobs, field management software like Procore can help you manage multiple sites and crews without letting things slip through the cracks.
Here are 4 immediate steps to take:
- Create a simple quality checklist for your final client walkthroughs.
- Track your primary machine’s utilization rate for the next 90 days.
- Set a revenue goal, like $250,000, as your trigger to evaluate expansion.
- Look at a demo of Procore to see how it handles multi-project scheduling.
You have the roadmap to build a solid excavating business. Remember, your reputation for quality work and clear communication will win you more jobs than the biggest excavator. The plan is in place, now go break ground on your future.
As you start, make sure getting paid is simple. JIM turns your phone into a card reader, so you can accept payments on-site for a flat 1.99% fee with no extra hardware. Download JIM and be ready for that first job.
.avif)


