
Starting a canning business is an exciting venture that combines a passion for food preservation with smart business sense. The market for preserved foods is a multi-billion dollar industry, with steady demand for quality canned goods in home pantries, specialty food shops, and restaurants.
This guide will take you through the practical steps of validating your business concept, obtaining necessary licenses and permits, acquiring the right equipment, and building supplier relationships to help you launch a successful canning business in the U.S.
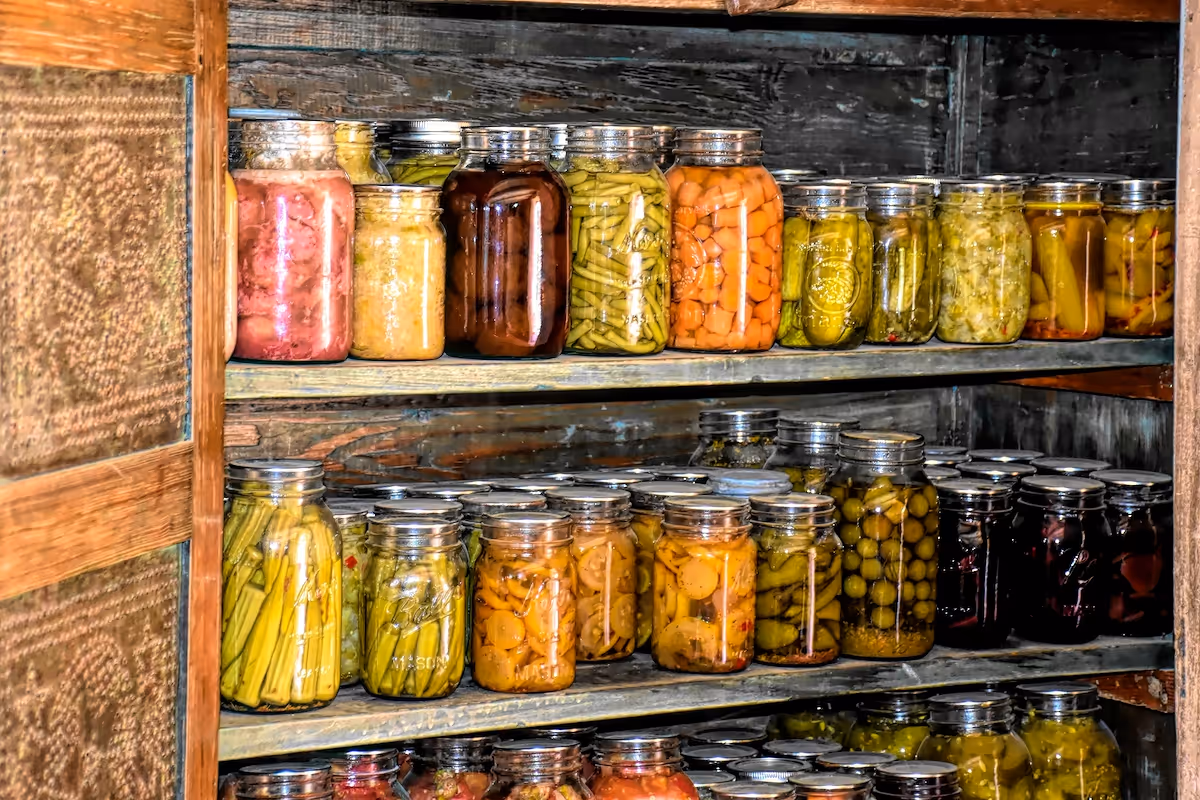
Step 1: Plan your business and validate your idea
Start by researching your local market. Visit farmers' markets and specialty food stores to see what sells. Note the types of jams, pickles, and sauces on shelves, their prices, and what seems popular. This direct observation gives you real-world data.
Next, analyze your potential competitors. Look at their websites and social media to understand their brand story and customer engagement. Pay attention to their product range and packaging design. This helps you find a gap in the market for your unique products.
Estimate your startup costs
Speaking of planning, let's talk about money. Your initial investment will vary, but you can expect startup costs to range from $5,000 to over $15,000. This depends heavily on your production scale and location.
A frequent oversight is underestimating equipment costs. While home gear is cheap, commercial canners and kitchen tools are a must for legal compliance and scale. Budgeting for this from day one prevents costly upgrades and production halts down the road.
Here is a typical breakdown:
- Licensing & Permits: $200 - $1,500
- Commercial Kitchen Rental: $25 - $75 per hour
- Basic Equipment: $3,000 - $10,000
- Initial Inventory (jars, labels, produce): $1,000 - $3,000
Here are 3 immediate steps to take:
- Visit three local stores to analyze competitor pricing and packaging.
- Draft a preliminary budget with estimated costs for equipment and licensing.
- Research your state's cottage food laws to see if you can start from home.
Step 2: Establish your legal entity and secure licenses
First, choose a business structure. An LLC is a solid choice for most canning businesses because it separates your personal assets from business debts. You can file for an LLC through your Secretary of State's office. After that, get a free Employer Identification Number (EIN) from the IRS website.
With your legal structure in place, you must navigate food regulations. The FDA governs acidified foods like pickles, while your state and local health departments oversee general food safety. A frequent misstep is assuming cottage food laws cover all canning. They often do not apply to acidified foods.
Navigate permits and certifications
You will likely need to operate from a licensed commercial kitchen. Your county health department issues the required Food Facility Health Permit, which can take 4-8 weeks to process. For acidified or low-acid foods, you must complete a Better Process Control School (BPCS) course to comply with FDA rules.
- Business License: $50 - $200 from your city or county.
- Food Facility Health Permit: $300 - $1,000 annually.
- BPCS Certification: Course fees are typically $400 - $600.
Here are 4 immediate steps to take:
- Register your business as an LLC with your state.
- Apply for a free Employer Identification Number (EIN) on the IRS website.
- Contact your local health department about commercial kitchen requirements.
- Look up upcoming Better Process Control School (BPCS) course dates.
Step 3: Protect your business with the right insurance
With your legal entity ready, it is time to manage risk. General Liability insurance is your starting point, covering claims like bodily injury at your market booth. A policy with $1 million in coverage is a standard benchmark for food producers.
Understand food-specific coverage
Product Liability insurance is non-negotiable for a canning business. It protects you if a customer gets sick from your product. Some new owners assume general liability is enough, but it often excludes claims from the products themselves, so confirm this detail.
You might also want to add Product Recall insurance. This coverage helps pay for the immense cost of pulling a contaminated product from shelves. Annual premiums for liability policies typically range from $500 to $2,500, depending on your sales volume.
Look for providers that know the food industry, such as the Food Liability Insurance Program (FLIP), Hiscox, or NEXT Insurance. If you hire employees, you will need Workers' Compensation. Also, a Commercial Auto policy is necessary if you use a vehicle for business purposes.
Here are 4 immediate steps to take:
- Request a quote from the Food Liability Insurance Program (FLIP).
- Ask insurers if product liability is included in their general liability policy or separate.
- Inquire about the cost to add product recall coverage.
- Check your state's requirements for Workers' Compensation insurance.
Step 4: Set up your location and buy equipment
You will likely start in a shared commercial kitchen. These spaces are zoned for food production and come equipped with basics. Look for a space with at least 200-500 square feet dedicated to your operation. Check with your city's planning department about specific zoning classifications.
When you review a lease for a kitchen space, ask about existing infrastructure. A pre-installed three-compartment sink or a commercial-grade ventilation hood can save you thousands. These are strong points for negotiation on your monthly rent.
Purchase your canning equipment
Your equipment is a large part of your budget. While it is tempting to use home gear, you need commercial-grade items for safety and legal compliance. Budgeting for this upfront avoids production delays later.
Here are some core items and their typical costs:
- Commercial Pressure Canner: $500 - $2,000
- Calibrated pH Meter: $50 - $200 (a must for acidified foods)
- Large Stainless Steel Stockpots: $100 - $300 each
- Commercial Food Processor: $500 - $1,500
For supplies like jars and lids, look at companies such as Fillmore Container or Uline. They sell by the case, which is typically 12 units, or by the pallet for larger orders. This is often more cost-effective than retail.
Here are 4 immediate steps to take:
- Research local commercial kitchens and their hourly or monthly rates.
- Check your city’s zoning map for areas approved for food production.
- Price out a commercial pressure canner and a calibrated pH meter.
- Request a catalog from a packaging supplier like Fillmore Container.
Step 5: Set up your payment processing
You need a way to get paid, especially at markets where most customers expect to use cards. A simple payment system lets you accept credit, debit, and digital wallets without needing clunky hardware. This makes checkout fast and keeps lines moving.
When you review payment solutions, look closely at the fees. Many providers charge between 2.5% and 3.5% per transaction, sometimes with added monthly costs. A frequent oversight is ignoring these fees, which can quietly reduce your profit margin on every jar sold.
For canning businesses that need to accept payments on-site or on-the-go, JIM offers a streamlined solution. With JIM, you can accept debit, credit and digital wallets directly through your smartphone - just tap and done.
At just 1.99% per transaction with no hidden costs or extra hardware needed, it's particularly useful for quick sales at a busy market stall. This rate is quite competitive, as other providers often have higher average commission rates.
Getting started is straightforward:
- Get Started: Download the JIM app for iOS.
- Make a Sale: Type the sales amount, hit sell, and ask your customer to tap their card or device on your phone.
- Access Funds: Your money is available right on your JIM card as soon as the sale is done - no waiting for bank transfers.
Here are 3 immediate steps to take:
- Compare the transaction fees of two or three payment solutions.
- Download the JIM app to see how it works on your phone.
- Adjust your product pricing to account for a processing fee of around 2%.
Step 6: Fund your business and manage finances
To get your canning business off the ground, you might want to look into an SBA Microloan. These loans range from $500 to $50,000 and are great for startups. Interest rates typically fall between 8% and 13%. Local credit unions are another solid option, often with more flexible terms.
A frequent oversight is mixing personal and business funds. Open a dedicated business checking account as soon as your LLC is formed. This simplifies bookkeeping and protects your personal assets. It also makes you look more professional to lenders and suppliers.
Plan your working capital
You will need enough cash to cover your first six months of operation. This working capital should account for kitchen rent, inventory, insurance, and marketing. A reasonable budget for this period is between $15,000 and $25,000, depending on your production volume.
Also, look into grants specific to food producers. The USDA’s Value-Added Producer Grant (VAPG) helps agricultural producers with projects that add value to their raw commodities. While competitive, securing one can provide a significant financial boost without adding debt.
Here are 4 immediate steps to take:
- Research the SBA Microloan program on the SBA website.
- Open a separate business checking account for your canning business.
- Calculate your estimated working capital needs for the first six months.
- Check the application deadlines for the USDA Value-Added Producer Grant.
Step 7: Hire staff and set up operations
Build your production team
Your first hire will likely be a Kitchen Assistant. This person helps with chopping, sanitizing, and packing. Expect to pay between $15 and $22 per hour. A clear job description is important, even if you hire someone you know. It prevents misunderstandings about responsibilities later.
Most states require food employees to have a Food Handler's Card. This is an online course that takes a few hours to complete and shows they understand basic food safety. You should check your local health department's website for specific rules in your area.
Manage your operations
As you grow, aim to keep labor costs below 30% of your revenue. This is a healthy benchmark for food businesses. For scheduling, you might want to look at apps like Homebase or When I Work. They simplify shift management and time tracking for small teams.
Some owners forget to track production efficiency. You should know how many jars one person can produce per hour. This data helps you forecast labor needs and price your products accurately. Start tracking this from your first production run to stay on top of your numbers.
Here are 4 immediate steps to take:
- Draft a job description for a Kitchen Assistant.
- Check your local health department for Food Handler's Card requirements.
- Calculate your target labor cost per jar based on a 30% revenue benchmark.
- Sign up for a free trial of a scheduling app like Homebase.
Step 8: Market your products and find customers
Farmers' markets are your primary launchpad. Booth fees often run from $50 to $150 per day. This channel provides immediate cash flow and direct customer feedback. A frequent oversight is a weak booth display, so invest in tiered shelving and clear price signs.
Expand your reach online
You should build a presence on visual platforms like Instagram. Post videos of your production process and photos of fresh ingredients. An engagement rate of 3-5% shows potential retail partners that you have an active following. This is a simple metric to track.
You might also want to collaborate with local food bloggers. Offer them a sample pack in exchange for an honest review or a feature. A single mention from a trusted source can send a wave of new customers your way, both online and to your market stall.
Get into retail stores
With some sales data, you can approach independent grocers. Prepare a professional sell sheet that lists your products, wholesale pricing, and case sizes. Retailers will expect a margin of 30-50%, so make sure your wholesale prices account for this from the start.
Here are 4 immediate steps to take:
- Research application deadlines for three local farmers' markets.
- Create an Instagram account and plan your first five posts.
- Draft a one-page sell sheet with your wholesale prices.
- Identify five local stores that could carry your products.
Step 9: Price your products for profit
Start with a cost-plus pricing model. Calculate your cost of goods sold (COGS) for each jar, which includes ingredients, the jar itself, the lid, and the label. You should also factor in your labor time per jar to get a true cost basis.
Many new owners only count direct costs and end up with thin margins. You should also add a small fraction of your overhead, like kitchen rent and insurance, into your COGS calculation for a complete cost picture.
Set your wholesale and retail prices
A healthy gross profit margin for specialty foods is between 60% and 75%. For example, if your total cost per jar is $2.50, a wholesale price of $6.25 gives you a 60% margin. This is the price you sell to stores.
Retailers typically expect a 50% margin, so they will often double your wholesale price. That $6.25 wholesale jar would likely sell for around $12.50 on the shelf. This is your suggested retail price (SRP).
With this in mind, check your competitors' prices. If your SRP seems high, you need to show why your product is worth more. Perhaps it is your organic ingredients or a unique flavor profile. Adjust your price if you need to compete directly.
Here are 4 immediate steps to take:
- Calculate the total cost-per-jar for one of your products.
- Add a percentage for overhead costs to your calculation.
- Set a wholesale price that achieves at least a 60% gross margin.
- Compare your suggested retail price to three similar products in local stores.
Step 10: Maintain quality and scale your operations
Establish your quality standards
Consistency is your reputation. For every batch, you must log the date, ingredients, and a unique batch number. This is your traceability system. For acidified foods, you also need to test and record the pH level, which must be below 4.6 to comply with FDA rules.
Some new owners forget to keep detailed logs. This becomes a major issue if you ever need to trace a product. A simple spreadsheet is enough to start. This practice protects you and shows professionalism to wholesale buyers.
Know when to grow
With a quality system in place, you can plan for growth. A good benchmark for your first hire is when you consistently sell over 500 jars a month. If production alone takes more than 20 hours of your week, it is time to find a kitchen assistant.
You might also want to look at food production software like Wherefour. It helps manage inventory, recipes, and traceability as you scale. This automates tasks that become difficult to handle manually once you have more than a few products.
Here are 4 immediate steps to take:
- Create a batch log template in a spreadsheet.
- Confirm the required final pH for each of your products.
- Set a monthly sales target that would trigger hiring an assistant.
- Request a demo for a food production software like Wherefour.
You now have the roadmap to launch your canning business. Remember that consistency is what builds trust in a food brand, so every jar should taste as good as the last. With a solid plan and a great product, you are ready to build a loyal following.
And when that following wants to buy, a simple payment solution helps. JIM lets you accept cards on your phone for a flat 1.99% fee, no hardware needed. It makes market sales smooth. Download JIM and you are set.
.avif)


