
Starting a commercial fishing business is an exciting venture that combines a passion for the sea and knowledge of marine life with sharp business savvy. The industry represents a multi-billion dollar market, driven by consistent demand for fresh seafood from restaurants, wholesalers, and direct to consumers.
This guide will walk you through the practical steps of validating your business idea, securing funding, obtaining the necessary permits, and acquiring a vessel and gear to help you launch a successful commercial fishing business in the U.S.
Step 1: Validate your business plan
Conduct market and competitor research
Your first move should be to research local seafood demand. Speak with restaurant chefs and fish market managers about their purchasing habits, desired species, and price points. You can also review commercial landings data on the NOAA Fisheries database to see catch volumes in your target region.
Many new operators make the mistake of not scouting their direct competition. Identify other commercial fishers in your port. Take note of their vessel sizes, the species they target, and who buys their catch. This provides a realistic picture of the local market dynamics.
Calculate your startup costs
With this information, you can map out your finances. A used 30-40 foot vessel can range from $50,000 to $150,000. Gear like nets, traps, and lines may add another $10,000 to $30,000, while initial permit fees can run into the thousands of dollars.
You should also plan for monthly operational costs for fuel, bait, ice, and maintenance, which often fall between $5,000 and $10,000. A cash reserve to cover your first six months of operations will help you navigate slow seasons or unexpected repairs.
Here are 3 immediate steps to take:
- List 10 local restaurants or fish markets to interview about their supply needs.
- Review recent commercial landings data for your state on the NOAA Fisheries website.
- Create a preliminary budget that outlines vessel, gear, and six months of operating expenses.
Step 2: Establish your legal structure and licensing
Choose your business structure
You might want to consider forming a Limited Liability Company (LLC). This structure separates your personal assets from business debts, a safeguard if you run into financial trouble. An LLC also offers pass-through taxation, meaning profits are taxed on your personal return, avoiding double taxation.
Navigate federal and state permits
Your next move is securing permits. Federally, NOAA Fisheries manages permits for fishing in federal waters, often for specific species like tuna or swordfish. For state waters, you will work with your state’s Department of Fish and Wildlife. Some new operators face delays by underestimating permit timelines.
Costs can range from a few hundred dollars to over $50,000 for limited-entry permits, which may have waiting lists. Plan for a processing time of 30 days to six months, and apply as early as possible to avoid holding up your launch.
Check local requirements
Don't forget your local obligations. Your city or county will likely require a general business license to operate. In addition, your home port authority will have its own set of rules, including specific fees for mooring, landing your catch, and using port facilities.
Here are 3 immediate steps to take:
- Decide on your business structure and file for an LLC with your state's secretary of state.
- Search the NOAA Fisheries permit database for the federal permits required for your target species.
- Contact your state's Department of Fish and Wildlife to request a commercial licensing packet.
Step 3: Secure your insurance and manage risk
Protect your vessel and operation
Your two primary policies will be Hull & Machinery (H&M) and Protection & Indemnity (P&I). H&M covers physical damage to your vessel and equipment. Expect annual premiums to be 1-3% of your vessel’s insured value. Some operators mistakenly insure for the purchase price, not replacement cost.
P&I insurance handles liability claims, such as crew injuries, property damage from your vessel, or wreck removal. Coverage often starts at $1 million, with annual premiums ranging from $2,000 to $10,000 depending on your vessel size and the fisheries you work.
Cover your crew
Standard workers' compensation does not apply to maritime employees. You will need coverage under a federal law called the Jones Act. This protects you if a crew member is injured due to negligence. Work with an agent who understands these specific maritime requirements.
Speaking of agents, you might want to consider providers like Gowrie Group, LIG Marine, or The Hartford. They specialize in the marine industry and can find policies that fit a commercial fishing operation, unlike a general insurance agent who may miss key coverage needs.
Here are 3 immediate steps to take:
- Request quotes for Hull & Machinery and Protection & Indemnity insurance from a marine specialist.
- Confirm your Hull & Machinery policy is based on replacement value, not just purchase price.
- Discuss Jones Act coverage with your insurance agent to ensure your crew is properly insured.
Step 4: Secure your vessel and gear
Find the right vessel
Focus your search on used vessels in the 30-40 foot range, which typically cost between $50,000 and $150,000. Before you buy, you should hire a marine surveyor for a pre-purchase inspection. This costs about $20-$25 per foot but can save you from buying a boat with costly hidden problems.
Secure a home port and equipment
With a vessel in mind, contact your local port authority or harbor master to inquire about slip availability. Monthly fees often range from $15 to $30 per foot of boat length. You might want to ask if they offer a discount for paying annually, which can sometimes save you 10-15%.
Now you can outfit your boat. For gear, check suppliers like Englund Marine & Industrial Supply or Hamilton Marine. A new gillnet can cost $2,000, while a set of 50 commercial crab pots may run you $4,000. Most suppliers do not have minimum orders for standard items.
Here are 3 immediate steps to take:
- Get a quote for a pre-purchase marine survey on a potential vessel.
- Contact your local port authority to check slip availability and annual fees.
- Price out a complete gear package from a marine supplier for your target fishery.
Step 5: Set up your payment processing
Manage your wholesale accounts
Most of your income will likely come from wholesalers who pay via check or bank transfer. Standard payment terms are often Net 30, meaning you get paid 30 days after your invoice. You can try to negotiate Net 15 terms to improve your cash flow.
Some new owners run into trouble by not having a clear invoicing system from day one. Use a simple template that details the catch, weight, price, and payment due date. This avoids confusion and helps you track who owes you money.
Set up for direct sales
Selling your catch directly from the boat can boost your profits. For these on-the-go sales, JIM offers a streamlined solution. With JIM, you accept debit, credit, and digital wallets directly on your smartphone. Just tap and you are done.
At just 1.99% per transaction with no hidden costs or extra hardware, it is a great fit for quick dockside sales. Other payment providers can charge between 2.5% and 3.5% plus monthly fees, so the savings add up quickly.
- Get Started: Download the JIM app for iOS.
- Make a Sale: Type the sales amount, hit sell, and ask your customer to tap their card or device on your phone.
- Access Funds: Your money is available on your JIM card as soon as the sale is done. No waiting for bank transfers.
Here are 3 immediate steps to take:
- Create a simple invoice template for your wholesale buyers.
- Download the JIM app to see how it works for direct sales.
- Ask your top three potential wholesale buyers about their standard payment terms.
Step 6: Secure funding and manage your finances
Find your funding
You will need significant capital. The NOAA Fisheries Finance Program offers loans specifically for vessels and gear. These government-backed loans often have favorable terms but may require a 10-20% down payment and a strong business plan that outlines your projected catch and revenue.
You can also look into SBA 7(a) loans. While not specific to fishing, they support small business startups. Lenders will want to see good personal credit and some industry experience. Expect interest rates between 5% and 9% depending on your qualifications and the lender.
Manage your working capital
With funding in mind, you need to plan for day-to-day costs. You should have a cash reserve to cover your first six months of operations. This includes fuel, bait, ice, and repairs. A buffer of $30,000 to $60,000 is a realistic target.
Some new owners run into trouble by mixing personal and business funds. Open a dedicated business bank account as soon as your LLC is formed. This simplifies bookkeeping and makes tax time much easier to manage. It also presents a more professional image to lenders.
Here are 3 immediate steps to take:
- Explore the NOAA Fisheries Finance Program to see if you qualify for a vessel loan.
- Contact your local SBA office to discuss 7(a) loan requirements for small businesses.
- Calculate your estimated operating costs for the first six months to determine your working capital needs.
Step 7: Hire your crew and manage operations
Assembling your team
You will likely need at least one deckhand. Their job includes handling gear, sorting the catch, and maintaining the boat. Pay is almost always a "crew share," not a salary. A deckhand typically earns 5-10% of the catch's value after trip expenses like fuel and ice are deducted.
Some new captains make the mistake of hiring based on verbal agreements. You should always use a written crew contract that clearly outlines the share percentage and which costs are deducted. This prevents disputes over pay, especially after a less profitable trip.
Set your operational standards
While extensive certifications are not always required for deckhands on smaller vessels, crew with Basic First Aid and CPR training are a major asset. For larger operations or those in federal waters, a Transportation Worker Identification Credential (TWIC) may be necessary for port access.
A typical revenue split gives 60% to the boat to cover ownership costs and profit, with the remaining 40% divided among the crew. Clear communication before each trip about the day's plan and safety procedures is more effective than any management software for a small crew.
Here are 3 immediate steps to take:
- Draft a crew share agreement that details how net revenue is split after trip costs.
- Network at your local docks to find two potential deckhands with experience.
- Check TWIC card requirements for your home port and planned fishing areas.
Step 8: Market and sell your catch
Build your wholesale relationships
Your primary sales channel will be wholesale. Focus on building relationships with at least 3-5 regular buyers, like restaurant chefs and fish market managers. This diversification protects you if one buyer's demand drops. Top chefs often pay a premium for consistent, high-quality product.
Many new operators make the mistake of relying on a single buyer. A better approach is to spread your catch across several accounts. This creates a stable revenue base and gives you more negotiating power on price.
Explore direct-to-consumer sales
Selling directly to customers from the dock or at a farmers' market can boost your profit margins by 25-50%. You can use a simple Facebook or Instagram page to post photos of your daily catch and announce when you will be at the dock.
Another option is a Community Supported Fishery (CSF). In this model, customers pay upfront for a weekly share of your catch during the season. This provides excellent working capital but requires you to manage logistics for distribution.
Here are 3 immediate steps to take:
- Identify five local restaurants or markets to approach as potential buyers.
- Set up a simple Facebook or Instagram page to post photos of your daily catch.
- Research one existing Community Supported Fishery (CSF) program to understand its model.
Step 9: Set your pricing strategy
Determine your dock price
Your baseline is the "ex-vessel" price, which is what processors pay at the dock. Check daily market reports from sources like Urner Barry to see current rates for your species. You can also call a few local buyers before you head out to get a feel for the day's price.
Some new operators make the mistake of accepting the first offer they get. Always get quotes from at least two buyers, as prices can vary between them. A difference of just $0.25 per pound adds up quickly over a thousand-pound trip. Quality and size also dictate your price, so handle your catch carefully.
Price for direct sales
For direct-to-consumer sales, you can often mark up your price by 25-50% over the dock price. For example, if the ex-vessel price for rockfish is $2.00 per pound, you might sell it directly from your boat for $3.00 per pound, or even more if it is filleted.
With this in mind, walk through a local farmers' market or fish shop to see what they charge for similar products. This helps you find a competitive price point. Remember to account for your extra time and costs like bags and ice, otherwise your direct sales may not be as profitable as you think.
Here are 3 immediate steps to take:
- Check today's ex-vessel price for your target species with two local processors.
- Visit a local farmers' market to see what competitors charge for direct sales.
- Calculate your break-even price per pound based on trip costs and expected catch volume.
Step 10: Maintain quality and scale your operation
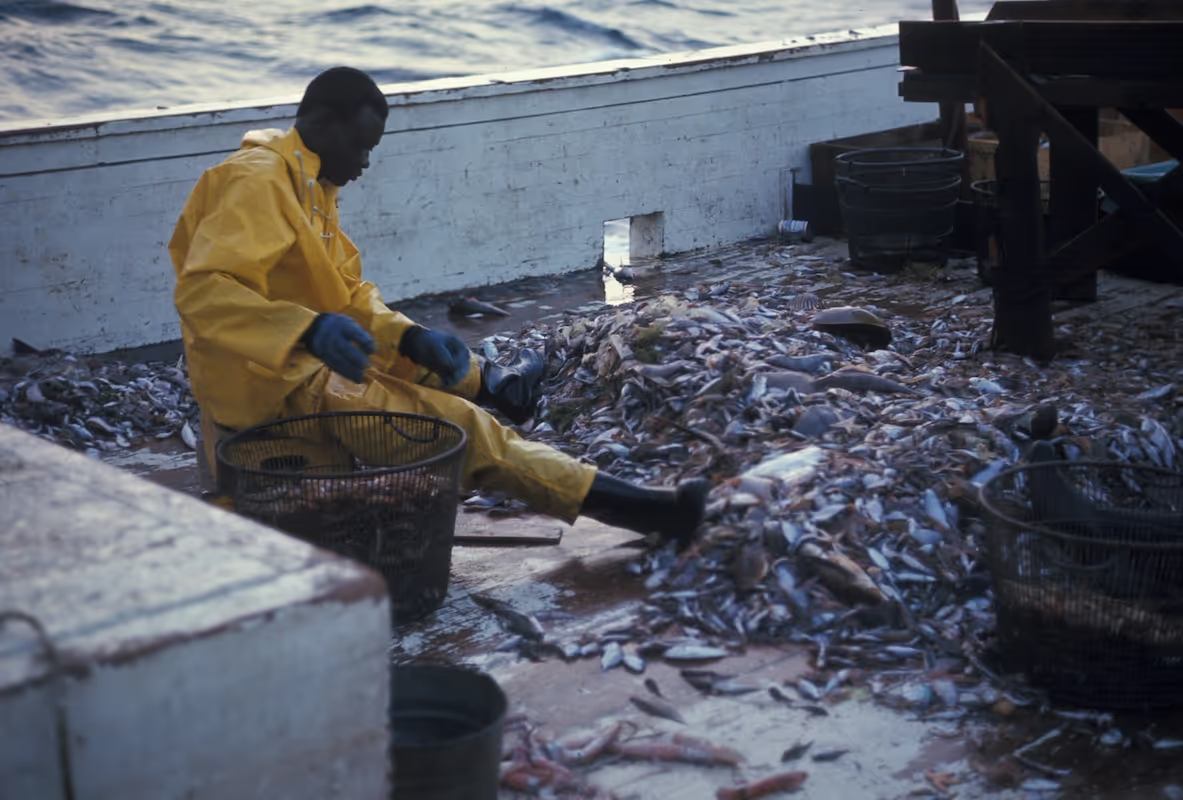
Focus on quality control
Top prices go to the best-handled fish. Bleed your catch immediately and get it on ice within minutes. A good rule is to maintain a 1:2 ice-to-fish ratio by weight to keep temperatures below 40°F. Some buyers will pay a premium for this level of care.
Many new operators lose money from poorly handled product. A bruised or poorly iced fish can drop in value by 30-50%. You might also want to look into Hazard Analysis and Critical Control Points (HACCP) principles, as many processors follow these food safety standards.
Know when to scale
With your quality dialed in, you can think about growth. Consider hiring another deckhand when you consistently hit your catch limit before the day is over. A larger vessel makes sense once you have 6-12 months of steady profits and have to turn down regular buyers.
For managing operations, you can use digital logbooks like Deckhand or FishTrax to track catch data. This information helps you prove your catch history, which is valuable when you decide to sell your permit or business down the line.
Here are 3 immediate steps to take:
- Create a quality control checklist for your vessel, including temperature logs.
- Set a revenue target that will trigger hiring an additional deckhand.
- Research the basic principles of a HACCP plan for seafood handling.
You have a solid map to launch your commercial fishing business. Remember, the quality of your catch and the relationships you build with buyers are just as important as the boat you choose. With careful planning and hard work, you can build a profitable life on the water.
As you build those relationships, especially with direct sales, getting paid should be simple. JIM lets you accept cards on your smartphone for a flat 1.99% fee, no hardware needed. This keeps your dockside sales moving smoothly. Download JIM and you are set.
.avif)


