
Starting a fishing lure business is a rewarding venture that combines craftsmanship and a love for fishing with smart business sense. The market is worth billions of dollars, with steady demand for quality lures from freshwater anglers, saltwater enthusiasts, and tournament professionals.
This guide will take you through the practical steps of validating your business concept, obtaining necessary licenses, acquiring equipment, and building supplier relationships to help you launch a successful fishing lure business in the U.S.
Step 1: Validate your business plan
Begin by researching your niche. Visit local bait and tackle shops to see what sells and what is missing. You can also browse online fishing forums like BassResource to understand what anglers are actively discussing and looking for in a lure.
Next, analyze your competition. Look at sellers on marketplaces like Etsy and Tackle Warehouse. Note their lure designs, pricing strategies, and how they photograph their products. This helps you find a gap in the market for your unique designs.
Estimate your startup costs
Speaking of costs, your initial investment will likely range from $900 to $2,800, depending on your starting scale. A frequent oversight is under-budgeting for safety, so you might want to plan for a proper ventilation system from day one.
Break down your budget into key areas. Molds and materials like plastisol and pigments can run from $500 to $1,500. Basic equipment, including a melting pot and safety gear, will add another $300 to $800. Set aside $100 to $500 for business registration.
Here are 3 immediate steps to take:
- Spend a weekend visiting local tackle shops to analyze their lure selection and pricing.
- Identify five online competitors and document their top-selling products and price points.
- Create a detailed startup budget using the cost categories provided.
Step 2: Establish your legal structure
Most new lure makers choose a Limited Liability Company (LLC). It protects your personal assets, like your home and car, if the business faces debt or a lawsuit. This structure costs between $50 and $500 to set up, depending on your state.
An LLC also offers pass-through taxation, meaning business profits pass to your personal tax return and simplify filings. While a sole proprietorship is easier to start, it offers no liability protection, putting your personal finances at risk from business issues.
Secure your licenses and permits
Once your business is structured, you will need a general business license from your city or county clerk's office, which usually costs $50 to $100 annually. You will also need a seller's permit from your state's department of revenue to collect sales tax.
The U.S. Fish and Wildlife Service does not typically license lure makers. Still, you might want to check with your state's Department of Fish and Wildlife for any specific local rules. This simple check can prevent future compliance headaches.
Here are 3 immediate steps to take:
- Check your Secretary of State's website for LLC filing fees and forms.
- Find your local city or county clerk's office online to download a business license application.
- Visit your state's department of revenue website to apply for a seller's permit.
Step 3: Protect your business with insurance
You will need general liability insurance to cover accidents or property damage. For a lure business, product liability coverage is just as important. This protects you if a defective lure causes injury or property loss. Expect to pay between $400 and $900 annually for a $1 million policy.
Many new owners assume their homeowner's policy covers their business, but it almost never does. You should get a separate commercial property policy or a home-based business endorsement. This covers your equipment, like melting pots and molds, from fire or theft.
As your business grows, you might also need workers' compensation if you hire employees or commercial auto insurance for a dedicated delivery vehicle. For now, focus on liability and property. You can get quotes from providers like The Hartford, Hiscox, or Next Insurance who specialize in small businesses.
Here are 3 immediate steps to take:
- Request general and product liability quotes from two of the recommended providers.
- Review your current homeowner's or renter's insurance policy for business activity exclusions.
- Create an inventory of your equipment and materials to determine the amount of property coverage you need.
Step 4: Set up your workspace and buy equipment
Most lure makers start in a garage or shed. A 100-square-foot area provides plenty of space. Before you begin, check your city’s zoning rules for home businesses. You want to ensure light manufacturing is permitted to avoid any future issues.
A frequent oversight is poor ventilation. Plastisol fumes require an open workspace, so a garage with the door up is a minimum. You might want to install a dedicated exhaust fan system for safety as you grow. This is a smart early investment.
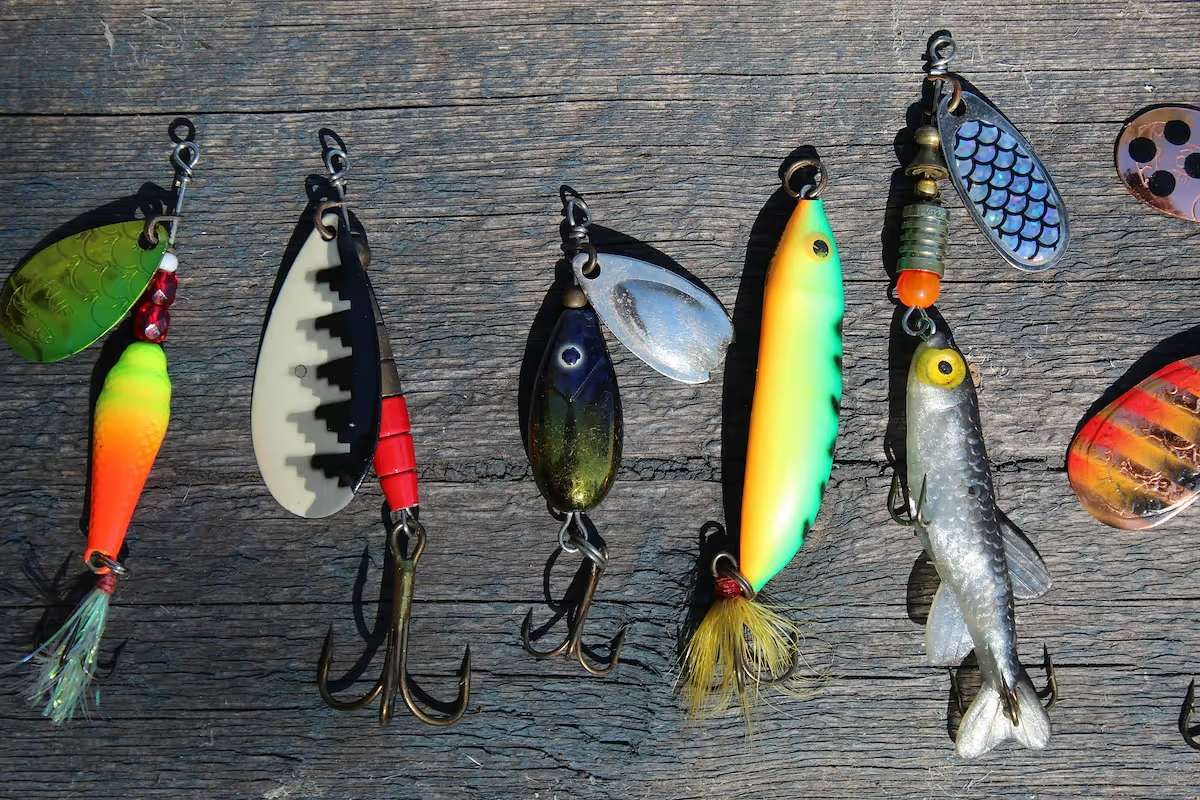
Gather your gear and materials
Your main equipment includes a melting pot, like a Lee Production Pot IV, which costs $70 to $120. You will also need aluminum molds from a place like Do-It Molds. These typically run from $40 to $100 each, depending on the design's complexity.
For materials, start with a gallon of plastisol from suppliers like Lure-Craft or Bait Plastics for about $50 to $80. Many new makers buy too much material at once. It is better to start with small quantities of plastisol and a few popular colors to test designs first.
Here are 3 immediate steps to take:
- Check your city’s website for home occupation zoning ordinances.
- Create a starter equipment list and budget for a melting pot, two molds, and safety gear.
- Compare one-gallon plastisol prices from two suppliers like Lure-Craft and Bait Plastics.
Step 5: Set up your payment processing
When you sell lures, you need a way to get paid. For an online store, platforms like Shopify or BigCommerce have built-in payment processing. Most customers will use credit cards, debit, or digital wallets, and these platforms handle it all.
For in-person sales at fishing expos, you need a mobile option. A frequent misstep is overlooking transaction fees, which often run from 2.5% to 3.5% and may require buying a card reader. You should look for a solution with transparent, low rates.
For lure makers who need to accept payments on-site or on-the-go, JIM offers a streamlined solution. With JIM, you can accept debit, credit and digital wallets directly through your smartphone—just tap and done.
At just 1.99% per transaction with no hidden costs or extra hardware needed, it's particularly useful for selling at fishing expos or local tackle swaps. You avoid the upfront cost of a card reader and keep more of each sale.
- Get Started: Download JIM app for iOS
- Make a Sale: Type the sales amount, hit sell, and ask your customer to tap their card or device on your phone
- Access Funds: Your money is available right on your JIM card as soon as the sale is done - no waiting for bank transfers
Here are 3 immediate steps to take:
- Compare transaction fees for two online payment gateways you might use.
- Download the JIM app to explore its features for in-person sales.
- List the places you plan to sell to choose the right payment mix.
Step 6: Fund your business and manage finances
Find your startup funding
Many lure makers self-fund with personal savings. If you need capital, you might want to look into an SBA Microloan. These government-backed loans range from $500 to $50,000 and are great for new businesses without a long credit history.
To qualify, you will need a solid business plan and a good credit score. Interest rates usually fall between 8% and 13%. These loans are offered through specific nonprofit lenders, which you can find on the SBA's website.
Manage your finances from day one
You should have enough working capital to cover your first six months of expenses. For a small lure business, this is typically between $1,500 and $5,000. This buffer covers materials, marketing, and unexpected costs before sales become consistent.
Open a separate business checking account immediately. It keeps your finances clean for tax purposes and makes your operation look more professional to suppliers. A frequent oversight is mixing personal and business funds, which creates a bookkeeping nightmare.
Start by tracking every transaction in a simple spreadsheet. As you grow, you can move to free accounting software like Wave. Diligently log every purchase of glitter or pigment. These small costs add up and impact your real profit margins.
Here are 3 immediate steps to take:
- Research SBA Microloan lenders in your area through the official SBA website.
- Calculate your estimated operating costs for six months to set a working capital goal.
- Open a dedicated business checking account at your bank or a local credit union.
Step 7: Build your team and streamline operations
Hiring your first helper
You will likely handle everything yourself at first. Once you reach consistent sales of around $2,000 per month, you might want to bring on a part-time Lure Production Assistant. This role typically pays between $15 and $20 per hour.
Their duties would include pouring plastisol, demolding lures, quality control, and packaging orders. A frequent misstep is hiring too soon. You should wait until order volume makes it impossible to keep up alone, otherwise you will hurt your cash flow.
Managing daily operations
No formal certifications are needed for this work, but you must provide thorough safety training. This includes handling hot plastisol and working in a well-ventilated space. Your process is your responsibility.
For operations, you can track your materials with a simple spreadsheet. As you grow, an inventory app like Sortly can help you manage stock levels of plastisol, pigments, and finished lures. This prevents running out of a popular color unexpectedly.
Here are 3 immediate steps to take:
- Set a monthly revenue goal that will trigger your first hire.
- Draft a simple job description for a part-time Lure Production Assistant.
- Create a spreadsheet to track your inventory of materials and finished lures.
Step 8: Market your lures and find customers
Start with visual platforms like Instagram and Facebook. Post high-quality photos and videos of your lures, especially action shots of them in the water. Aim for an engagement rate of 2-3% on your posts, which is a solid benchmark for this niche.
Many new makers only post static product photos. You should also share behind-the-scenes content of your creation process. This builds a connection with fellow anglers and shows the craftsmanship that goes into each lure.
Build your online presence
Beyond social media, online communities offer a direct line to your audience. Join fishing forums like BassResource or The Hull Truth. Participate in discussions genuinely to build credibility before you mention your products. A soft launch here can generate your first sales.
You might also want to collaborate with local fishing guides or micro-influencers. Offer them free lures in exchange for an authentic post or video. This approach can be more effective and affordable than paid ads when you are just starting out.
A frequent oversight is neglecting email. Add a simple signup form to your website or social media profile. An email list is a direct line to your customers that you own, unlike social media followers, and is perfect for announcing new lure drops.
Here are 3 immediate steps to take:
- Set up an Instagram profile and post three high-quality photos of your lures.
- Join one relevant fishing forum and participate in a discussion to build credibility.
- Identify three local fishing micro-influencers for a potential collaboration.
Step 9: Price your lures for profit
Calculate your cost of goods sold
Start with a cost-plus pricing model. First, calculate the total material cost for one lure. This includes plastisol, hooks, pigment, and glitter. A frequent oversight is forgetting packaging costs, which can add another $0.20 to $0.40 per lure.
For example, if a lure costs $1.10 in materials and $0.40 to package, your total cost is $1.50. A standard markup for handmade lures is between 3x and 4x your cost. This gives you a healthy profit margin of around 70%.
Set your market price
With your cost calculated, you can now set a market price. For that $1.50 lure, a 3x markup puts your price at $4.50. This is a solid starting point. You should also research what similar custom lures sell for on Etsy or in local shops.
If competitors price similar lures at $7, your $4.50 price is very competitive. However, avoid pricing too low. Anglers often associate extremely low prices with poor quality, which can hurt your brand perception before you even get started.
Here are 3 immediate steps to take:
- Calculate the total material and packaging cost for one of your main lure designs.
- Research the prices of five comparable handmade lures on Etsy and at a local tackle shop.
- Apply a 3x markup to your total cost to determine your initial selling price.
Step 10: Maintain quality and scale your production
Establish your quality standards
Your reputation depends on consistency. Create a quality checklist for every lure. It should confirm the lure swims straight, the paint is durable, and the hooks are secure. Aim for a defect rate below 3% for bubbles, crooked hooks, or color inconsistencies.
A frequent oversight is skipping water tests. Before you package an order, always test a few lures from each batch in a small tank or pool. This simple step ensures your product performs correctly and prevents customer complaints down the line.
Plan your growth
As sales grow, you will need to scale. Once you hit consistent sales of around $2,000 per month, it is a good time to hire a part-time assistant. This frees you up to focus on design and marketing instead of just production.
You might want to invest in multi-cavity molds for your best-selling designs. When a single lure model sells over 200 units, a multi-cavity mold can triple your output for the same amount of effort. This is a smart way to increase your profit margins.
To manage your growing inventory, consider moving from a spreadsheet to an app like Sortly. It helps you track plastisol, pigments, and finished lures so you never run out of a popular color unexpectedly. This keeps your operations smooth as you expand.
Here are 3 immediate steps to take:
- Create a quality control checklist that includes a water test for each lure design.
- Set a sales benchmark, like 200 units sold, for when to invest in a multi-cavity mold.
- Explore an inventory app like Sortly to see how it could streamline your stock management.
You have the steps to turn your passion into a business. Remember, in the lure world, your unique designs and the stories behind them build a loyal following. You have a clear path forward, so go make that first cast.
And when you make that first sale, you need a simple way to get paid. JIM lets you accept payments right on your smartphone, with no extra hardware and a flat 1.99% fee. It keeps things simple so you can focus on your craft. Download JIM.
.avif)


