
Starting a gelato business can be a rewarding venture, blending culinary artistry with smart business sense. The demand for authentic gelato is strong, making it a lucrative market to enter, but this accessibility does not guarantee success without careful planning.
This guide will take you through the practical steps of validating your concept, securing funding, obtaining licenses, and selecting the right location to help you launch a successful gelato business in the U.S.
Step 1: Plan your business and validate your concept
Start by understanding your local customer base. Use U.S. Census Bureau data to check neighborhood demographics. A great way to get direct feedback is to offer samples at a farmers' market. This tests your recipes and price points before you commit.
Analyze your competition
Use Google Maps to find every dessert shop nearby. Look at their Yelp and Google reviews to see what customers love and what they complain about. This can reveal an unmet need, like a lack of vegan options or unique local flavors.
Many new owners only focus on other gelato shops. Remember that premium ice cream parlors and frozen yogurt spots are also your competition. Analyze their offerings and pricing to position your business effectively.
Estimate your startup costs
With this in mind, you need a realistic budget. Startup costs can range from $40,000 to over $150,000. Expect to spend $20,000-$50,000 on a batch freezer and display case, while store improvements can add another $10,000-$75,000.
A frequent oversight is not budgeting for at least six months of operating expenses as working capital. Also, set aside $3,000-$7,000 for your initial ingredients and supplies, plus about $500-$2,000 for licenses and permits.
Here are 4 immediate steps to take:
- Map all dessert competitors within a five-mile radius using Google Maps.
- Survey 50 potential customers at a local event about flavor preferences.
- Create a preliminary budget with estimated costs for equipment and rent.
- Review your local health department's website for food permit requirements.
Step 2: Set up your legal structure and get licensed
First, choose a business structure. You might want to consider a Limited Liability Company (LLC) to protect your personal assets from business debts. An S Corporation is another option that could reduce your self-employment tax burden, but it requires more formal compliance.
Once you have a structure, get your Employer Identification Number (EIN) from the IRS website. It is free and you will need it for taxes and payroll. Also, register for a state seller’s permit to collect sales tax. This is usually done through your state's department of revenue.
Secure your permits and licenses
Your most important document will be the food facility health permit from your county health department. Many new owners underestimate this process. It can take 60-90 days and cost between $500 and $1,000, so apply as soon as you sign your lease.
You will also need a local business license, which typically costs $50-$100 annually. In addition, every person who handles food must have a Food Handler Permit. These are available online for about $10-$15 per person and take a few hours to complete.
Here are 4 immediate steps to take:
- Decide between an LLC or S Corp and file with your Secretary of State.
- Apply for a free Employer Identification Number (EIN) on the IRS website.
- Contact your county health department for their food facility permit application.
- Budget at least $1,500 for initial licenses and permit fees.
Step 3: Insure your business and manage risk
You will need several types of insurance. General Liability is the foundation, covering customer injuries or property damage. Plan for $1 million in coverage, which typically costs between $500 and $1,200 annually. This protects you from slip-and-fall accidents in your shop.
Next, get Property Insurance. This covers your expensive batch freezers and display cases. A frequent oversight is skipping spoilage coverage. Add it to your policy to protect against losses if a freezer fails overnight, which could ruin thousands of dollars worth of gelato.
If you hire even one employee, you must have Workers' Compensation insurance. This covers medical bills and lost wages if they get injured on the job. Also, if you plan to use a vehicle for deliveries or events, you will need a Commercial Auto policy.
You might want to consider providers who specialize in food businesses, such as the Food Liability Insurance Program (FLIP), Hiscox, or The Hartford. They understand the unique risks of a gelato shop better than a general agent and can offer more relevant coverage options.
Here are 4 immediate steps to take:
- Request a quote for a $1 million General Liability policy.
- Ask your agent to include spoilage coverage in your Property Insurance quote.
- Confirm your state's requirements for Workers' Compensation insurance.
- Contact an insurer like FLIP that specializes in food service businesses.
Step 4: Select your location and buy equipment
Find the right spot
Look for a space between 800 and 1,500 square feet in a commercial zone that permits food service. You can check your city’s zoning map online. High foot traffic is key, so prioritize locations near parks, theaters, or busy shopping streets.
When you negotiate your lease, ask for a Tenant Improvement (TI) allowance to help cover plumbing and electrical upgrades. You might also request an exclusivity clause. This prevents the landlord from leasing another space in the building to a direct dessert competitor.
Purchase your equipment
With a location in mind, you can focus on equipment. A batch freezer will cost $15,000-$30,000, and a dipping cabinet runs $5,000-$20,000. Many new owners look at used equipment to manage costs, but be sure any second-hand purchase includes a warranty.
For supplies like cups and spoons, check WebstaurantStore. For authentic Italian bases and flavorings, suppliers like PreGel or Carpigiani are industry standards. They can guide you on initial orders, which often have minimums of a few hundred dollars.
Here are 4 immediate steps to take:
- Identify three potential locations with high foot traffic and confirm their zoning.
- Ask a potential landlord about a Tenant Improvement allowance and an exclusivity clause.
- Get quotes for a new batch freezer and a dipping cabinet.
- Contact a supplier like PreGel to understand their minimum order for ingredients.
Step 5: Set up your payment processing
Your customers will expect to pay with cards and digital wallets. You need a payment solution that is fast, reliable, and affordable. Many new owners get caught by high transaction fees and monthly charges that can hurt their margins.
Average commission rates from traditional providers often range from 2.5% to 3.5% plus hardware costs. For gelato businesses that need to accept payments on-site or on-the-go, JIM offers a streamlined solution. You can accept debit, credit, and digital wallets directly through your smartphone.
At just 1.99% per transaction with no hidden costs or extra hardware needed, it's particularly useful for selling at farmers' markets or local events. With JIM, you just tap and you are done.
Here is how it works:
- Get Started: Download the JIM app for iOS.
- Make a Sale: Type the sales amount, hit sell, and ask your customer to tap their card or device on your phone.
- Access Funds: Your money is available right on your JIM card as soon as the sale is done - no waiting for bank transfers.
Here are 3 immediate steps to take:
- Compare the total cost of two different payment solutions, including all fees.
- Download the JIM app to explore its interface.
- Decide if you need a mobile payment option for pop-ups or events.
Step 6: Fund your business and manage finances
Secure your funding
The Small Business Administration (SBA) is a great resource. Their Microloan program offers up to $50,000, which can cover initial equipment and deposits. Interest rates for these loans typically fall between 8% and 13%.
Lenders will want to see a strong business plan and a good personal credit score, usually 680 or higher. Many applications are denied because the plan lacks detailed financial projections. Make sure yours is solid before you apply.
You should also secure enough working capital to cover your first six months of operations. This can range from $30,000 to $60,000 for rent, payroll, and inventory before you turn a consistent profit.
Here are 4 immediate steps to take:
- Check your credit score through a service like Experian or Equifax.
- Draft a one-page business summary to share with potential lenders.
- Explore the SBA Microloan program requirements on the SBA website.
- Calculate your estimated operating expenses for the first six months.
Step 7: Hire your team and set up operations
Build your team
Your first hires will likely be a Gelato Maker and a Server. An experienced Gelato Maker can expect $18-$25 per hour, while Servers typically earn $12-$16 per hour plus tips. Remember that every employee who handles food needs a Food Handler Permit, which they can get online.
Streamline your operations
To manage schedules, you might want to use software like Homebase or 7shifts. These platforms help you avoid understaffing during your busiest hours on Friday and Saturday nights. They also simplify communication with your team about shift changes.
A good target is to keep your total labor cost between 25% and 35% of your revenue. Many new owners miscalculate this and overstaff during slow periods, which can drain cash flow quickly. Start with a lean team and add staff as you get busier.
Here are 4 immediate steps to take:
- Draft job descriptions for a Gelato Maker and a Server.
- Check your state and local minimum wage laws.
- Explore scheduling software like Homebase or 7shifts.
- Calculate your projected labor cost as a percentage of expected sales.
Step 8: Market your business and acquire customers
Start with hyperlocal marketing. You could partner with a local pizzeria for a "dinner and dessert" deal. Give them coupons for a free kids' scoop to hand out with their receipts. This targets families and other customers in your immediate area.
Your best visual platform is Instagram. Post vibrant photos of your gelato daily. A successful campaign could be a "Flavor of the Week" reveal. This builds anticipation and keeps your audience engaged without a big budget.
Encourage repeat customers
A simple punch card is a great start. You might want to consider a "buy nine, get one free" model. Many owners overlook the power of a simple email list. Offer a free topping in exchange for an email address to announce new flavors and special events.
For your grand opening, create a local buzz. Offer the first 50 customers a free scoop. This can generate immediate foot traffic and word-of-mouth marketing that far outweighs the cost of the giveaway. Your initial Customer Acquisition Cost should be low.
Here are 4 immediate steps to take:
- Draft a cross-promotion offer for a nearby restaurant.
- Create a content calendar for your first month on Instagram.
- Design a simple "buy 9, get 1 free" punch card.
- Plan a grand opening special for the first 50 customers.
Step 9: Price your gelato for profit
Your first step is to calculate your Cost of Goods Sold (COGS) for each flavor. This includes everything from milk and sugar to the cup and spoon. A good target for your food cost is 20-28% of your menu price. Many new owners forget to include paper goods in this calculation.
Set your retail prices
Once you know your costs, you can set your prices. A standard markup for gelato is 300-400%. If a small scoop costs you $1.25 to make, a retail price between $4.50 and $5.00 is a solid starting point. You should also see what others charge.
Visit a few local dessert shops and note their prices for similar quality products. You do not have to be the cheapest, but you need to be in the same ballpark. Consider a small upcharge, perhaps $0.50 to $1.00, for premium flavors with expensive ingredients like pistachios.
Here are 4 immediate steps to take:
- Calculate the full COGS for your most popular flavor, including the cup and spoon.
- Visit three competitors and document their prices for small, medium, and large sizes.
- Create a price list for your core flavors based on a 300% markup.
- Decide if you will charge extra for premium ingredients or specialty toppings.
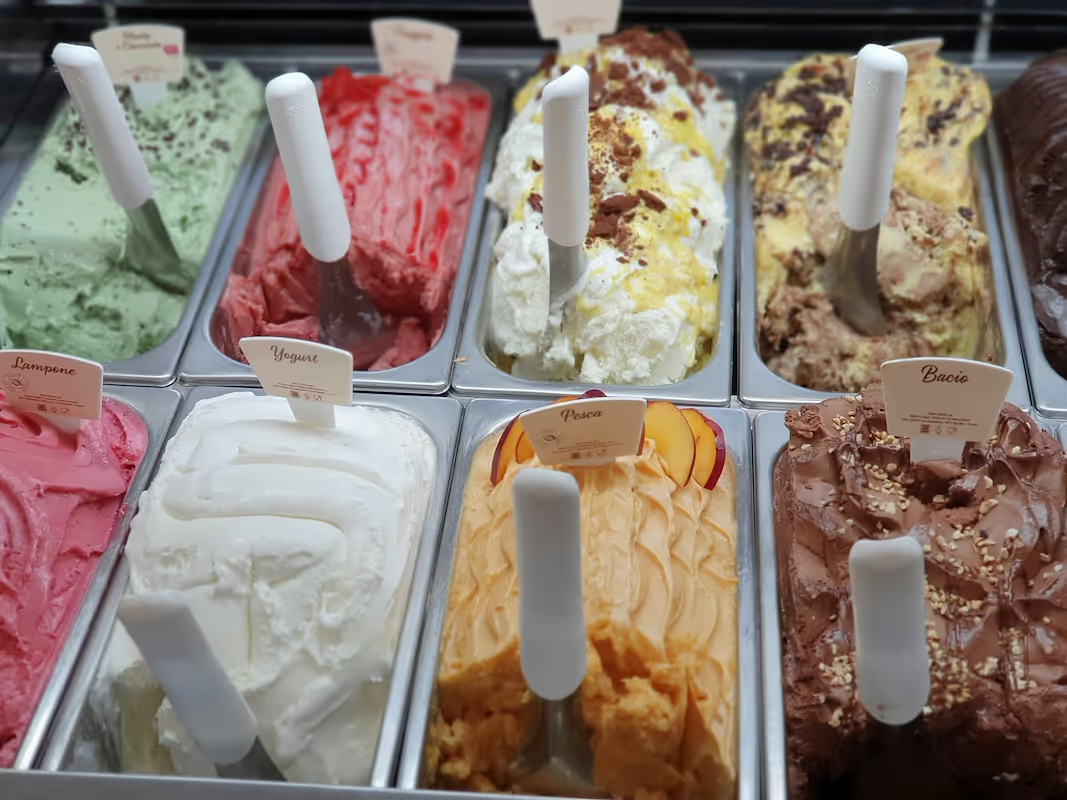
Step 10: Maintain quality and scale your operations
Keep your quality consistent
Your reputation depends on consistency. Aim for an overrun, or air content, between 25-35% for that authentic dense texture. Your display case temperature should hold steady between -12°C and -14°C. A daily checklist helps your team maintain these standards without fail.
To measure quality, track your daily food waste. A good target is to keep it under 5%. You can also use simple QR code surveys on your tables to get direct customer feedback on flavors and service.
Plan your growth
Growth should be data-driven. If you consistently sell out of top flavors before 7 PM on weekends, it is time to increase production. If you personally work over 60 hours a week, you should hire more staff.
Many owners expand too soon. Before you consider a second location, make sure your net profit margin is above 15% for at least six straight months. When you are ready, inventory software like MarketMan can help manage multiple locations.
Here are 4 immediate steps to take:
- Create a daily quality checklist for temperature and overrun.
- Set up a simple QR code survey for customer feedback.
- Define the revenue or production triggers for your next hire.
- Calculate your net profit margin for the last quarter.
You now have a roadmap to launch your gelato shop. Remember that success in this business is about more than just great flavor; it is in the details, like that authentic, dense texture. With a clear plan, you are ready to build something wonderful.
As you prepare to serve your first customers, make your payments simple. JIM turns your smartphone into a card reader for a flat 1.99% fee, with no extra hardware. You can accept payments easily from day one. Download JIM to get started.
.avif)


