
Starting a live streaming business is a rewarding venture where your creativity and on-screen charisma meet smart business planning. The industry is already a multi-billion dollar market, with steady demand for engaging content across gaming, online education, and corporate events.
This guide will take you through the practical steps of validating your business concept, acquiring the right equipment, securing funding, and building your audience to help you launch a successful live streaming business in the U.S.
Step 1: Plan your business and validate your concept
Find your niche
First, decide on your content focus. Use Google Trends to compare the popularity of potential topics. Also, browse platforms like Twitch and YouTube Live to identify content gaps. A common mistake is choosing a niche that is too broad; specificity attracts a dedicated audience.
Analyze the competition
Once you have a niche, study the top performers. Use a database like Social Blade to review their growth metrics and engagement statistics. Watch their streams to understand their format, on-screen graphics, and how they interact with their viewers. This gives you a blueprint for success.
Estimate your startup costs
Your initial investment can vary. Many new streamers overspend on gear before they have an audience. You might want to start with a modest setup and upgrade later. A good webcam and microphone can cost around $200, while a professional camera, lighting, and audio interface can exceed $2,000.
- Essential Gear: $200 - $700 (HD Webcam, USB Mic, Ring Light)
- Streaming Software: $0 (OBS Studio is a powerful free option)
- Business Formation (LLC): $100 - $500 (Varies by state)
Here are 3 immediate steps to take:
- Research three potential content niches using Google Trends.
- Analyze two successful streamers in your chosen niche.
- Draft a startup budget for essential gear, aiming to stay under $700.
Step 2: Establish your legal and financial framework
Choose your business structure
You might want to form a Limited Liability Company (LLC). This structure separates your personal assets from business debts. Many new streamers make the mistake of operating as a sole proprietor, which puts their personal finances at risk if the business is sued.
An LLC offers pass-through taxation, so profits are taxed on your personal return. You can file for an LLC through your state's website or use a service. Expect costs between $100 and $500, depending on your state. Processing can take a few weeks.
Secure licenses and permits
Once you have a business structure, get a free Employer Identification Number (EIN) from the IRS website. You need an EIN to open a business bank account. Also, check your city or county clerk’s website for a general business license, which typically costs $50 to $150 per year.
For content, you must handle music rights correctly. Using copyrighted music without permission from organizations like ASCAP or BMI can result in DMCA takedowns or legal action. A simple solution is to use a royalty-free music library like Epidemic Sound to avoid these issues.
Here are 4 immediate steps to take:
- Register your business as an LLC to protect your personal assets.
- Apply for a free EIN on the IRS website.
- Check your city’s website for business license requirements.
- Sign up for a royalty-free music service to avoid copyright strikes.
Step 3: Secure your insurance and manage risk
Types of insurance to consider
With your legal structure in place, the next step is to protect your assets. Insurance is your financial safety net. A frequent mistake is to assume a homeowner's policy covers business equipment, but most policies exclude commercial use, which leaves your expensive gear unprotected.
- General Liability: This covers third-party claims like injury or property damage. If a guest trips over a cable in your studio, this policy responds.
- Professional Liability: Also called Errors & Omissions (E&O), it protects against claims of negligence. This applies if you provide paid advice or consult on stream.
- Business Property Insurance: This specifically covers your cameras, computers, and other gear from theft, damage, or loss.
For $1 million in general liability coverage, annual premiums typically range from $400 to $900. Equipment insurance might add $250 to $600, based on your gear's value. You can get quotes from providers like Hiscox, The Hartford, or Next Insurance who work with media creators.
Here are 3 immediate steps to take:
- Create an inventory of your streaming gear with replacement costs.
- Get quotes for general liability and equipment insurance from two providers.
- Review your homeowner's policy to confirm its business use exclusions.
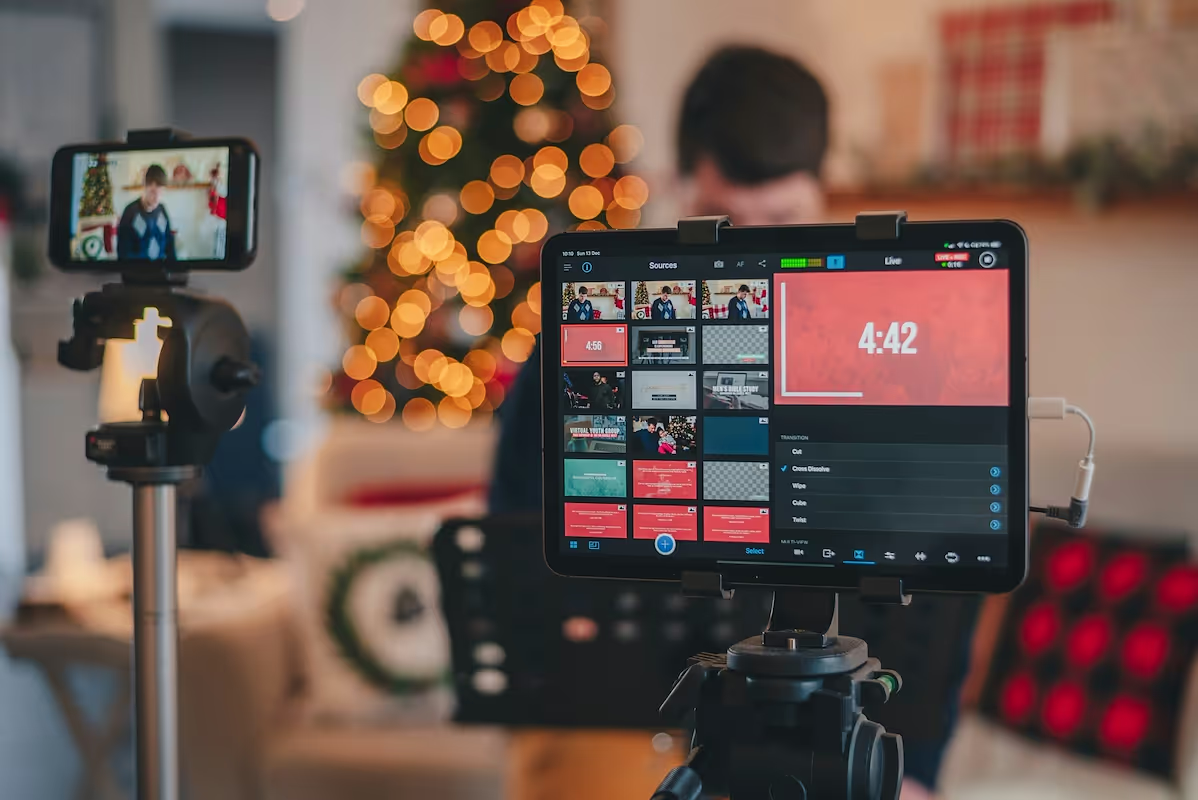
Step 4: Set up your location and equipment
Most streamers start from a home office. A dedicated room of 100-150 square feet gives you enough space. Check local residential zoning, but a home-based stream without foot traffic rarely causes issues. You can also add acoustic foam panels to improve audio quality.
With your space sorted, you can focus on gear. Many new streamers mistakenly prioritize video over audio. Your audience will forgive average video quality, but they will not tolerate poor sound. A quality microphone should be a top consideration.
Select your core streaming gear
- Camera: A high-end webcam like a Logitech C922 or a mirrorless camera with an HDMI-out will work. Expect to spend $100 to $600.
- Microphone: A USB mic like the Blue Yeti or Rode NT-USB+ offers great quality for the price, around $100 to $170.
- Lighting: A key light and fill light remove shadows. A pair of LED panels or a ring light costs between $70 and $200.
- Internet: This is non-negotiable. You need a stable connection with at least 10 Mbps upload speed. Run a speed test to confirm your bandwidth.
You can find this equipment at retailers like B&H Photo Video for cameras and Sweetwater for audio gear. They cater to creators and offer expert advice.
Here are 4 immediate steps to take:
- Measure a dedicated space in your home for your setup.
- Test your internet upload speed to ensure it exceeds 10 Mbps.
- Price out a specific camera and microphone combination from a supplier like B&H.
- Research acoustic foam panels to budget for sound treatment.
Step 5: Set up your payment processing
Many streamers rely on platform-native monetization like Twitch Bits or YouTube Super Chat. However, if you offer direct services like coaching or sell merchandise, you need a separate payment system. A common mistake is to overlook transaction fees, which can reduce your earnings.
Choose a payment solution
When you offer services directly, you need a way to handle payments. Many payment processors charge between 2.5% and 3.5% per transaction, which adds up. Look for a solution with transparent, low fees and no long-term contracts.
For live streaming businesses that need to accept payments on-site or on-the-go, JIM offers a streamlined solution. With JIM, you can accept debit, credit, and digital wallets directly through your smartphone. Just tap and you are done.
At just 1.99% per transaction with no hidden costs or extra hardware needed, it's particularly useful for selling merchandise at a meet-and-greet or taking payment for a private coaching session. Getting started is straightforward.
- Get Started: Download the JIM app for iOS.
- Make a Sale: Type the sales amount, hit sell, and ask your customer to tap their card or device on your phone.
- Access Funds: Your money is available right on your JIM card as soon as the sale is done - no waiting for bank transfers.
Here are 3 immediate steps to take:
- Map out your revenue streams, including platform donations, subscriptions, and direct services.
- Compare JIM's 1.99% transaction fee with other payment solutions you might consider.
- Download the JIM app to explore its interface for on-the-go payments.
Step 6: Fund your business and manage finances
Most streamers self-fund their launch. This approach, known as bootstrapping, avoids debt and gives you full control. You can use personal savings or revenue from a day job. This keeps the financial pressure low while you build an audience.
Explore external funding options
If you need capital, an SBA Microloan is a solid option. These loans go up to $50,000 with interest rates between 8% and 13%. Lenders typically look for a credit score above 640 and a detailed business plan that shows how you will generate revenue.
You might also look into creator-specific grants. Programs like the Patreon grant program or the YouTube Shorts Fund offer non-repayable funds to creators. These are competitive but can provide a significant boost without adding debt. Each has its own application cycle and criteria.
Manage your working capital
Many new streamers focus on the one-time cost of gear but overlook monthly expenses. You should budget for at least six months of working capital to cover these costs while your channel grows. This buffer prevents you from running out of money before you gain traction.
Your six-month budget might include:
- Software Subscriptions: $150 - $300 (e.g., Streamlabs Prime, Epidemic Sound)
- Marketing & Promotion: $300 - $600 (e.g., social media ads)
- Contingency Fund: $500+ (for unexpected costs or opportunities)
With these figures, a working capital budget of $1,000 to $2,000 is a reasonable starting point for your first six months. This ensures you can operate smoothly without immediate revenue.
Here are 3 immediate steps to take:
- Draft a six-month operating budget that includes software and marketing costs.
- Check your personal credit score to assess your eligibility for a microloan.
- Research the application requirements for one creator-specific grant program.
Step 7: Staff your business and manage operations
You will likely start as a one-person operation. A mistake many streamers make is to hire help too early. Once your workload becomes unmanageable or you have steady revenue, you can bring on freelancers. This frees you to focus on the content itself.
Hire your first team members
Your first hire is often a Video Editor. They turn long streams into highlight reels for YouTube or clips for social media. Freelance editors typically charge $25 to $60 per hour. Look for a strong portfolio rather than formal certifications.
You might also need a Moderator to manage your live chat. They enforce community rules and keep the conversation positive. Many start as volunteers from your community, but you can also pay a rate of $15 to $25 per hour for dedicated moderators.
Manage your workflow
To keep things organized, use a project management app. A free Trello or Asana board is perfect to create a content calendar and track video ideas. This helps you maintain a consistent stream schedule, a key to audience growth.
For community management, a Discord server is the standard. It gives your audience a place to connect outside of streams. You can also use it for team communication. Pair it with a moderation bot like Nightbot or Streamlabs Cloudbot for automated chat filtering.
A good rule of thumb is to reinvest 10-20% of your monthly income into outsourcing. For example, if you consistently make $2,000 a month, an allocation of $200-$400 for an editor saves you hours and helps you grow faster.
Here are 4 immediate steps to take:
- Draft a simple job description for a freelance video editor.
- Set up a free Trello board to plan one week of content.
- Create a Discord server for your community.
- Research the features of two moderation bots like Nightbot and Streamlabs Cloudbot.
Step 8: Market your business and acquire customers
Repurpose your content
Your marketing work starts after the stream ends. Many streamers finish a broadcast and move on, which neglects a massive growth opportunity. You should repurpose every stream into smaller pieces of content to distribute across other platforms.
Turn your best stream moments into short clips for TikTok, YouTube Shorts, and Instagram Reels. A single clip that performs well can attract hundreds of new followers. Aim for a consistent posting schedule, like three to five clips per week.
Collaborate and network
You can also grow through collaboration. Partner with another streamer who has a similar audience size. A joint stream introduces your channel to a new, engaged audience and can result in 50-200 new followers overnight.
In addition, become an active member of communities where your target audience gathers. Join relevant Discord servers or subreddits. Offer help and participate in discussions before you ever promote your own stream. This builds trust and avoids the common mistake of spamming links.
Here are 4 immediate steps to take:
- Identify three platforms to post short-form video clips.
- Research five streamers in your niche for potential collaboration.
- Join two relevant Discord communities and participate in conversations.
- Turn one of your past streams into three short clips for social media.
Step 9: Price your services and create packages
Develop your pricing models
Beyond platform revenue, you can sell services directly. Many streamers underprice their offerings at first. Research the market to set fair rates. Your pricing should reflect your expertise and the value you provide to your audience or clients.
With that in mind, you can structure your offerings in several ways. This allows you to create multiple income streams that are not dependent on a single platform's monetization policies. Consider these common models:
- Coaching Sessions: $50 - $150 per hour for gaming or skill-based training.
- Sponsored Content: $100 - $500 for a dedicated segment promoting a product.
- Digital Products: $10 - $50 for guides or presets with nearly 100% profit margins.
Analyze competitors and set margins
Look at what streamers with a similar audience size charge for shout-outs or sponsored posts. This gives you a solid baseline. You can find this information in their media kits or by reaching out directly. This prevents you from guessing your rates.
For merchandise, aim for a 50-100% markup. If a t-shirt costs you $15 to produce and ship, a price of $25-$30 is reasonable. This margin covers your costs, platform fees, and leaves you with a healthy profit per item sold.
Here are 4 immediate steps to take:
- Draft a price list for two services, like a coaching session and a sponsored segment.
- Research the rates of three other streamers in your niche.
- Calculate the profit margin for one potential merchandise item.
- Set a price for a digital product you could sell, like a short ebook.
Step 10: Control quality and scale your business
Once your stream is live, it is easy to get complacent with your setup. You should regularly check your production quality to retain viewers. Your audience expects a consistent, professional broadcast, and small technical issues can cause them to leave.
Set your quality benchmarks
Use your streaming software’s analytics to track performance. Many streamers neglect to monitor their stream health in real-time, which can lead to a poor viewer experience. Aim to meet these standards for every broadcast:
- Video Quality: A resolution of 1080p at 60 frames per second (fps).
- Audio Levels: Keep your voice audio between -6dB and -12dB to avoid distortion.
- Stream Stability: Maintain a dropped frame rate below 1% for a smooth broadcast.
Know when to scale
With quality under control, you can plan for growth. A good signal to hire help, like a video editor, is when administrative tasks consume more than 10 hours of your week. Also, plan to reinvest 20-30% of your monthly income back into better gear or marketing to accelerate growth.
To expand your reach, you can use a service like Restream.io to broadcast to multiple platforms at once. For deeper audience insights than what Twitch or YouTube offer, you might use a platform like Stream Hatchet to analyze viewer behavior and identify growth opportunities.
Here are 4 immediate steps to take:
- Review your last stream VOD for audio and video quality against the benchmarks.
- Open the stats window in OBS Studio during your next stream to monitor dropped frames.
- Set a rule to reinvest 20% of your monthly revenue into growth.
- Research a multi-streaming service to evaluate its benefits for your channel.
Conclusion
You now have a complete roadmap to launch your live streaming business. Remember that consistency is what separates successful streamers from the rest. Your audience will grow if you show up for them regularly. The plan is ready, now go build your community.
As you sell services or merchandise, remember that payments should be simple. JIM turns your phone into a card reader for a flat 1.99% fee, with no extra hardware. This simplifies payments so you can focus on your content. Download JIM to get started.
.avif)


