
Starting a travel photography business is a rewarding venture that combines a creative eye and technical photo skills with solid business savvy. The rise of digital platforms and a constant need for fresh visual content make this field more accessible than ever, but that accessibility also means the market is quite competitive.
This guide will take you through the practical steps of validating your business concept, acquiring the right equipment, obtaining necessary licenses, and marketing your services to help you launch a successful travel photography business in the U.S.
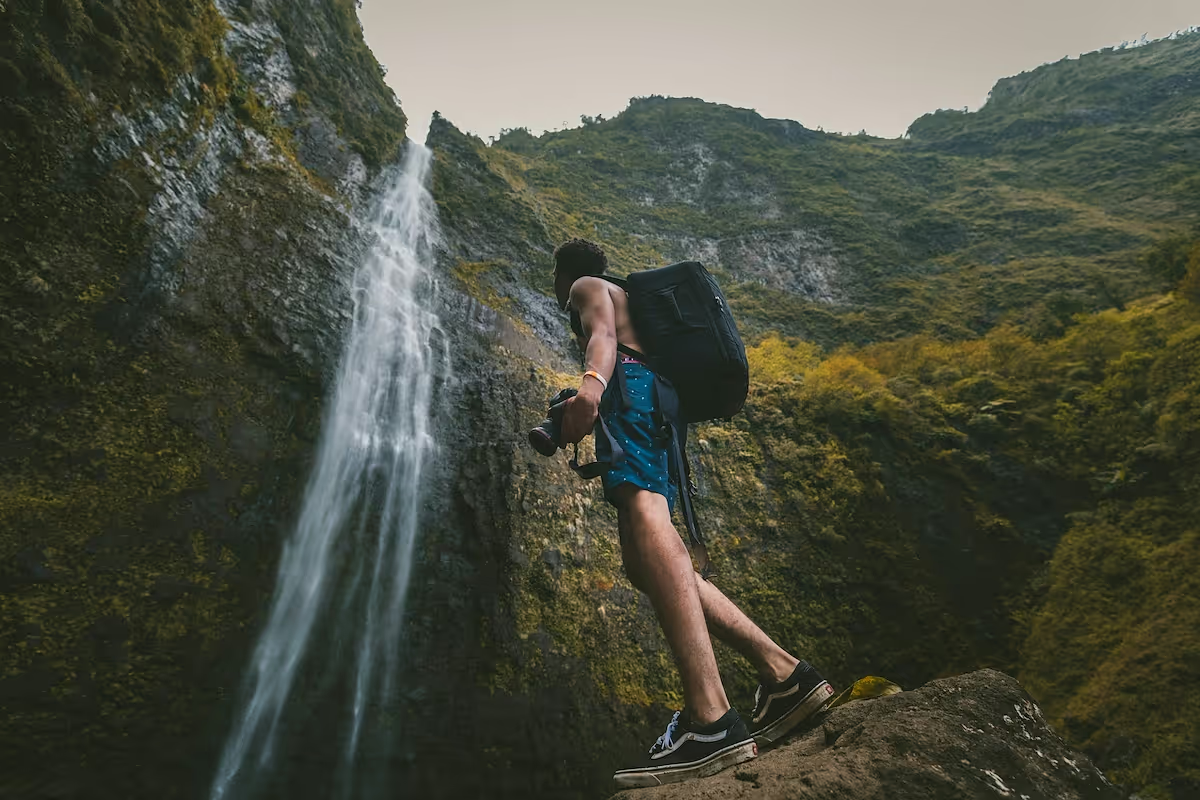
Step 1: Plan and validate your business concept
First, find your niche. Analyze stock photo sites like Getty Images and Adobe Stock to see which themes are popular. You can also review travel brand accounts on Instagram to understand what kind of visual content performs well. Use Google Trends to compare interest in different specialties.
Next, look at what successful photographers are doing. You might use a platform like Semrush to find the keywords that drive traffic to their websites. Also, browse portfolios on Behance to see how others present their work and what services they offer.
Estimate your startup costs
Initial equipment is a major part of your budget. A professional camera body can run from $1,500 to $3,000, with lenses adding another $500 to $2,000 each. Many new photographers make the mistake of buying too much gear at once. Consider renting specialized lenses for specific jobs.
Beyond gear, account for software and administrative fees. An Adobe Creative Cloud subscription is about $10 per month. Business formation (LLC) can cost between $100 and $500, and general liability insurance typically runs $400 to $600 annually.
Here are 3 immediate steps to take:
- Research 10 travel photographers and document their niche, pricing, and portfolio style.
- Create a startup budget that lists all potential equipment, software, and business fees.
- Use Google Trends to compare search interest for three potential niches you are considering.
Step 2: Establish your legal structure and get licensed
Most new travel photographers choose an LLC. This structure protects your personal assets if the business faces a lawsuit. A sole proprietorship is simpler but offers no liability protection. An S Corp is an option for tax savings once you earn over $60,000.
Many photographers operate as sole proprietors for too long, which is a big risk. Once you decide on a structure, register it with your state's Secretary of State. This process costs between $50 and $500, depending on your location.
Next, get a free Employer Identification Number (EIN) from the IRS website. You need this for an LLC and to open a business bank account. You will also need to register for a state sales tax permit if your state taxes photography services.
Secure location-specific permits
Shooting commercially in national or state parks requires a permit. A National Park Service Commercial Use Authorization can cost $200-$500 and take 30-60 days to process. City permits for public spaces are also common, so always check with the local film office before a shoot.
Here are 4 immediate steps to take:
- Decide between an LLC and a sole proprietorship for your business.
- Apply for a free Employer Identification Number (EIN) on the IRS website.
- Check your city clerk’s website for business license application forms and fees.
- Research the commercial photography permit process for one national park you plan to visit.
Step 3: Insure your business and manage risk
Secure the right insurance coverage
You will need several types of insurance. General liability covers third-party injuries or property damage, with policies often starting at $1 million in coverage for around $400-$600 annually. Professional liability protects you if a client claims your work was inadequate, costing $500-$1,000 per year.
Equipment insurance is another priority. Many photographers assume their homeowner's policy covers their gear, but most policies exclude commercial use. Expect to pay 1-2% of your equipment's total value annually for a dedicated policy that covers theft, loss, and damage while traveling.
You might want to consider providers that specialize in photography, such as Full Frame Insurance, Hill & Usher, or the Professional Photographers of America (PPA). They understand the specific risks involved. Get quotes from at least two to compare coverage and pricing before you commit.
Plan for travel-specific risks
Beyond client-facing issues, you must protect your digital assets. Data loss from a corrupted hard drive can be catastrophic. A solid backup strategy involves one cloud-based service and at least one separate physical hard drive stored in a different location from your primary drive.
Here are 4 immediate steps to take:
- Get a quote for equipment insurance that covers the full value of your gear.
- Compare general liability policies from two providers that specialize in photography.
- Review your homeowner's policy to confirm its exclusions for commercial equipment.
- Create a data backup plan that uses both a cloud service and a physical hard drive.
Step 4: Set up your workspace and gear
Designate your workspace
Most travel photographers begin with a home office. You do not need a commercial lease. A dedicated space of about 100 square feet is plenty for a desk and gear storage. If you plan to meet clients at home, check your local zoning ordinances, but this is rarely an issue.
Acquire your editing and support gear
With your camera sorted, focus on support equipment. A sturdy travel tripod is a good buy. Brands like Peak Design or Manfrotto offer options from $150 to $400. For lighting, a portable speedlight or a small LED panel will run you $100 to $300.
Your computer is your digital darkroom. You might want to consider a MacBook Pro or a PC with at least 16GB of RAM, which can cost between $1,500 and $3,000. A color-calibrated monitor is also a smart investment for accurate editing.
Many new photographers make the mistake of buying too much specialized gear upfront. Consider renting items like drones or underwater housing from a service like Lensrentals.com. This lets you offer more services without a huge initial cash outlay.
Here are 4 immediate steps to take:
- Clear a 100-square-foot area in your home for your office.
- Compare travel tripods from two different brands in your budget.
- Research the cost of a computer that meets professional photo editing standards.
- Check rental rates for a drone or another piece of specialty gear you might use.
Step 5: Set up your finances and payment processing
A standard approach is a 50% non-refundable deposit to secure a booking. The final 50% is due upon delivery of the images. Always use a contract that clearly outlines these payment terms, deliverables, and image usage rights to avoid any confusion later.
Accepting payments
For larger payments from commercial clients, bank transfers are common. However, you need a flexible way to accept credit cards, especially for on-location work. Many new photographers overlook the need for a mobile payment option, which can limit their ability to make spontaneous sales.
For accepting payments on-site, JIM offers a streamlined solution. With JIM, you can accept debit, credit, and digital wallets directly through your smartphone. Just tap and done. It is a cost-effective option at just 1.99% per transaction with no hidden costs or extra hardware needed.
Other payment processors often charge between 2.5% and 3.5% plus additional fees. JIM is particularly useful for selling prints at a market or securing a deposit for a portrait session while traveling. Here is how it works:
- Get Started: Download the JIM app for iOS.
- Make a Sale: Type the sales amount, hit sell, and ask your customer to tap their card or device on your phone.
- Access Funds: Your money is available right on your JIM card as soon as the sale is done. No waiting for bank transfers.
Here are 3 immediate steps to take:
- Draft a standard contract that includes a 50% deposit clause.
- Compare transaction fees for at least two different payment solutions.
- Download the JIM app to explore its interface for on-the-go payments.
Step 6: Fund your business and manage finances
Most photographers self-fund with personal savings. You might also use a business credit card for initial gear purchases, which often come with 0% introductory APR offers. This can be a smart way to manage cash flow, but track your spending carefully to avoid debt.
Explore loans and grants
For external funding, look into an SBA Microloan. These loans go up to $50,000 and are designed for new small businesses. Interest rates typically range from 8-13%. You can also search for arts-focused grants on platforms like GrantWatch to find non-repayable funding.
Calculate your working capital
Plan to have at least six months of operating expenses saved. This working capital, often between $5,000 and $10,000, covers marketing, insurance, and software costs before you have consistent client work. Many new photographers budget for gear but forget to fund their actual operations.
Here are 4 immediate steps to take:
- Open a dedicated business checking account to keep finances separate.
- Create a 6-month operating budget to determine your working capital needs.
- Research SBA Microloan requirements on the official SBA website.
- Search for three photography grants you may be eligible for.
Step 7: Build your team and streamline operations
Build your support team
You will likely start as a one-person operation. As you get busier, consider hiring freelancers for specific projects. A second shooter can assist on larger jobs for $25-$50 per hour or a flat day rate. They help manage gear and capture alternate angles.
Many photographers burn out by trying to edit every photo themselves. Instead, find a freelance photo editor on a platform like Upwork. They typically charge $30-$75 per hour and can save you dozens of hours, freeing you up to find more clients.
If you plan to offer drone photography, you must have an FAA Part 107 license. This is a legal requirement for any commercial drone work in the U.S.
Streamline your workflow
To manage clients, you might want to use a client relationship management (CRM) system. Platforms like HoneyBook or Dubsado let you send contracts, invoices, and questionnaires from one place. This keeps your business organized and looking professional.
Once you start to generate consistent income, keep an eye on your expenses. A good benchmark is to keep total contractor and payroll costs under 30% of your gross revenue. This ensures your business remains profitable as it grows.
Here are 4 immediate steps to take:
- Research day rates for second shooters in your local area.
- Explore freelance photo editor portfolios on a platform like Upwork.
- Sign up for a free trial of a client management system like HoneyBook or Dubsado.
- Review the FAA's Part 107 license requirements for commercial drone use.
Step 8: Market your business and find clients
Your portfolio website is your digital storefront. Use a platform like Squarespace or Format to showcase 20-30 of your strongest images. To attract local search traffic, optimize your site with keywords like "[Your City] travel photographer" in your page titles and descriptions.
While Instagram is valuable, many photographers rely on it too heavily. You should also build a profile on Behance to connect with art directors and post articles on LinkedIn to establish your professional brand. This diversification helps you reach commercial clients, not just consumers.
Develop your outreach strategy
Create a target list of 50 brands, hotels, or tourism boards. Send personalized emails that show you understand their brand and propose specific ways your photography can help them. Expect a response rate of 1-3% for cold outreach, so persistence is key.
You can also pitch story ideas to travel publications. Instead of just sending your portfolio, propose a specific photo essay or article. This positions you as a creative partner and can lead to paid assignments that build your reputation and portfolio at the same time.
Here are 4 immediate steps to take:
- Select your 25 best images for your online portfolio.
- Optimize your website's homepage with three relevant SEO keywords.
- Create a list of 20 target brands or publications for outreach.
- Draft a personalized email template to pitch your services.
Step 9: Define your pricing strategy
Common pricing models
Most travel photographers use a day rate for commercial work, which can range from $1,000 to $3,000 depending on your experience. This fee should cover your shoot time, local travel, and basic editing for a set number of images.
It is easy to only bill for the shoot day itself. A better approach is to factor in 4-8 hours of post-production for every full day of shooting. Think of your day rate as a project fee that covers the entire scope of work.
You can also price with per-image licensing. A brand might pay $250-$1,000 for one image with specific usage rights. For editorial clients, rates are often lower, around $150-$500 per photo. Project-based fees work well for larger campaigns.
Set your profit margin
To price profitably, first calculate your cost of doing business (CODB). Add up annual expenses like gear, insurance, and software, then divide by the number of days you plan to work. With this number in mind, aim for a 60-70% gross profit margin.
Here are 4 immediate steps to take:
- Calculate your daily cost of doing business based on your annual expenses.
- Research day rates and image licensing fees from five other travel photographers.
- Draft three sample packages with different pricing models (day rate, project fee, per-image).
- Set a target gross profit margin of at least 60% for your services.
Step 10: Maintain quality and scale your business
In photography, quality is measured by client satisfaction. You can track this by aiming for an image rejection rate below 5% on any given project. Also, monitor your referral rate. A healthy business should see 15-20% of new work come from past client recommendations.
Know when to grow
Once you start to get busy, you need clear signals for when to expand. If you turn down more than two or three jobs a month, it is time to hire a freelance editor or second shooter. This frees you up to focus on client acquisition.
With this in mind, you can plan for larger investments. After you achieve consistent net profit for six months, you might reinvest in a significant gear upgrade or a larger marketing budget. This ensures you grow from a stable financial base.
As your client list expands, email and spreadsheets will not be enough. You might want to use a client gallery platform like Pixieset or Pic-Time. These systems automate photo delivery, proofing, and even print sales, which can add a new revenue stream.
Here are 4 immediate steps to take:
- Set a target referral rate of 20% for new business.
- Define your personal benchmark for hiring help, such as turning down three jobs in one month.
- Explore client gallery platforms like Pixieset to see how they automate image delivery.
- Calculate your average monthly profit over the last quarter to assess your readiness for a major investment.
Your travel photography business is about more than great photos. It's about running a smart operation. Remember, your unique perspective is your greatest asset. You have the roadmap, so go build the business you have imagined.
As you make sales on the road, you will need a simple way to get paid. JIM turns your smartphone into a card reader for a flat 1.99% fee, with no extra hardware. Download JIM to get started.
.avif)


